

Gravel cycling means riding on unpaved surfaces — packed dirt, loose gravel, rocky tracks, woodchip paths, and mixed terrain — on a bike built (or adapted) to handle what pavement can’t offer. Per the Wikipedia definition, it can be done on a dedicated gravel bike or any capable bicycle with the right tires. If you want to try it this weekend, here’s where to start:
- Try a short mixed-surface loop. Find a local fire road or dirt trail that connects back to pavement. Keep it under 15 miles for your first outing.
- Lower your tire pressure before you roll. Lowering your tire pressure from your usual road setting improves grip and comfort on loose surfaces.
- Pack a basic repair kit. A spare tube, mini-pump, and multi-tool are the minimum. The Adventure Cycling Association recommends building shorter first rides specifically to learn pacing before tackling longer routes.
The USDA Forest Service publishes free geodata and mapping resources that help you locate legal gravel routes on public land near you. Thebeamofficial also covers gravel safety skills and gear for riders just getting started.
Key Takeaways
Gravel cycling rewards preparation: the riders who carry the right gear, plan realistic time estimates, and practice basic handling skills consistently have better, safer rides than those who don’t.
| Point | Details |
|---|---|
| Definition and terrain | Gravel cycling covers packed dirt, loose gravel, fire roads, and mixed surfaces on any capable bike. |
| Tire width matters most | Gravel bikes run 35–50 mm tires; wider tires run lower pressure for better grip and comfort on rough terrain. |
| Always carry a repair kit | Bring a spare tube, tubeless plug kit, multi-tool, pump, duct tape, and zip ties on every ride. |
| Plan for slower pace | Gravel is slower than pavement; add 20–30% to road-pace estimates and always finish with daylight to spare. |
| Thebeamofficial safety gear | The VIRGO MIPS helmet and visibility accessories from Thebeamofficial are built for gravel’s remote, variable conditions. |
Table of Contents
- What surfaces and routes actually count as gravel riding?
- How do gravel bikes differ from road and mountain bikes?
- What to bring on a gravel ride: beginner gear checklist
- Tires and pressure: what actually matters for gravel
- How to build gravel skills and fitness as a beginner
- How to find gravel routes and plan your first rides
- Safety, trail etiquette, and emergency preparedness
- Gravel culture and events worth knowing about
- Your beginner gravel ride checklist
- What gravel actually feels like compared to road riding
- Ride safer on gravel with Thebeamofficial
- Sources
What surfaces and routes actually count as gravel riding?
BikeRadar describes gravel riding’s defining quality as versatility: it links paved roads, gravel tracks, and technical trails into continuous routes that take you places road bikes simply can’t reach. In practice, “gravel” covers a wide range of surfaces:
- Packed dirt and clay roads — the smoothest unpaved option; fast when dry, slippery when wet
- Loose gravel — the classic surface; demands attention to steering and braking
- Washboard — corrugated dirt that vibrates everything loose; slow down and relax your grip
- Fire roads — wide, maintained paths through forests and public land; common on longer routes
- Light singletrack — narrow trails usually associated with mountain biking; some gravel routes dip into these
- Farm tracks and field paths — often found on rural routes; surface quality varies wildly
- Woodchip paths — soft, forgiving, and occasionally found in parks and greenways
Most gravel routes mix surfaces. A 40-mile loop might start on pavement, shift to packed dirt for 20 miles, cross a gravel fire road, and return on tarmac. That mix matters for pacing: loose or rough sections slow you down noticeably compared to the same distance on asphalt. A route that looks like a two-hour road ride can easily stretch to three hours once the gravel starts.
Common route types beginners encounter:
- Local dirt loop — 10–25 miles, close to home, good for learning surface transitions
- Fire-road long ride — 30–60 miles on forest service roads; remote but usually well-graded
- Gravel century — 100 miles of mixed terrain; not a beginner target, but useful to know it exists
Plan your time estimates generously. A conservative rule: plan for significantly more time than your usual road-pace estimate for any route with significant unpaved sections.
How do gravel bikes differ from road and mountain bikes?
Gravel bikes sit between road bikes and mountain bikes — faster and more efficient than a full-suspension trail rig, but far more capable off-road than a road bike with narrow tires. That middle ground is the whole point.
The geometry tells the story. Gravel bikes use a longer wheelbase and slacker head tube angle than road bikes, which adds stability on loose surfaces where a twitchy front end gets you into trouble fast. The bottom bracket sits slightly lower, keeping your center of gravity closer to the ground. Disc brakes are standard across the category — they outperform rim brakes in mud, wet gravel, and dust.
ROUVY’s gravel overview notes that modern gravel bikes commonly run tire widths of 35–50 mm, with clearance to go wider. That extra rubber volume is what makes the ride feel so different from a road bike: more air, more cushion, more grip.
Key differences at a glance:
| Feature | Road bike | Gravel bike | Mountain bike |
|---|---|---|---|
| Tire width | 35–50 mm | 35–50 mm | 35–50 mm |
| Brakes | Rim or disc | Disc (standard) | Disc (standard) |
| Handlebars | Drop bar | Drop bar (flared) | Flat or riser bar |
| Geometry | Aggressive, short | Relaxed, longer | Slack, low |
| Intended terrain | Pavement | Mixed/unpaved | Trails, technical |
Do you need a gravel-specific bike to start? Not necessarily. A cyclocross bike or even a road bike with wider tire clearance can handle easy gravel routes. The dedicated geometry and tire clearance become meaningful once you’re riding longer distances or rougher terrain regularly.
What to bring on a gravel ride: beginner gear checklist
The gear list for gravel is longer than for road riding because you’re often farther from help. Think of it in layers: safety first, then repair, then comfort.
Safety essentials:
- Helmet — a well-fitted helmet with MIPS technology is the single most important piece of kit; Thebeamofficial’s gravel helmet guide explains what to look for in protection and fit
- Front and rear lights, even for daytime rides on remote roads
- Phone (charged, with offline maps downloaded) and a physical ID
Repair kit:
- Multi-tool with a chain breaker
- Patch kit and tire boot (for sidewall cuts)
- Spare tube
- Mini-pump or CO2 inflator
- Tubeless plug kit if your tires are set up tubeless
Global Cycling Network specifically recommends adding duct tape and spare zip ties to your kit for emergency field repairs — a snapped cable housing, a cracked bag mount, or a broken strap can all be jury-rigged with those two items.
Pro Tip: Wrap a short strip of duct tape around your pump or water bottle before every ride. It weighs almost nothing and has saved more rides than any other item in the kit.
Hydration and nutrition:
- At least two water bottles or a hydration pack for rides over 90 minutes
- Simple carbohydrate food (bars, gels, rice cakes) every 45–60 minutes of riding
- Electrolyte tabs for hot or humid conditions
Clothing and layers:
- Padded shorts or bibs — non-negotiable for anything over an hour
- A packable wind/rain jacket; gravel routes often go through exposed terrain where conditions shift fast
- Arm warmers and a base layer for morning starts; strip them as you warm up
For cold-weather gravel rides, Thebeamofficial’s winter gear guide covers layering strategies that apply directly to gravel conditions.
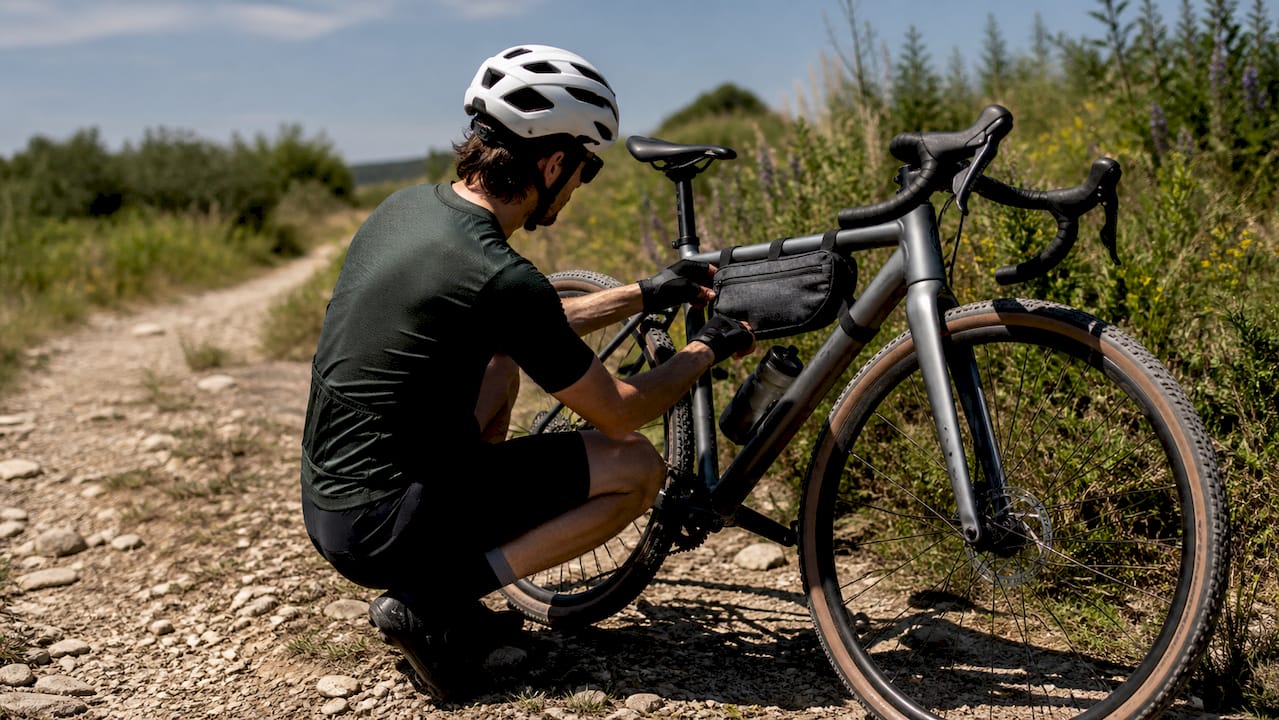
Bags and storage: A frame bag, handlebar bag, and small saddle bag give you easy access to food and tools without a backpack. On gravel, you want snacks reachable without stopping, and your repair kit accessible without digging through a jersey pocket.
Tires and pressure: what actually matters for gravel
Tire choice is where gravel riding diverges most sharply from road cycling, and getting it right makes a bigger difference than almost any other equipment decision.
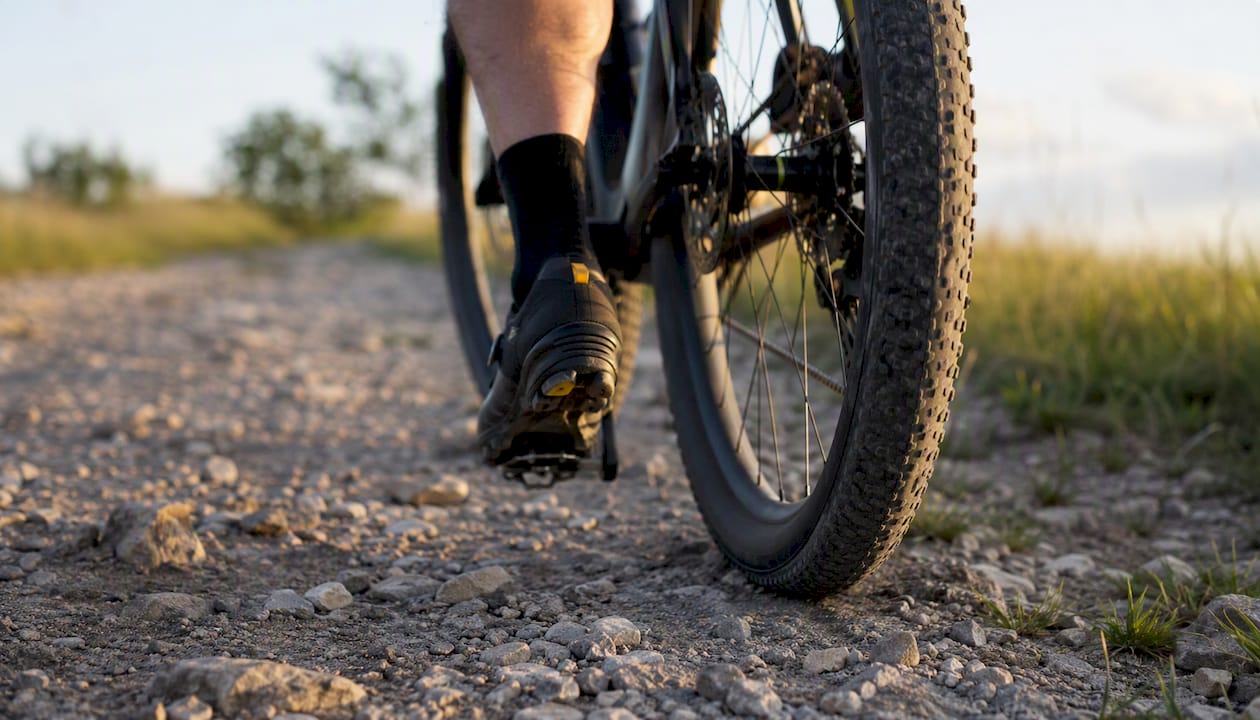
Width first. Gravel bikes typically run tires in a wider size range than road bikes. Wider tires carry more air volume, which means you run lower pressure, which means more comfort and grip on loose surfaces. The trade-off is slightly more rolling resistance on pavement, but on mixed terrain, the wider tire wins.
Tread pattern second. Smooth or lightly textured tires roll faster on packed dirt and gravel. Knobby tires grip better on mud, loose rock, and wet roots. Most beginners do well with a semi-slick or light-tread tire that handles both.
Tubeless vs. tubes:
| Factor | Tubeless | Tubes |
|---|---|---|
| Puncture resistance | Higher (sealant fills small holes) | Lower |
| Setup complexity | More involved | Simple |
| Weight | Slightly lighter | Slightly heavier |
| Large cut failure | Sealant may not seal | Tube fails immediately |
| Cost | Higher upfront | Lower |
Even if you go tubeless, Global Cycling Network advises always carrying a tubeless plug kit and at least one spare tube. Sealant handles small punctures well but can fail completely on a large gash from a sharp rock.
Starting tire pressure varies by tire width and rider weight; riders should adjust according to personal preference and route conditions. Ride the same route at two different pressures and notice which feels more controlled. Gravel pressure tuning is personal.
How to build gravel skills and fitness as a beginner
Handling, pacing, and endurance are the three pillars of gravel competence. Power matters less than you’d think. A rider who manages those three consistently will finish a long gravel route more comfortably than someone stronger who burns out or crashes on a descent.
Core handling drills (drawn from Cycling Weekly’s national champion guidance):
- Drop the pressure before every off-road section — even 5 PSI makes a real difference in grip
- Stay loose — relax your hands, elbows, and shoulders; a stiff upper body amplifies every bump
- Be smooth — brake before corners, not during; abrupt inputs on loose surfaces cause slides
- Enter high, exit fast — take corners wide on entry, cut toward the apex, and accelerate out
- Pedal through rough sections — keeping power on the pedals stabilizes the bike over washboard and roots
Descending on loose surfaces: shift your weight back, keep your heels down, and look 10–15 feet ahead of where you are. Resist the urge to grab the brakes hard; feather them instead.
A simple weekly training structure for beginners, based on ROUVY’s gravel training guidance:
- Long endurance ride — 2–4 hours at a conversational pace; builds the aerobic base gravel demands
- Interval session — 45–60 minutes with short hard efforts; improves fatigue resistance
- Steady aerobic ride — 60–90 minutes at moderate effort; reinforces pacing discipline
- Skills session — 30–45 minutes practicing cornering, descending, and line choice on a local dirt loop
Timing and daylight: gravel is consistently slower than the same distance on pavement. The Adventure Cycling Association recommends planning extra time for gravel routes and building shorter first rides to learn how your pace changes on different surfaces. Start rides early enough to finish with an hour of daylight to spare.
How to find gravel routes and plan your first rides
The shortest answer: start with Adventure Cycling’s mapped routes, check Strava segments in your area, and verify land access through USDA Forest Service geodata before heading somewhere remote.
Where to look for routes:
- Adventure Cycling Association’s route library (mapped, safety-vetted, beginner-friendly options available)
- Strava segments and local club ride calendars
- Regional forest service maps and county GIS data for surface type and access permissions
- Dedicated gravel-route apps and community forums
How to evaluate a route before you commit:
- Distance and surface type — is the unpaved percentage realistic for your current fitness?
- Remoteness — how far are you from a paved road or cell signal at the farthest point?
- Resupply — are there water sources or stores along the way?
- Escape routes — can you cut the route short if something goes wrong?
Pre-ride checklist (run this before every gravel ride): Check tire pressure and look for cuts or embedded debris. Squeeze both brake levers and confirm they engage firmly. Run through the gears to catch any skipping. Tighten any loose bolts on bags, racks, or accessories. Pack food, water, and your repair kit. Download the route to your GPS or phone with offline maps enabled. Tell someone your planned route and expected return time.
Joining a local club or guided gravel ride for your first few outings is worth it. You’ll learn surface-reading and pacing from riders who already know the terrain, and you’ll have help nearby if something mechanical goes wrong.
Safety, trail etiquette, and emergency preparedness
Safety essentials on every ride:
- Wear a helmet on every ride, no exceptions
- Use front and rear lights, especially on roads shared with vehicles
- Carry your ID and an emergency contact card in your kit
- Ride with a plan: someone at home knows your route and return time
- Signal your intentions to other riders and trail users
Trail etiquette:
- Yield to hikers and equestrians; slow down and announce yourself verbally
- Pass other cyclists with a clear, calm call (“on your left”)
- Leave no trace: pack out everything you pack in
- Respect private property; stay on marked public routes
- Slow for farm traffic and give animals wide clearance
Emergency preparedness:
- Download offline maps before every remote ride; cell coverage on gravel routes is unreliable
- Know the nearest paved road access point from every section of your route
- Carry a basic first-aid kit: bandages, antiseptic wipes, and blister treatment
- Wildlife encounters: make noise on blind corners in bear or mountain lion country; carry bear spray in areas where it’s recommended
Legal note: Trail access rules and land use permissions vary by jurisdiction and land manager. Before riding on U.S. Forest Service land or other public land, check current access status through the relevant land manager — rules change seasonally and by specific area.
Gravel culture and events worth knowing about
Gravel didn’t grow into a scene because of racing. It grew because riders wanted to explore roads that didn’t appear on standard cycling maps, and they wanted to do it without the pressure of a peloton. The culture emphasizes “ride your own ride” — your pace, your route, your goals.
That said, events exist across a wide range of formats:
- Gran fondos and gravel centuries — mass-participation rides with marked routes, aid stations, and no pressure to race
- Gravel races — timed events ranging from 50 miles to multi-day epics; competitive but usually open to all fitness levels
- Gravel triathlon series — USA Triathlon’s Gravel Triathlon Series combines gravel cycling with running and other disciplines, offering structured options for varied fitness levels
- Informal group rides — local clubs run beginner-friendly gravel meetups in most U.S. cities; these are the best entry point for new riders
The community is genuinely welcoming to beginners. Most gravel events have sweep riders, generous time cutoffs, and experienced riders happy to share route knowledge. Thebeamofficial’s ultracycling event page is worth checking for community events that connect safety-focused riders.
Your beginner gravel ride checklist
Print this or screenshot it before your first ride.
Packing checklist:
- Helmet (MIPS-rated, properly fitted)
- Front and rear lights
- Spare tube and tubeless plug kit
- Mini-pump or CO2 inflator
- Multi-tool with chain breaker
- Patch kit and tire boot
- Food for the ride (plus a small emergency reserve)
- Two water bottles or hydration pack
- Packable rain/wind jacket
- Phone (charged, offline maps downloaded) and ID
Quick pre-ride bike check:
- Tire pressure set and tires free of visible cuts
- Brakes engage firmly on both levers
- Gears shift cleanly through the full range
- Bag mounts and accessory bolts tight
Timing reminders:
- Start early enough to finish with at least one hour of daylight remaining
- Add 20–30% to your road-pace time estimate for unpaved sections
- Tell someone your route and expected return time before you leave
For a deeper look at organizing your kit efficiently, Thebeamofficial’s gear organization guide walks through bag placement and packing priorities for longer rides.
What gravel actually feels like compared to road riding
Gravel riding is slower, louder, and more demanding than road cycling in ways that don’t show up on a map. Your average speed drops, your hands work harder, and you spend more mental energy reading the surface ahead. That sounds like a downside until you’re 20 miles into a quiet forest road with no cars and no stoplights, and you realize that’s exactly the point.
The mechanical awareness gravel demands is real. Tires pick up debris, chains wear faster in grit, and a small mechanical issue in a remote spot is a bigger problem than the same issue on a city street. Carrying the right kit and knowing how to use it matters more here than on any road ride.
Visibility is another factor that road riders underestimate. On remote gravel routes, you may share the road with farm vehicles, ATVs, or logging trucks that appear without warning. Running a rear light and a high-visibility reflector isn’t just for night riding. Thebeamofficial’s gravel safety gear guide covers visibility accessories worth adding to your kit before your first remote ride.
Start with shorter loops. Always tell someone your plan. The payoff for those habits is the freedom to go farther with confidence.
Ride safer on gravel with Thebeamofficial
Gravel riding puts you farther from help and closer to unpredictable terrain than road cycling. The right safety gear isn’t optional out there.

Thebeamofficial designs helmets and visibility accessories built for exactly this kind of riding. The VIRGO full-face helmet with MIPS technology offers serious impact protection for technical descents and remote routes. The accessory line covers rear-view mirrors, high-visibility reflectors, and connected lighting solutions that keep you visible on roads where vehicles appear without warning. These aren’t commuter accessories repurposed for gravel — they’re built for riders who take safety seriously in low-traffic, low-visibility conditions.
Browse the full Thebeamofficial accessories collection to find helmets, reflectors, and visibility gear matched to gravel riding’s specific demands.
Sources
These are the sources used throughout this article, organized by what they’re most useful for:
- Gravel cycling - Wikipedia
- Global Cycling Network
- What is gravel riding? – BikeRadar
- The Basics of Gravel Riding - Adventure Cycling Association
- Exploring gravel cycling: Benefits, trends, and routes | ROUVY
- Gravel Triathlon Series | Team USA


