

TL;DR:
- Installing a rear-view mirror on your bike quickly improves safety by providing a clear view of traffic behind you. Proper selection, precise installation, and regular adjustments ensure reliable vision and confidence during rides.
Installing a rear-view mirror is one of the fastest safety upgrades you can make to your bike. Clip one on correctly, and you get a clear view of traffic behind you without ever turning your head or drifting out of your lane. The whole process takes a short amount of time, requires only a couple of basic tools, and pays off on the very first ride.
Here is what the installation covers at a glance:
- Mirror type selection: handlebar clamp, bar-end plug, or helmet-mounted, matched to your handlebar style and riding environment
- Tools needed: typically a 6mm or 8mm wrench and a screwdriver
- Core steps: choose a mounting location, position the mount, tighten securely without overtorquing, then adjust the angle from your riding position
- Post-install habits: test stability on a quiet road, then check fittings before every ride
Mirrors eliminate the need to look over your shoulder, which reduces the risk of drifting into traffic and keeps your eyes on the road ahead. Whether you commute through city intersections or train on open roads, a properly fitted mirror changes how aware you feel out there.
What mirror types work with your handlebars?
The right mirror for your bike depends almost entirely on your handlebar style. Get this match wrong and you will spend more time fighting the mount than actually riding.
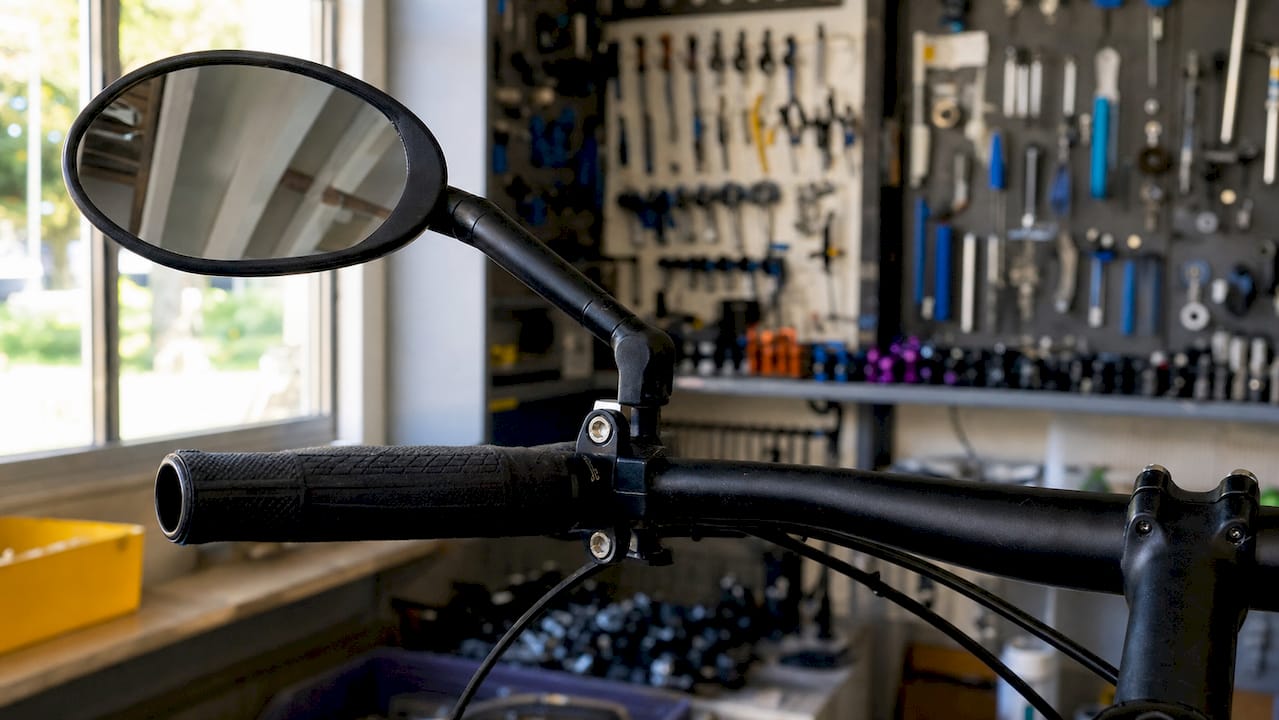
Handlebar clamp mirrors attach anywhere along the bar using a strap or clamp. They tend to offer the largest mirror surface and the widest field of view, which suits riders who want maximum rear coverage. The tradeoff is that they can crowd an already-busy cockpit, especially if you run lights, a bell, and a computer. Flat bars work well with these; drop bars can be trickier depending on where the brake levers sit.
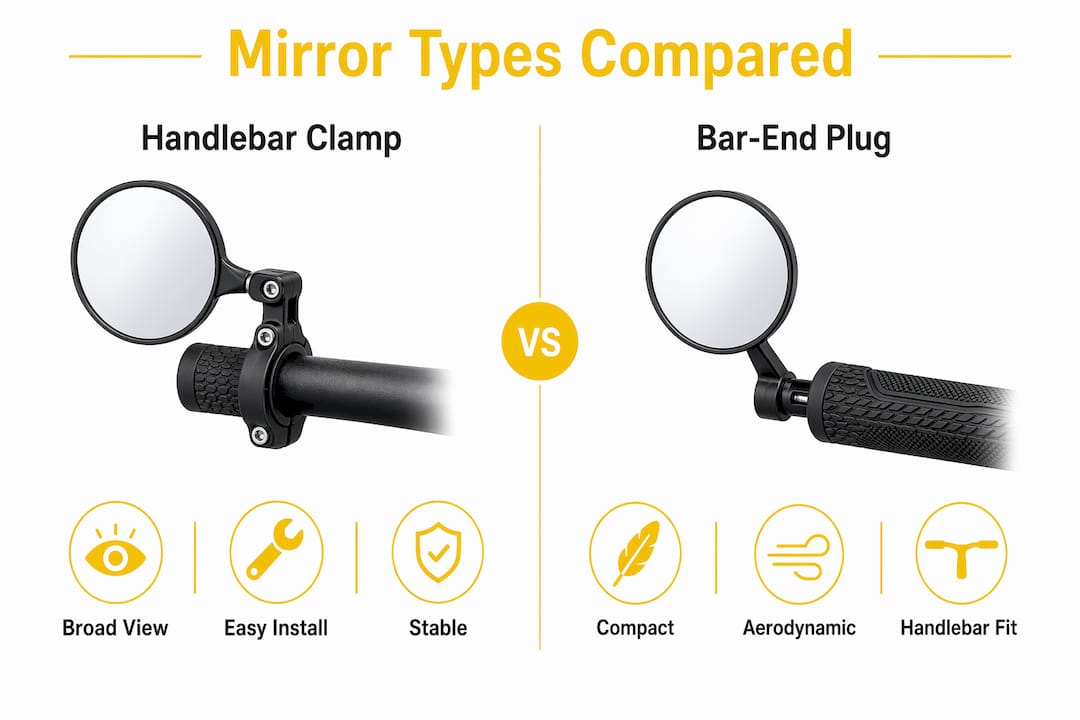
Bar-end plug mirrors insert directly into the open end of the handlebar. Drop bars usually have a small removable plug that pops out easily, making bar-end installation straightforward. Flat bars require either a grip with a removable end cap or a bit of DIY trimming to open the bar end. These mirrors are more discreet and less likely to snag on anything, though the viewing area is smaller.
Helmet-mounted mirrors clip directly to your helmet, glasses, or sunglasses. They follow your head movement, so you get a dynamic view rather than a fixed one. They are compact and light, but they take longer to get used to because the image shifts every time you move your head.
A quick reference for compatibility:
- Flat bars: handlebar clamp mirrors or bar-end plugs (with grip modification)
- Drop bars: bar-end plugs (easiest), handlebar clamp on the lever hood, or helmet-mounted
- E-bike flat bars: bar-end or helmet-mounted preferred, since brake controls often block clamp placement
For urban commuters, a handlebar clamp mirror on the traffic-facing side gives the most stable, glanceable view. Trail riders often prefer the lighter profile of a bar-end or helmet option.
What tools and preparation do you need before installing?
Gather everything before you touch the bike. Stopping mid-install to hunt for a wrench is how mounts end up half-tightened.
Tools you will need:
- A 6mm or 8mm wrench (check your mirror’s hardware before you start)
- A Phillips or flathead screwdriver, depending on the mount design
- An anti-slip rubber pad (optional but useful for preventing handlebar scratches)
Preparation steps:
- Clean the handlebar section where the mount will sit. Grit and grease under a clamp will let it rotate over time.
- Stabilize the bike. Lean it against a wall, use a repair stand, or ask someone to hold it. A bike that tips mid-install can damage the mirror or the bar.
- Wear gloves. Handlebar edges and clamp hardware can be sharp, and gloves give you better grip on small fasteners.
- Check that the bar end is clear of old plugs or end caps before attempting a bar-end installation.
Pro Tip: Lay all your tools and hardware on a light-colored cloth before you start. Small screws and washers disappear instantly on a dark workshop floor.
No law in any North American state or province requires a cyclist to use a rear-view mirror, so installation is entirely your choice. That said, taking five minutes to prep properly means the mirror stays put for thousands of miles rather than loosening after the first pothole.
How do you install a cyclist rear-view mirror step by step?
The process differs slightly between handlebar clamp and bar-end plug mirrors. Follow the steps for your mirror type.
Handlebar clamp installation
- Choose the mounting location. Sit on the bike in your normal riding position. Hold the mirror roughly where you think it will go and check whether you can see the lane behind you without your shoulder blocking the view. Mark the spot lightly with a piece of tape.
- Open the clamp. Loosen the clamp bolt enough to slide it over the handlebar. Do not remove the bolt entirely unless the design requires it.
- Position the mount. Slide the clamp to your marked location. On most mirrors, the arm should point outward and slightly downward at this stage.
- Snug the clamp. Hand-tighten first, then use your wrench to firm it up. Stop when the mount resists rotation under firm hand pressure. Overtightening crushes aluminum bars and can crack carbon.
- Pre-set the mirror angle. Rotate the mirror head so it roughly faces rearward before your first ride. Fine-tuning happens from the saddle.
- Final tighten and check. Give the mount one last check with the wrench. Tug the mirror arm firmly. It should not rotate or slide.
Bar-end plug installation
- Remove the existing plug or grip end cap. On drop bars, the factory plug usually pulls straight out. On flat bars, you may need to trim the grip or use a grip with a removable end.
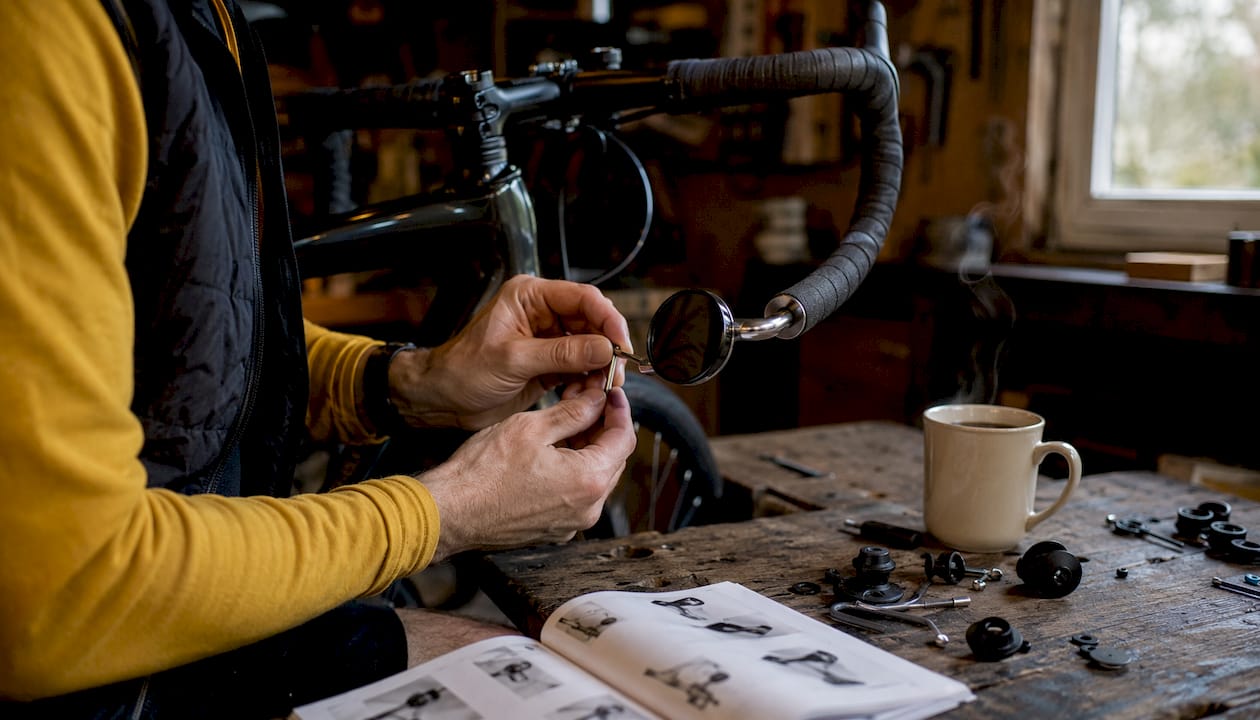
- Insert the expander plug. Slide the mirror’s expander plug into the open bar end. Most designs use a bolt that, when tightened, expands a rubber or plastic sleeve against the inside of the bar.
- Tighten the expander bolt. Use your wrench or screwdriver to tighten until the plug resists twisting. Test by trying to rotate the mirror by hand. It should hold firm.
- Set the initial mirror angle. Rotate the mirror head to face rearward. You will fine-tune this from your riding position.
- Confirm stability. Tap the mirror firmly from different angles. No movement means the plug is seated correctly.
Comparison: handlebar clamp vs. bar-end plug
| Step | Handlebar clamp | Bar-end plug |
|---|---|---|
| Grip removal needed | Rarely | Often (flat bars) |
| Mounting hardware | External clamp bolt | Internal expander bolt |
| Placement flexibility | High (anywhere on bar) | Fixed at bar end |
| Risk to handlebar | Scratching if no pad used | Minimal |
| Field of view | Larger mirror possible | Typically smaller mirror |
| Best for | Flat bars, commuters | Drop bars, road cyclists |
Pro Tip: Place a thin rubber strip between the clamp and the handlebar before tightening. It prevents scratches and adds friction so the mount stays put even on rough roads.
How do you adjust the mirror angle for optimal rear visibility?
Adjustment is where most cyclists shortchange themselves. A mirror set at the wrong angle is nearly useless, yet five minutes of careful tuning makes it feel like a second pair of eyes.
Sit on the bike in your normal riding position before making any adjustments. The angle that looks right while you are standing next to the bike will be completely wrong once you are hunched over the bars. Aim the mirror so a quick glance shows the lane behind you, not your own shoulder or elbow.
Key adjustment tips:
- Target the lane, not yourself. If you see your arm or jersey filling the mirror, rotate the mirror head outward until the road behind appears.
- Account for your riding posture. Aggressive road positions require a different angle than an upright commuter posture. Adjust for how you actually ride, not how you stand.
- Use eye dominance to choose your side. Point a finger at a distant object and alternate closing each eye. The eye that keeps the finger on target is your dominant eye. Mounting the mirror on that side improves how quickly your brain processes what it sees.
- Practice in a quiet area. A few minutes on a calm street trains your eyes to flick to the mirror and back without conscious effort.
Pro Tip: For the most complete rear awareness, combine a handlebar mirror with a helmet-mounted mirror. The handlebar mirror gives you a stable fixed view; the helmet mirror lets you scan left and right by turning your head. Together, they cover nearly every blind spot.
For urban riders, position the mirror on the traffic-facing side. In the United States, that means the left side for most road situations. Trail riders can mount on whichever side gives the clearest sightline past their body.
How do you maintain and troubleshoot your rear-view mirror?
A mirror that wobbles or fogs up is worse than no mirror at all, because it trains you to ignore it. Maintenance takes about two minutes per ride.
Regular maintenance tasks:
- Clean the mirror surface before every ride. A smudged or dirty mirror gives a distorted view that is hard to trust at speed.
- Check clamp or plug tightness before each ride. Vibration from road surfaces loosens fasteners gradually, and a loose mount is the most common cause of mirror wobble.
- Inspect the mirror arm for cracks or stress marks, especially after a fall. A hairline crack in the arm can cause sudden failure.
- Wipe down the mount area on the handlebar periodically to prevent grit buildup under the clamp.
Troubleshooting common problems:
- Mirror wobbles while riding: Tighten the clamp or expander bolt. If the wobble persists after tightening, the mount may be worn and needs replacement.
- Mirror rotates out of position: The ball joint or pivot is too loose. Tighten the joint’s locking screw, usually a small hex bolt on the arm.
- Bar-end plug spins in the bar: The expander is not fully seated. Remove the plug, check that the rubber sleeve is intact, and re-insert with more torque on the expander bolt.
- Mirror arm broke after a fall: Replace the arm or the full unit. A cracked arm cannot be safely repaired with tape or adhesive.
Replace any component that shows visible damage. An inexpensive replacement part is a far better trade than riding with a mirror you cannot trust.
What do cycling safety experts say about mirror placement?
Placement strategy is where most cyclists leave real safety gains on the table. Getting the mirror on the bike is the easy part. Getting it in the right position for your specific riding context takes a bit more thought.
Mounting on the traffic-facing side is the consistent recommendation across cycling safety resources. In right-hand traffic countries like the United States, that means the left side. Handlebar mirrors are convex on most designs, so objects appear closer than they are. Keep that in mind when judging how much space a passing vehicle has.
Key expert-backed insights:
- Combine mirror types for better coverage. Helmet mirrors follow head movement for a detailed dynamic view; handlebar mirrors maintain a fixed stable reference point. Using both together reduces blind spots more effectively than either alone.
- Eye dominance matters more than most riders realize. A simple finger-point test reveals which eye is dominant, and placing the mirror on that side speeds up how quickly your brain reads the image.
- Practice the glance habit. A quick check every 10 seconds or so beats one panicked look when you already sense a car. Quiet roads are the best place to build that rhythm before taking it into traffic.
- Mirrors complement, not replace, shoulder checks. Before changing position in a group or pulling out to overtake, a head-check remains necessary. The mirror adds a layer of awareness; it does not substitute for the basics.
Thebeamofficial’s approach to cycling safety mirrors reflects this same philosophy: a well-placed mirror is a tool for awareness, not a reason to stop scanning actively.
How do you test mirror stability and vision after installation?
Never skip the test ride. A mirror that feels solid in the garage can vibrate loose or sit at the wrong angle the moment you hit a real road surface.
Start on a quiet, low-traffic street. Ride at your normal pace and take a few glances at the mirror. Check that the image is stable and not vibrating. If the view shakes noticeably, pull over and tighten the mount before continuing. A small amount of image movement on rough pavement is normal; the mirror should not oscillate freely.
Check the angle while riding. The lane behind you should be visible with a natural glance, not a deliberate head tilt. If you have to crane your neck to see the road, the mirror arm needs repositioning. Pull over, loosen the joint slightly, re-angle, and retighten.
Test the mount’s resistance to accidental bumps. Brush the mirror arm with your hand as you would if you were reaching for a water bottle. It should not shift position. If it does, tighten the clamp or expander bolt by a quarter turn and test again. Once the mirror holds its angle through a full ride on varied surfaces, the installation is complete.
Key Takeaways
A correctly installed rear-view mirror gives you reliable rear visibility without turning your head, and the installation process is straightforward when you match the mirror type to your handlebar and follow the tightening steps carefully.
| Point | Details |
|---|---|
| Match mirror to handlebar | Bar-end plugs suit drop bars best; handlebar clamps offer more flexibility on flat bars. |
| Use the right tools | A 6mm or 8mm wrench and a screwdriver cover most installations; add a rubber pad to protect the bar. |
| Adjust from the saddle | Set the mirror angle while seated in your riding position so the lane behind is visible, not your shoulder. |
| Check fittings before every ride | Vibration loosens fasteners gradually; a quick tighten before each ride prevents wobble and misalignment. |
| Thebeamofficial for safety gear | Thebeamofficial offers rear-view mirrors and safety accessories designed for road, urban, and e-bike cyclists. |
Why mirrors deserve more credit than they get
Most cyclists treat a rear-view mirror as an optional extra, something for cautious commuters or older riders who have slowed down. That framing misses the point entirely.
The shoulder-check habit that most cyclists rely on is genuinely imperfect. Every time you rotate your body to look back, your steering input changes slightly. On a narrow road or in a tight group, that micro-drift matters. A mirror does not replace the shoulder check before a lane change, but it gives you the information you need to decide whether a shoulder check is even necessary right now. That is a meaningful difference in how you manage your attention at speed.
What surprises most riders who finally install one is not the safety benefit in isolation. It is how much calmer the ride feels. Knowing what is behind you, without having to look, removes a constant low-level tension that most cyclists do not even realize they are carrying. The road ahead gets more of your focus, not less.
The installation itself is not the barrier. Five minutes of preparation, the right tools, and a careful test ride are all it takes. The barrier is usually the assumption that mirrors are for a different kind of cyclist. They are not.
Thebeamofficial’s cycling safety accessories are worth a look
If you are already thinking about rear visibility, Thebeamofficial’s full range of safety accessories is a logical next step. The brand designs gear specifically for cyclists who take protection seriously, from road and gravel riders to urban commuters and e-bike users.

Thebeamofficial’s cycling safety accessories include rear-view mirrors built for real-world handlebar compatibility, alongside high-visibility reflectors and connected safety products. The flagship VIRGO helmet with MIPS technology pairs naturally with these accessories for riders who want a complete safety setup rather than a piecemeal one. For anyone ready to go beyond a single mirror, the full helmet collection covers road, urban, and everyday riding with the same focus on protection and usability that runs through everything Thebeamofficial makes.


