

For multi-day bikepacking, an MTB-style half-shell helmet with extended rear coverage, a removable visor, and integrated rotational-impact protection is the right call. Thebeamofficial VIRGO is the recommended pick: it pairs MIPS technology with a robust retention system and ventilation balance built for long days in the saddle, not just a quick spin around the block.
MTB-style helmets give you deeper rear and occipital coverage than road helmets, which matters when a loaded bike goes down on gravel or singletrack. MIPS reduces the rotational forces your brain experiences in an angled impact. A visor blocks low branches, morning sun, and rain without requiring you to stop and dig through a bag. These aren’t nice extras on a bikepacking trip. They’re the baseline.
The short version:
- Helmet style: MTB-style or gravel half-shell with extended rear coverage
- Protection tech: MIPS or equivalent rotational-impact system
- Certification: CPSC (mandatory in the U.S.) plus Virginia Tech lab rating as a secondary check
- Visor: removable preferred for route flexibility
- Publisher pick: THE BEAM VIRGO (details in the dedicated section below)
Table of Contents
- Why does helmet choice matter more for bikepacking?
- What safety certifications and tests should you check?
- Which features actually matter for multi-day touring?
- How do you match a helmet to your specific route and conditions?
- How do you get the fit right for a multi-day trip?
- When should you replace a helmet?
- THE BEAM VIRGO: why it fits bikepacking
- Your bikepacking helmet buying checklist
- Key Takeaways
- The feature that most buyers overlook
- Get the THE BEAM VIRGO for your next route
- Authoritative sources for deeper safety research
Why does helmet choice matter more for bikepacking?
A road helmet is optimized for one thing: keeping weight and drag low on smooth pavement. Bikepacking is something else entirely. You’re on mixed terrain, often fatigued, carrying a loaded bike that handles differently than a clean race setup. The fall dynamics change. A backward or sideways fall on gravel hits differently than a forward tumble on tarmac, and the rear of your head is far more exposed.
Extended rear coverage, the defining feature of MTB-style half-shells, addresses exactly that. It wraps lower around the occipital area, the back-bottom of the skull, where road helmets typically leave a gap. Over a five-day route with variable surfaces, that gap is a real risk, not a theoretical one.
Comfort compounds over hours. A helmet that feels fine for 90 minutes can become genuinely miserable by hour six. Weight, ventilation, and how well the retention system holds position without pressure points all determine whether you’re thinking about your ride or thinking about your head.
- Ventilation: Poor airflow accelerates fatigue and overheating on sustained climbs
- Weight: Even small differences in weight can be noticeable on a full day in the saddle.
- Retention stability: A helmet that shifts on descents requires constant micro-adjustments
- Rear coverage: Protects against the backward falls more common on uneven, loaded riding
Pro Tip: When choosing a visor for backcountry routes, pick a model with a removable, angle-adjustable peak. On open gravel segments you can flip it up or detach it entirely; on forested singletrack it earns its keep blocking branches at eye level. A fixed visor forces a compromise; an adjustable one doesn’t.
What safety certifications and tests should you check?
CPSC: the U.S. baseline
Every helmet sold legally in the United States for cycling must meet CPSC standards. Look for the compliance label inside the helmet. This is non-negotiable, not a differentiator. If a helmet doesn’t carry it, don’t buy it.
The catch: CPSC standards were written before e-bikes were common, when typical riding speeds topped 10–15 mph. Class 3 e-bikes reach 28 mph, and the physics of a crash at that speed are meaningfully different.
MIPS and rotational-impact systems
Standard impact tests measure linear force. Real crashes almost always involve an angled, rotational component. MIPS (Multi-directional Impact Protection System) adds a low-friction slip-plane layer inside the helmet that allows the shell to rotate slightly relative to your head on impact, reducing the rotational forces transmitted to the brain. For bikepacking on unpredictable terrain, this matters. Look for the yellow MIPS liner or an equivalent branded system clearly labeled on the product page.
Virginia Tech helmet ratings
The Virginia Tech Helmet Lab runs independent drop tests on bicycle helmets and publishes a publicly searchable database. Their ratings give you a measured performance baseline that goes beyond what any manufacturer’s marketing copy can tell you. Before buying, search the model name in their database. A five-star rating is the benchmark to aim for.
NTA 8776 for e-bike riders
If you’re bikepacking on a Class 3 e-bike (28 mph assist), NTA 8776 is the Dutch standard created specifically for higher-speed electric bike riding. It requires more coverage on the sides and rear than standard CPSC helmets. Availability is still limited, but the standard is gaining traction in the U.S. market. Any helmet carrying NTA 8776 already meets CPSC, so it’s a straight upgrade.
Quick trust-signal checklist for product pages:
- CPSC compliance label (inside the helmet or on the box)
- MIPS liner or equivalent rotational-impact system clearly named
- Virginia Tech rating (five stars is the target)
- NTA 8776 if you ride a Class 3 e-bike
- Manufacturer crash-replacement policy stated explicitly
Which features actually matter for multi-day touring?
Coverage and construction
The rear coverage gap between a road helmet and an MTB half-shell leaves a noticeable area of exposed skull. On a bikepacking route, that’s the difference between a bruise and a serious injury on a backward fall. In-mold construction (where the EPS foam liner is fused to the outer shell during manufacturing) produces a lighter, more integrated structure than helmets with a separate shell glued on top. Reinforced rim edges resist cracking from the knocks a helmet takes when strapped to a bag or dropped at a campsite.
Ventilation versus weight
Bikepacking-optimized helmets prioritize protection and coverage over minimal weight, which means accepting slightly more material than a pure road helmet. The trade-off is real but manageable. More vents mean more airflow but also more structural complexity and often a weight penalty. For hot desert routes, maximize vent count. For cold or wet touring, fewer large vents reduce wind chill without requiring a separate cover.
Visor: keep it or ditch it?
Experts consistently favor a visor for off-road and mixed-terrain riding. Sun, rain, and branches are real hazards on backcountry routes. The aerodynamic penalty is negligible at bikepacking speeds. The packability argument against visors is solved by a removable design. If your route is mostly fast, open gravel, a peakless helmet is a reasonable call. If it mixes forest trails, variable weather, and long sun exposure, keep the visor.
Retention systems and fit adjustability
A dial retention system that you can operate with gloves on, one-handed, while moving, is genuinely useful on a multi-day trip. Temperatures drop overnight; you add a thin cap or buff under the helmet in the morning. A coarse dial that only adjusts in large increments won’t accommodate that layering. Look for a micro-adjust dial at the rear, ideally with tilt adjustment so the helmet sits level regardless of headwear underneath.
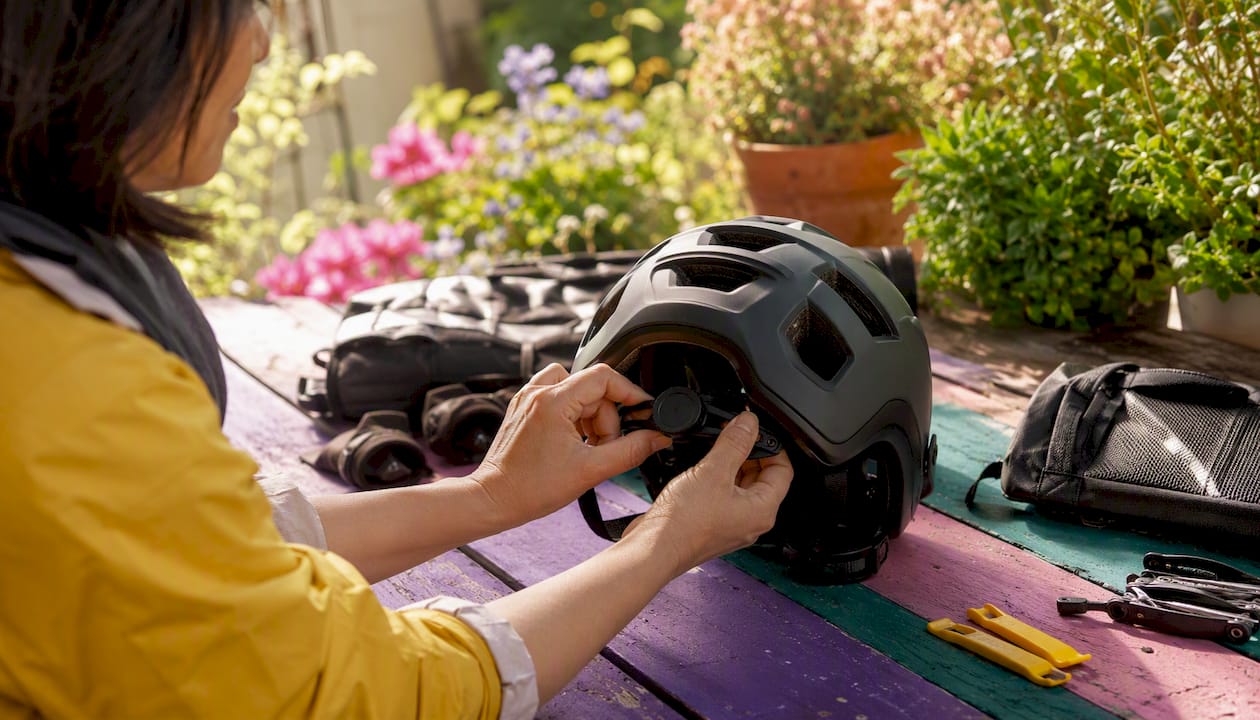
Pro Tip: Before buying online, test the retention dial while wearing a thin beanie. If the helmet rocks forward or the dial bottoms out before achieving a snug fit, that model won’t work for cold-morning starts on tour.
Mounts, compatibility, and materials
| Feature | What to look for | Why it matters for bikepacking |
|---|---|---|
| Headlamp mount | Integrated front clip or strap channel | Keeps the lamp stable on night segments without tape |
| Sunglass stowage | Eye-garage clip at the front vents | Locks glasses in place on rough descents |
| Camera mount | GoPro-compatible slot or adhesive pad area | Useful for route documentation without a separate mount |
| EPS liner | Single-density or multi-density foam | Absorbs impact energy; inspect for compression after any crash |
| Shell material | In-mold polycarbonate | Lighter and more integrated than separate-shell construction |
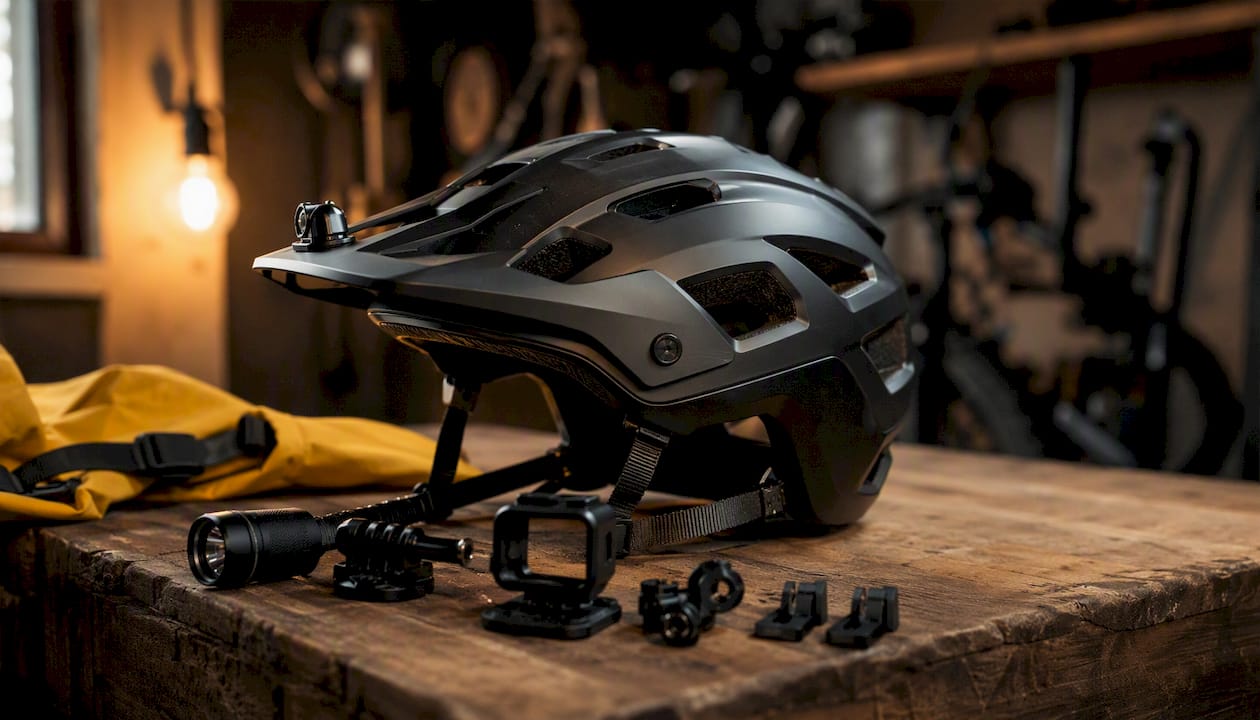
Helmet add-ons and mounting accessories can extend a helmet’s utility significantly on long routes, particularly for night riding where a stable headlamp mount beats a head-strap lamp every time.
How do you match a helmet to your specific route and conditions?
The right helmet depends on where you’re riding, how fast, and what the weather will do. Here’s a practical decision flow:
By ride type:
- Fast gravel and mixed road: Prioritize ventilation and low weight; a gravel-style half-shell with a removable visor covers most scenarios
- Technical singletrack with a loaded bike: Prioritize rear coverage and a secure retention system; accept a modest weight penalty
- Hot desert touring: Maximum vent count; lighter shell; consider a helmet with a wide visor for sun protection
- Cold or wet touring: Fewer large vents; compatible with a thermal liner cap; check that the retention dial works over a buff
- E-bike high-speed touring (Class 3): Look for NTA 8776 certification or at minimum a helmet with extended side and rear coverage beyond standard CPSC
Quick condition swaps:
- Remove the visor for long open-road segments to reduce drag and improve airflow
- Add a thin merino liner cap under the helmet for cold mornings; confirm the dial still adjusts
- Use a helmet cover (lightweight silnylon) for sustained rain rather than switching helmets
- Attach a clip-on rear light to the helmet for dawn and dusk segments on roads
For e-bike bikepackers, the e-bike helmet considerations go beyond standard CPSC. At 28 mph, impact energy increases substantially. If NTA 8776 isn’t available in your preferred model, at minimum choose a helmet with extended rear and side coverage and a confirmed MIPS liner.
How do you get the fit right for a multi-day trip?
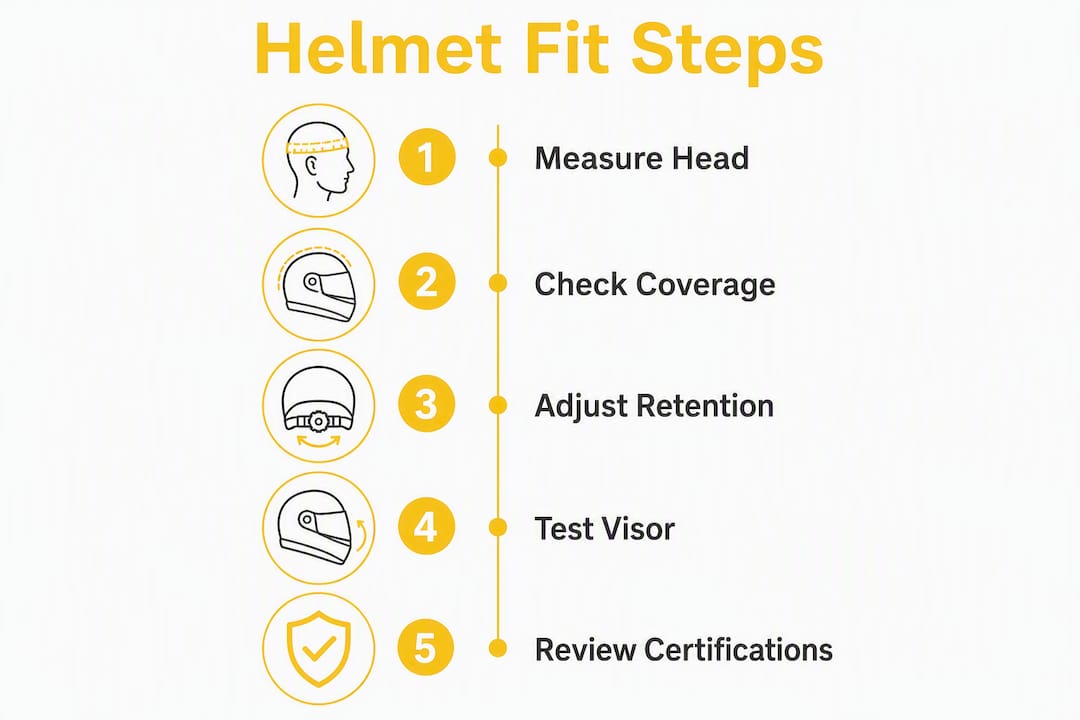
Measuring and dialing in
Head circumference is the starting point. Measure at the widest point, roughly 1 inch above the eyebrows. Most helmets cover a 2–3 cm range per size. When in doubt between sizes, try both and assess retention dial range: you want the dial to sit in the middle of its adjustment range when the helmet fits correctly, leaving room to tighten or loosen as conditions change.
The helmet should sit level, two finger-widths above the eyebrows. Front-to-back stability matters: push the front up and the back down. If it rocks more than about an inch, the fit is wrong.
Fit checklist for multi-day trips:
- Retention dial adjusts smoothly with gloves on
- Helmet stays level when you shake your head side to side
- Chin strap forms a V just below each ear; buckle sits under the chin with one finger of clearance
- No pressure points after 20 minutes of wear
- Dial still achieves snug fit when wearing a thin cap underneath
Packing and protecting your helmet on tour
EPS foam is the energy-absorbing material in your helmet. It compresses permanently under sustained pressure, which means strapping a helmet tightly to a bag for hours can degrade its protection without leaving any visible damage. Use a helmet bag or a soft stuff sack. If you’re strapping to handlebars or a fork cage, use a loose attachment that holds position without squeezing the shell.
Pro Tip: Pack the helmet crown-down in a stuff sack so the visor and retention dial face inward. This protects both the most fragile components and keeps the helmet from acting as a sail in crosswinds when mounted externally.
Sunglass eye-garage clips are useful on tour: they lock your glasses to the front vents when you’re not wearing them, eliminating the need to find a safe pocket on rough terrain.
When should you replace a helmet?
Lifespan and crash rules
The standard industry guidance is to replace a helmet every five years from the manufacture date, regardless of visible condition. UV exposure, sweat, and temperature cycling degrade EPS foam and shell adhesion over time in ways that don’t show on the surface. After any crash that involves a direct impact to the helmet, replace it immediately. EPS foam compresses on impact and does not recover. A helmet that has absorbed one crash has reduced capacity for the next.
Real-world retirement often comes before the five-year mark. Broken retention dials, failed strap buckles, and degraded padding are the most common reasons riders retire helmets on tour, not crash damage. Inspect these components before every multi-day trip.
Inspection checklist before a long tour:
- No hairline cracks in the shell (run your fingers across the surface in good light)
- EPS foam shows no visible compression or soft spots
- Retention dial clicks through its full range without slipping
- All strap buckles click and release cleanly
- Pads are intact and not peeling; replace if they’ve lost their shape
Cleaning and storage on tour
Sweat, sunscreen, and salt accelerate material degradation. Rinse the helmet with cool water and mild soap after heavy days. Never use solvents or alcohol-based cleaners on the shell or foam. At tour stops, store the helmet out of direct sunlight and away from heat sources. A car trunk in summer sun can reach temperatures that warp the shell and soften the foam. A mesh bag hung in shade is the practical solution at a campsite.
THE BEAM VIRGO: why it fits bikepacking
The VIRGO is Thebeamofficial’s flagship helmet, built around the priorities that matter most for multi-day mixed-terrain riding. It integrates MIPS technology directly into the liner, meaning the rotational-impact protection isn’t an afterthought bolted on after the fact. The extended rear coverage addresses the occipital gap that road helmets leave open. The retention system is designed for on-the-fly adjustment, which matters when you’re adding or removing headwear across temperature swings on a long route.
| Spec | THE BEAM VIRGO |
|---|---|
| Protection tech | MIPS integrated liner |
| Certification | CPSC compliant |
| Coverage | Extended rear/occipital (MTB half-shell profile) |
| Visor | Removable, angle-adjustable |
| Retention system | Micro-adjust dial with tilt adjustment |
| Headlamp compatibility | Front mount channel |
| Construction | In-mold EPS with polycarbonate shell |
| Available in U.S. | Yes, via Thebeamofficial e-commerce |
Pros:
- MIPS liner provides rotational-impact protection on unpredictable terrain
- Extended rear coverage closes the gap left by road-style helmets
- Removable visor adapts to open gravel or forested trail conditions
- Micro-adjust retention dial works with layered headwear
Cons:
- Slightly heavier than a pure road helmet (the trade-off for more coverage and MIPS)
- Full-face chin guard not included (this is a half-shell design, not a downhill helmet)
Browse the full helmet collection at Thebeamofficial to see current colorways, sizing, and shipping details.
Your bikepacking helmet buying checklist
Use this when comparing helmets in a shop or on a product page:
Safety and certification:
- CPSC compliance label present inside the helmet
- MIPS liner or equivalent rotational-impact system clearly named
- Virginia Tech rating checked (five stars preferred)
- NTA 8776 present if you ride a Class 3 e-bike
Fit and comfort:
- Retention dial adjusts smoothly one-handed with gloves
- Helmet fits level with dial in mid-range of adjustment
- Dial still achieves snug fit over a thin cap or buff
- No pressure points after 20 minutes in-store
Features for bikepacking:
- Visor decision made: removable preferred for route flexibility
- Vent count matches your primary climate (more for hot, fewer for cold/wet)
- Headlamp mount or strap channel present
- Eye-garage clip for sunglass stowage
Practical:
- Manufacturer crash-replacement policy confirmed
- Helmet ships to your U.S. address
- Plan for how you’ll carry it: stuff sack or helmet bag ready
In-store fit test steps:
- Put the helmet on without fastening the strap; it should sit level without sliding
- Fasten the strap and shake your head firmly in all directions
- Push up on the front brim: movement of more than about an inch means poor fit
- Tighten the retention dial to snug; check for pressure points at the temples and rear
- Try the dial adjustment while wearing a thin cap if you plan to tour in variable temperatures
Key Takeaways
For bikepacking, an MTB-style half-shell with MIPS, extended rear coverage, and a removable visor is the right starting point, and the THE BEAM VIRGO delivers all three in a single package built for multi-day use.
| Point | Details |
|---|---|
| Helmet style for bikepacking | MTB-style half-shell gives extended rear coverage that road helmets lack on mixed terrain. |
| Non-negotiable safety checks | CPSC compliance plus a Virginia Tech rating and MIPS liner are the three baseline trust signals. |
| E-bike riders need more | Class 3 e-bike riders should look for NTA 8776 certification for higher-speed impact protection. |
| Fit matters as much as specs | A micro-adjust retention dial that works over a thin cap is critical for variable-temperature multi-day tours. |
| Publisher recommendation | THE BEAM VIRGO integrates MIPS, extended coverage, and a removable visor for bikepackers. |
The feature that most buyers overlook
Most bikepacking helmet guides spend their word count on MIPS versus no-MIPS, visor versus no-visor, and weight comparisons. Those things matter. But the feature that actually determines whether a helmet works for a five-day route is the retention dial, specifically whether it still achieves a snug fit when you’re wearing a thin cap at 5 AM on a cold mountain pass.
A dial that bottoms out over a beanie isn’t a minor inconvenience. It means the helmet is loose for the first two hours of every cold-morning ride, which is exactly when you’re most fatigued and most likely to make a mistake. Riders who test-fit with alternate headwear consistently report better comfort over long days, yet almost no one does this in a shop.
The second overlooked point: EPS foam degradation from sustained compression. Strapping a helmet tightly to a handlebar bag for eight hours a day, every day, for a week is not the same as wearing it. The foam takes a slow, invisible hit. A helmet bag or loose stuff sack costs almost nothing and preserves the protection you paid for.
The VIRGO’s design addresses both of these. The tilt-adjustable retention system accommodates headwear layering, and the removable visor means you’re not fighting the helmet’s geometry when packing it away. For bikepackers who treat gear as tools rather than trophies, that kind of practical thinking in the design is what separates a helmet worth buying from one that looks good in a product photo.
Get the THE BEAM VIRGO for your next route
Thebeamofficial ships the VIRGO directly to U.S. customers through its e-commerce platform, with no middleman markup. The brand’s direct-to-consumer model means you’re buying from the people who designed the helmet, with access to customer support that actually knows the product.

The adults’ helmet collection includes current sizing, colorways, and shipping details for U.S. orders. Thebeamofficial also offers a crash-replacement policy and warranty support, details available on the product page. If you need mounting accessories, headlamp clips, or visibility add-ons for your setup, the accessories range ships alongside helmets in a single order.
For bikepackers who want a helmet that was designed with protection and real-world usability in mind, not just weight savings, the VIRGO is the place to start. Visit the full helmet collection and check current availability before your next route.
Authoritative sources for deeper safety research
“A bike helmet provides some protection in any crash, but not enough for a powered vehicle consistently traveling at 20 mph and higher. At a minimum your helmet should be certified to the Dutch NTA 8776 standard, the only one specifically for e-bikes.” — Bicycle Helmet Safety Institute (helmets.org)
- Virginia Tech Helmet Lab — Bicycle Helmet Ratings: searchable database of independently tested helmets with star ratings; use it to verify any model before buying
- MIPS official site: explains how the slip-plane system works and which helmets carry a licensed MIPS liner
- Helmet standards and guidance — helmets.org: covers NTA 8776, CPSC, and e-bike helmet law by state
- Consumer Reports — Helmets for Riders of Electric Bikes: practical guidance on when to upgrade beyond standard CPSC for e-bike use
- REI Expert Advice — How to Choose Bike Helmets: solid baseline on helmet types, fit, and coverage differences
When reading Virginia Tech scores, prioritize the star rating over the raw STAR score number. Five stars indicates the helmet absorbed impact energy well across multiple test configurations. A four-star helmet is still a reasonable choice; below three stars, look elsewhere regardless of price.


