

The single most effective visibility strategy for most cyclists is a layered system: a fluorescent base layer for daytime and dawn/dusk riding, targeted retroreflective elements for night, and active front and rear lights running at all times. No single piece of gear covers all conditions. Stack them, and drivers see you from much farther away, in more directions, and in more lighting situations than any solo solution can manage.
For a commute or dawn/dusk ride, put on this combination right now:
- Fluorescent vest or shell (neon yellow or orange) as your outer layer
- Ankle reflectors or reflective bands on both legs
- Front light: 200–300 lumens minimum
- Rear light: 50+ lumens, flashing mode
- THE BEAM FRAME FLASH mounted to your frame or helmet for passive 360° retroreflection
- THE BEAM VIRGO helmet with compatible helmet add-ons for head-level visibility, the zone drivers notice first
Pro Tip: Clip your ankle reflectors on before you leave the house. They take ten seconds and are the single highest-impact addition most cyclists skip.
Key Takeaways
A layered system combining fluorescent clothing, retroreflective elements, and active lights gives cyclists the broadest visibility across all conditions and lighting environments.
| Point | Details |
|---|---|
| Layer all three types | Fluorescent for day, retroreflective for night, active lights always — no single type covers all conditions. |
| Prioritize ankle placement | Ankle and pedal reflectors create biomotion cues that help drivers recognize a human shape faster than torso coverage alone. |
| Minimum light thresholds | Use 200+ lumens front and 50+ lumens rear for commutes; 150+ lumens rear for night rides on open roads. |
| Check materials and standards | Look for 3M Scotchlite or named retroreflective standards; ANSI Class 2 is the U.S. minimum for commuter garments. |
| Thebeamofficial FRAME FLASH | Mounts on frame or helmet for passive retroreflection; pairs with the VIRGO helmet add-ons for head-level coverage. |
Table of Contents
- What types of reflective gear should you actually use?
- How do fluorescent, retroreflective, and illuminated gear actually work?
- Where you place reflectivity matters as much as how much you wear
- What features actually matter when you’re buying reflective gear?
- Ready-to-use kits for your most common rides
- How to care for reflective gear so it stays effective
- How we selected and vetted these recommendations
- The visibility gap most cyclists still underestimate
- THE BEAM gear that fits directly into these kits
- Sources
What types of reflective gear should you actually use?
Reflective gear for cyclists breaks into six practical categories. Each fills a different gap in your visibility system, and most work best in combination rather than alone.
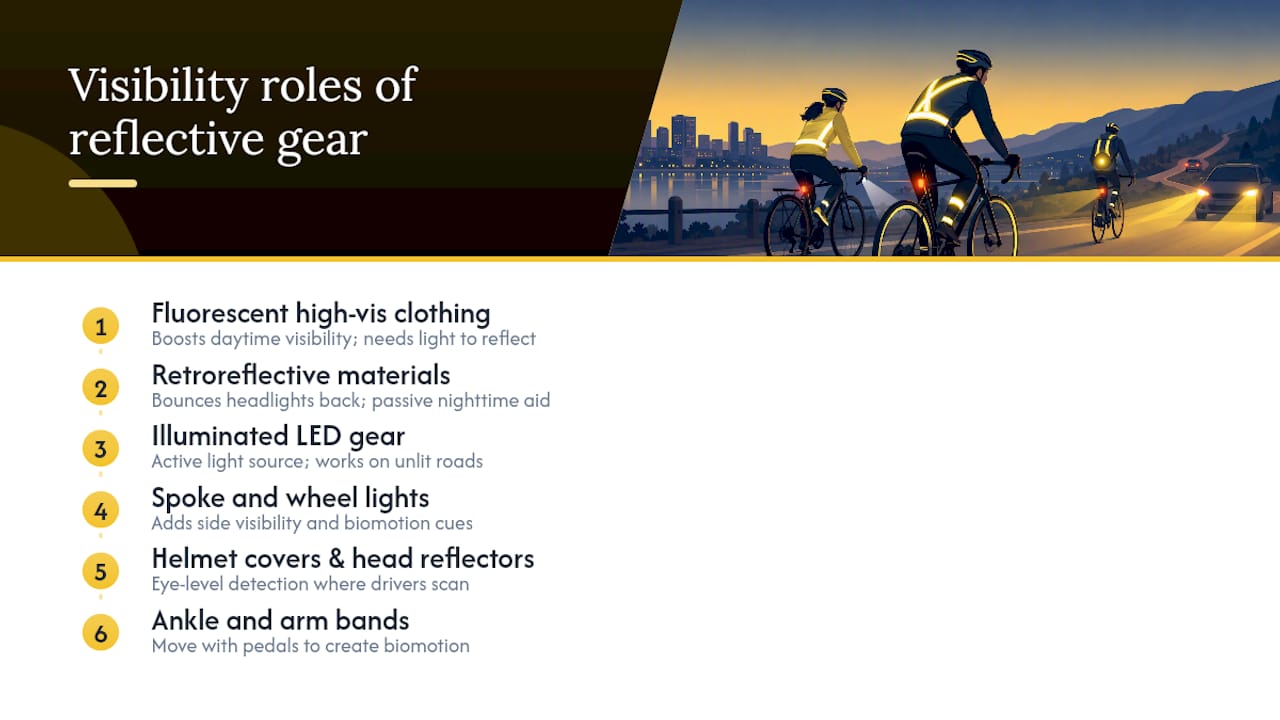
Fluorescent high-vis clothing (vests, jackets, gilets) uses bright color to scatter ambient light in daylight and low-angle sun. It does nothing in the dark without a light source hitting it.
Retroreflective materials (glass-bead or microprismatic fabrics, tape, patches) bounce a driver’s headlights directly back toward the source. They are passive, require no battery, and are most effective at night. Fully retroreflective fabrics reflect from more angles and perform significantly better in tests than isolated reflective stripes on otherwise dark clothing.
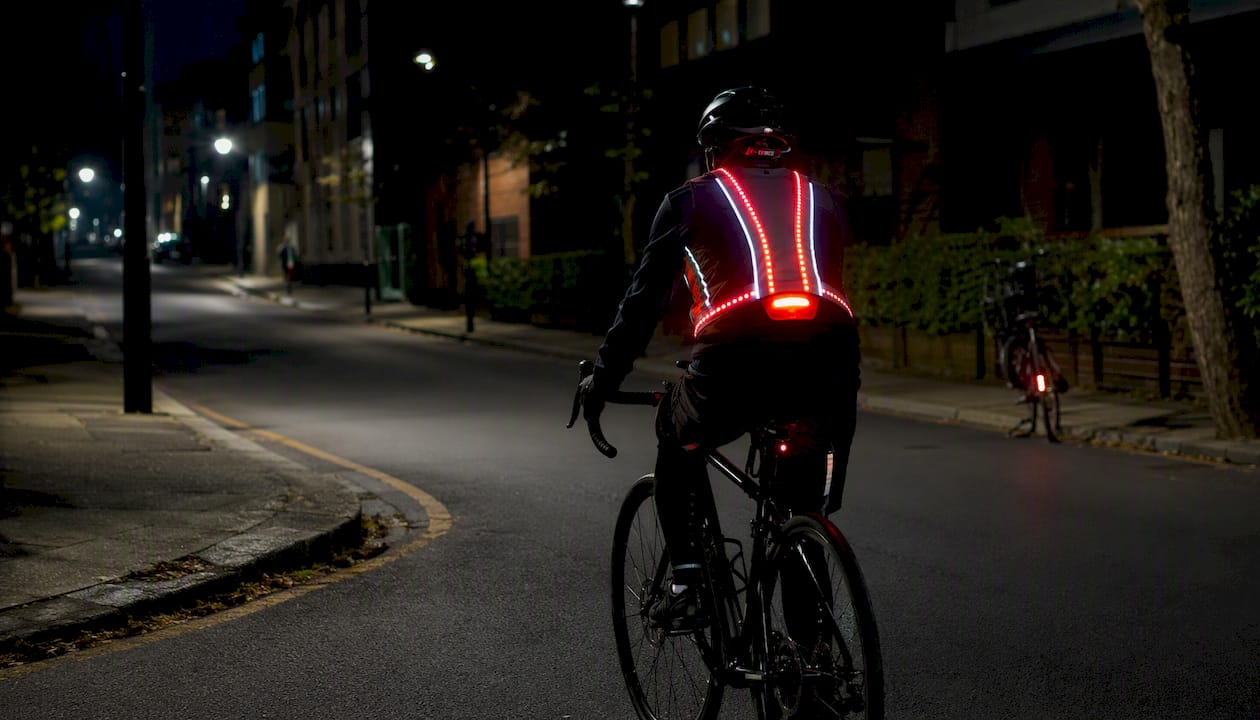
Illuminated and LED gear (LED vests, light-up belts, clip-on lights) generates its own light. Active visibility is independent of external light sources, which matters on unlit rural roads.
Spoke and wheel lights add side visibility and biomotion cues as the wheel spins. They are inexpensive and highly visible from cross-traffic angles.
Helmet covers and head-mounted reflectors place visibility at eye level, the zone drivers scan first. Helmet-level detection is especially valuable in urban traffic.
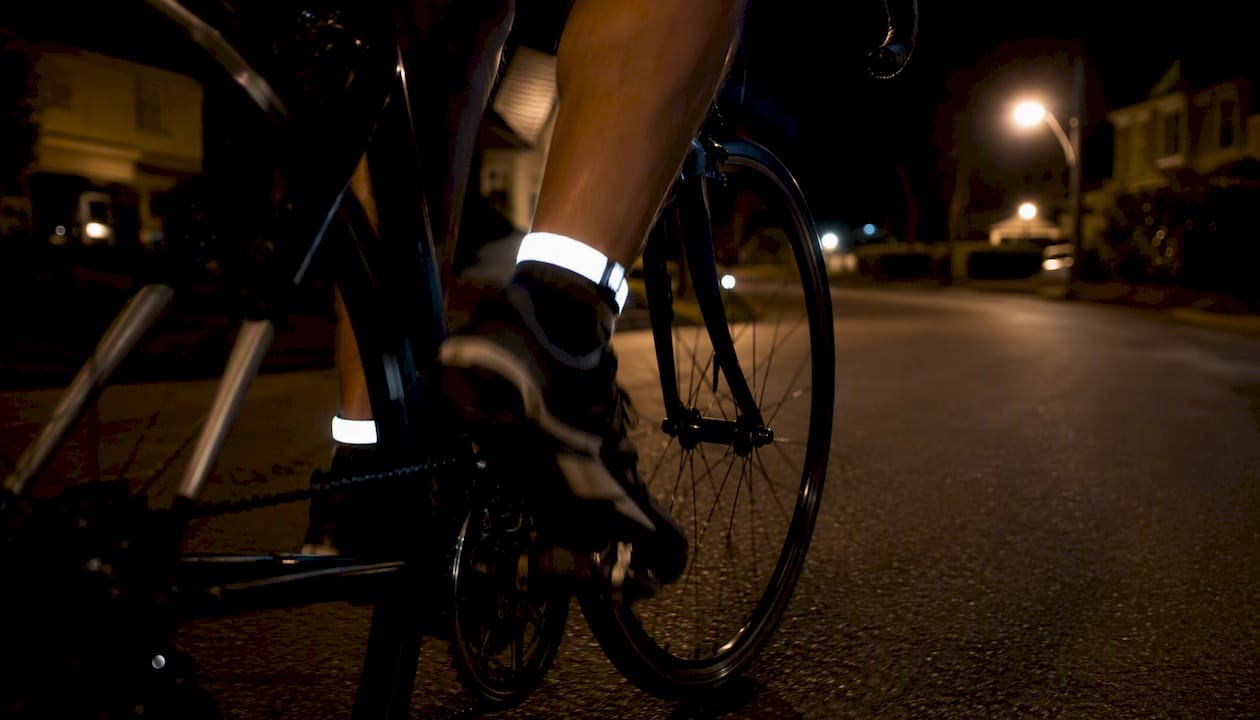
Ankle and arm bands are the most underrated item in this list. They move with your pedal stroke, creating the biological motion pattern (biomotion) that helps drivers recognize a human shape rather than a static object.
Reflective stickers and tape are the lowest-cost option. Applied to a frame, panniers, or helmet, they add passive retroreflection anywhere you need it.
Packable hi-vis vests are a common commuter choice precisely because they fold into a jersey pocket and go on in seconds. Treat them as a base layer, though, not a complete system. A vest alone leaves your legs, arms, and sides unaddressed.
How do fluorescent, retroreflective, and illuminated gear actually work?
The physics behind each type determines when to use it, and getting this wrong is the most common mistake cyclists make.
Fluorescent materials absorb UV and short-wave light and re-emit it as visible color, which is why neon yellow looks almost electric in overcast daylight. That effect disappears in darkness. Experts consistently recommend fluorescent colors for daytime and dawn/dusk, and retroreflective materials for night, with layering as the standard approach for riders who go out in multiple conditions.
Retroreflective fabrics use glass beads or microprismatic structures to return light directly back to its source. A driver’s headlights hit the material and bounce straight back to the driver’s eyes, not off to the side. The detection range for quality retroreflective fabric is significantly farther than for a cyclist with no reflectives, increasing visibility by several times under normal headlight conditions. Fully retroreflective jackets, where the entire outer shell reflects, perform better than jackets with only accent stripes because they return light from more angles and body positions.
Active lights operate independently of any external source. A quality rear light with wide-angle output can be visible up to roughly 1 mile under ideal conditions, which is well beyond what even the best retroreflective fabric can achieve. The tradeoff is battery management and the need to charge or replace cells.
Pro Tip: On unlit rural roads at night, prioritize active lights over passive reflectives. On a lit urban commute, a retroreflective jacket plus a rear light is often enough. The environment determines the right balance.
One critical limitation: reflective gear is passive. If no light source hits it, it returns nothing. A cyclist wearing a fully retroreflective jacket on a road with no oncoming traffic is effectively invisible. Active lights solve this, which is why the layered approach is not optional for night riding.
Where you place reflectivity matters as much as how much you wear
Placement is where most cyclists leave real visibility gains on the table. Covering your torso is a start, but it is not where the biggest detection improvements come from.
The highest-impact placement locations, ranked by effect:
- Ankles and calves: Moving with every pedal stroke, these create the biomotion pattern drivers recognize as human
- Pedals and shoes: Same biomotion benefit, at the lowest point of the bike where side-approach drivers see first
- Helmet / head: The zone drivers’ eyes naturally track; head-level light or reflection gets noticed faster in urban traffic
- Torso (front and back): Large surface area, good for overall brightness, but static
- Wrists and forearms: Visible during hand signals and turns, adds limb coverage
- Panniers and rucksack straps: Rear-facing reflectives that cover the sides of the bike
- Spokes and wheel rims: Side visibility for cross-traffic and intersections
The science behind biomotion is straightforward. Research and buyer testing consistently show that moving reflectors on ankles and feet outperform static torso-only reflectivity for early driver detection. A static bright object reads as a road sign or marker. A moving point of light at ankle height reads as a person on a bike. That recognition happens faster, which translates directly to more reaction time for the driver.
Biomotion placement on moving limbs, particularly ankles and pedals, is statistically superior to static torso reflectors for rapid human recognition by drivers. Coverage and placement matter more than brand or price when it comes to actual detection outcomes.
A vest is genuinely useful, but treat it as the base of a multi-part system, not the whole answer. Add ankle bands and you have addressed the single biggest gap most vests leave open.
Pro Tip: If you can only add one item to an existing vest setup, make it ankle reflectors. They cost under $15, weigh almost nothing, and address the biomotion gap that a torso-only vest cannot.
What features actually matter when you’re buying reflective gear?
Marketing language around reflective gear is thick with vague claims. Here is what to actually check before buying.
Reflective material quality: Look for 3M Scotchlite or equivalent glass-bead/microprismatic fabric. Generic “reflective” labeling without a named standard can mean anything from a thin strip of tape to a fully engineered retroreflective surface.
Fluorescent color coverage: For daytime use, the more surface area in neon yellow, orange, or lime green, the better. A small fluorescent panel on a dark jacket is not high-vis clothing.
Waterproof rating: For commuters and wet-weather riders, a high waterproof and breathability rating is important to stay dry and comfortable in sustained rain. Some budget gear offers moderate protection suitable for lighter showers.
Breathability: A waterproof shell that traps heat is a problem on any ride over 30 minutes. Look for a breathability rating alongside the waterproof spec.
Fit and adjustability: Reflective gear that bunches or shifts while riding reduces the effective reflective surface. Side adjusters and elastic hems keep panels flat and visible.
360° coverage: Check whether the garment addresses front, back, and sides. Many budget vests are retroreflective only at the back.
Power source and battery life for illuminated gear: Rechargeable USB-C is now the standard worth insisting on. Check rated battery life at the brightness level you will actually use, not the maximum setting.
Packability: A vest or gilet you will actually carry beats a jacket left at home. Low-cost accessories like ankle bands, reflective strips, and LED belts add effective 360° coverage when combined with clothing and lights, and most pack flat.
For standards, ANSI Class 2 is the recommended minimum for commuter garments in the U.S., and EN17353 is the relevant European cycling-specific standard. Neither is legally required for recreational cycling, but both give you a verified baseline.
Pro Tip: Check the reflective material spec, not just the label. “Reflective detailing” on a product page can mean a 1-inch strip on the hem. “3M Scotchlite” or a named glass-bead standard means something you can verify.
Ready-to-use kits for your most common rides
Urban commute (day, dawn, or dusk)
- Fluorescent gilet or shell over your regular kit
- THE BEAM FRAME FLASH on the frame or helmet
- Rear light at 50+ lumens, flashing
- Ankle reflective bands on both legs
- Front light at 200+ lumens if riding before full daylight
Night ride (road or gravel)
- Fully or heavily retroreflective jacket as the outer layer
- Front light: 200–1,500 lumens depending on road lighting (higher for unlit roads)
- Rear light: 150+ lumens, wide-angle beam
- Ankle and pedal reflectors for biomotion
- Spoke lights or wheel reflectors for side visibility at intersections
- Helmet-mounted reflector or light for head-level detection
Cold-weather and wet commutes
- Waterproof reflective shell rated at 10k/10k or better
- Breathable mid-layer underneath to manage heat
- Rechargeable rear light with at least 6 hours of runtime at your working brightness
- Dynamo lighting is worth considering for multi-hour winter rides where charging is impractical
Group rides
Use a steady rear light rather than a flashing one when riding in a tight group. Flashing lights can disorient riders directly behind you. Pair a retroreflective vest with a helmet-mounted reflector so drivers approaching from behind see both torso-level and head-level cues simultaneously. Coverage and placement consistently outperform brand in real-world detection tests, so prioritize 360° coverage across your group rather than matching kit.
For a complete night-ride equipment checklist and urban-specific guidance, thebeamofficial blog covers both in detail.
How to care for reflective gear so it stays effective
Reflective performance degrades with washing, UV exposure, and abrasion. Most riders do not notice until the gear has already lost a significant portion of its retroreflective return.
Washing:
- Use a gentle machine cycle (30°C / 86°F) or hand wash
- Avoid fabric softener — it coats glass-bead surfaces and reduces reflectivity
- Turn reflective garments inside out to protect the outer surface
- Air dry flat; tumble drying at high heat degrades both waterproof coatings and reflective layers
Storage:
- Store flat or loosely rolled, away from direct sunlight
- UV exposure over time fades fluorescent colors, reducing daytime visibility
- Keep reflective tape and sticker-based products away from heat sources
When to replace:
| Product type | Replacement signal | Suggested timeline |
|---|---|---|
| Reflective vest / gilet | Visible cracking or peeling of reflective tape | 2–3 years with regular use |
| Fully reflective jacket | Loss of sheen, significant abrasion on reflective panels | 3–5 years |
| Ankle / arm bands | Reflective surface dulled or flaking | 1–2 years |
| Reflective stickers / tape | Peeling edges, loss of mirror-like surface | 1 season |
| LED / illuminated vest | Battery no longer holds charge; LEDs dim significantly | Per manufacturer spec |
For illuminated gear, charge batteries before storage and avoid storing at full charge for extended periods if the manufacturer recommends partial charge for lithium cells. Dispose of worn lithium batteries at a certified e-waste or battery recycling drop-off, not in household trash. Most major US retailers (Best Buy, Home Depot) accept small lithium batteries for recycling.
How we selected and vetted these recommendations
The recommendations in this article are built on four selection signals, applied consistently across every gear type covered.
- Visibility performance: retroreflective material quality (named standards like 3M Scotchlite), fluorescent color coverage, and detection-range data from published testing
- Certified materials and standards: ANSI Class 2 compliance for commuter garments, EN17353 for cycling-specific high-vis wear, and manufacturer-stated waterproof/breathability specs
- Battery life and charging: for illuminated gear, real-world runtime at working brightness, not peak-output specs
- Fit, packability, and durability: how well the gear stays in place during a ride, how it packs for commuters, and how it holds up over multiple seasons
Expert input came from published cycling safety guides, visibility research referenced in road safety literature, and buyer testing across jackets, vests, and accessories that prioritized visibility, fit, durability, and value over brand recognition. The biomotion placement guidance draws on research showing moving limb reflectors outperform static torso coverage for driver recognition.
Pro Tip: When evaluating any reflective product, take it outside at night with a flashlight. Shine the light from 30 feet away. If the return is dim or patchy, the material is not performing at a level that will help a driver at 60 mph.
For a step-by-step visibility checklist that applies these criteria to your own kit, Thebeamofficial’s guide walks through each layer in sequence.
The visibility gap most cyclists still underestimate
There is a version of this conversation that focuses entirely on gear, and it misses the most important variable: where the reflectivity is placed and whether it moves.
Most cyclists who invest in visibility buy a vest and call it done. That vest is genuinely useful. But a static bright object on a torso reads differently to a driver’s brain than a moving point of light at ankle height. The biomotion research is consistent on this point, and it changes how you should prioritize your spending. A $12 pair of ankle reflectors added to an existing vest setup does more for early driver recognition than upgrading to a more expensive vest with slightly more reflective surface area.
The second thing most riders underestimate is the difference between being seen and being recognized as a cyclist. Retroreflective tape on a pannier tells a driver there is something on the road. Ankle reflectors moving in a pedal cadence tell a driver there is a person on a bike. That distinction affects how quickly drivers adjust their speed and position, which is the outcome that actually matters.
THE BEAM gear that fits directly into these kits
Two Thebeamofficial products slot into the layered system described above without adding bulk or complexity.
The FRAME FLASH bike reflectors are minimalist retroreflective units designed to mount on your frame or helmet. In the commute kit, they handle passive 360° coverage without requiring a battery or charging routine. Mount one on the frame and one at helmet level, and you have addressed both torso-height and head-level retroreflection in a single product family.

The THE BEAM VIRGO helmet is built for compatibility with Thebeamofficial’s helmet add-ons, including reflective accessories that bring retroreflection to head level, the zone drivers scan first in urban traffic. Paired with the FRAME FLASH, the VIRGO gives you a helmet-to-frame reflective system that works passively every ride.
Both products are available through the Thebeamofficial helmets collection and the accessories store. If you are building a night-ride or commuter kit from scratch, start with the FRAME FLASH and layer active lights and ankle reflectors around it.
Sources
The sources below were used to build the recommendations in this article. Each covers a specific aspect of cycling visibility in more depth.
- Best reflective running gear (Verywell Fit)
- The best reflective vests (Bicycling)
- Road
- Best visibility gear for night riding 2026 (GreenMoov)
- Reflective gear for running in the dark (TreeLine Review)
- Hi-Viz motorcycle gear (Cycle Gear)
For standards references: ANSI/ISEA 107 covers high-visibility safety apparel in the U.S. (Class 2 is the commuter-relevant tier); EN17353 is the European standard for cycling-specific high-visibility clothing. Neither is legally required for recreational cycling in the U.S., but both provide verified baselines for material performance.


