

Before you roll away, run this once: lights on, tires firm, brakes bite, helmet fastened. That four-point check covers the legal minimums under France’s Code de la route and takes under 30 seconds. Per Service Public, every bicycle ridden on public roads in France must carry a front white or yellow light, a rear red non-flashing light, front and rear reflectors, side orange reflectors (or reflective tires), pedal reflectors, a bell audible at a significant distance, and two working brakes. Helmets are mandatory for riders under 12; High-visibility vests must be worn outside built-up areas at night or when visibility is poor.
Legal note: Decree n°2024-1074 (November 2024) now permits optional non-flashing extra lights, non-flashing stop lights, and orange flashing turn signals on bikes and helmets. The primary rear flashing lamp remains prohibited.
Key Takeaways
France’s mandatory bicycle equipment, combined with the ABC mechanical check and a 30-second pre-ride routine, covers the vast majority of legal and safety risks for urban commuters.
| Point | Details |
|---|---|
| Legal minimums are non-negotiable | Front white/yellow light, rear red non-flashing light, reflectors, bell, and two brakes are required by French law. |
| 30-second routine builds habit | Lights, tires, brakes, helmet, bag, essentials: run this before every departure. |
| Decree n°2024-1074 expands options | Optional stop lights, extra lights, and flashing turn signals are now permitted; primary rear flashing lamp remains prohibited. |
| E-bike riders add battery checks | Confirm battery is seated, display shows no errors, and assist engages before joining traffic. |
| Thebeamofficial closes two key gaps | FRAME FLASH reflectors and the VIRGO helmet address side visibility and head protection directly. |
Table of Contents
- What does a solid 30-second pre-ride routine look like?
- What equipment does French law actually require?
- How do you perform the ABC mechanical check?
- Where should you place lights and reflectors for maximum visibility?
- What should you carry for urban repairs and emergencies?
- How do behavioral choices affect your safety on urban rides?
- E-bike quick checks to add to your routine
- When should checks escalate to actual maintenance?
- Your printable 30-second checklist
- Why we built this checklist
- Close the checklist gaps with Thebeamofficial gear
- Sources
What does a solid 30-second pre-ride routine look like?
Stand beside your bike, not on it. That one habit keeps you from rolling forward before you’ve finished checking.
- Lights: Switch both front and rear lights on. Confirm the rear is steady, not flashing.
- Tires: Squeeze each tire firmly. Road bikes need resistance; city tires should feel hard, not spongy.
- Brakes: Pull each lever independently. The wheel should stop before the lever reaches the bar.
- Helmet: Clip the buckle, tug the chin strap. Two fingers should fit snugly under it.
- Bag balance: Shift your bag or panniers. Nothing should swing into the wheel or obstruct the rear light.
- Essentials: Phone charged? Keys? Lock? Confirm before you leave the building.
Pro Tip: Keep removable lights in one fixed spot, like a hook by the door, so you never leave without them. The most common reason riders skip lights is forgetting to reattach them after charging.
What equipment does French law actually require?
Legal minimums (Code de la route, R.313-1)
France’s mandatory equipment rules are specific. Missing any one item is a fineable offense:
- Front white or yellow light (fixed, not flashing as primary)
- Rear red light, non-flashing
- Front and rear white/red reflectors
- Side orange reflectors on wheels, or reflective tires
- Pedal reflectors (orange)
- Bell audible at 50 meters minimum
- Two independent working brakes
Children under 12 must wear a helmet. Adults riding outside built-up areas at night or in poor visibility must wear high-visibility vests.
Recommended kit beyond the legal floor
Legal compliance keeps you out of trouble. This list keeps you out of the hospital:
- Helmet: Mandatory for under-12s, strongly recommended for everyone. The VIRGO full-face helmet from Thebeamofficial integrates MIPS technology for rotational impact protection, a real upgrade over basic foam lids.
- Fixed permanent lights: Rechargeable lights mounted to the frame beat clip-ons that vibrate loose.
- FRAME FLASH reflectors: Thebeamofficial’s FRAME FLASH reflectors mount directly to the frame and satisfy the side-reflector requirement while staying visible from wide angles.
- Rearview mirror: Handlebar or glasses-mounted; reduces the need to turn your head in traffic.
- Lock: A sold-secure rated U-lock or folding lock.
- Mini repair kit: Tube, levers, mini pump. Covered in detail below.
- High-vis layer: A vest or jacket with retroreflective strips, especially for dawn and dusk commutes.
Worth knowing: The 2024 decree also allows reflective tires as a substitute for side reflectors. If your tires have a reflective sidewall strip, they count.
Pro Tip: Buy lights with a USB-C port. Proprietary charging cables are the fastest way to end up riding dark because you grabbed the wrong cable.
How do you perform the ABC mechanical check?
Bicycling recommends the ABC check as the minimum mechanical inspection before every commute. It takes under 60 seconds and catches the issues that cause most urban failures.
Air
Squeeze both tires. A road tire should resist hard; a city or hybrid tire should feel firm with minimal give. If a tire feels soft or you hear a slow hiss, pump it before riding. Riding on underinflated tires increases puncture risk and makes braking less predictable.
Brakes
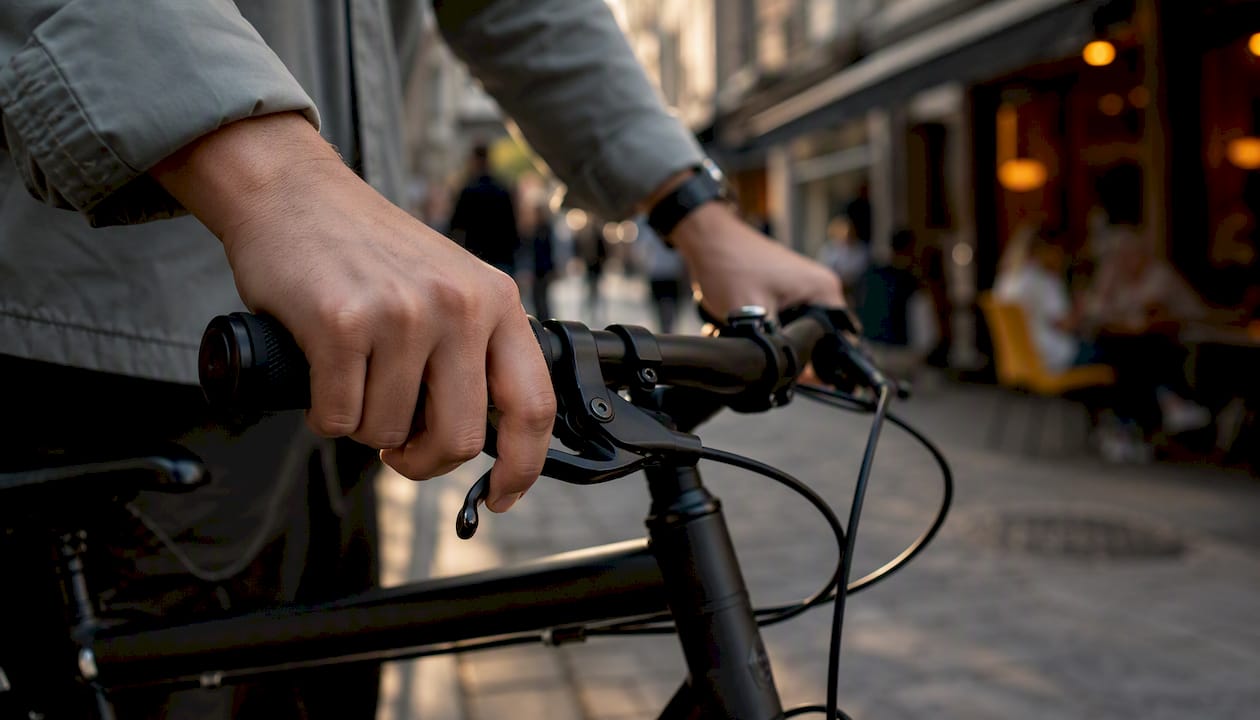
Pull the front lever, then the rear. Each wheel should lock before the lever bottoms out. Listen for squealing or grinding. Squealing often means contaminated pads; grinding means metal-on-metal contact and the bike should not be ridden until pads are replaced.
Chain and drivetrain
Spin the pedals backward and watch the chain move. It should run smoothly without jumping or skipping. A stretched or dry chain makes a clicking sound under load. A quick visual check for rust or stiff links takes five seconds.
Stop riding immediately if you hear repeated clicking under pedaling load, if a brake lever pulls to the bar, or if the chain skips under power. These are not “ride and see” situations.
E-bike additions
- Confirm the battery is fully seated and the locking mechanism is engaged.
- Power on the display. No error codes should appear.
- Take a short powered roll before joining traffic. Confirm the assist engages smoothly.
- Test the mechanical brakes without assist: the bike should stop cleanly on brakes alone.
Pro Tip: A short powered roll in your building’s courtyard or driveway is the fastest way to catch a sensor fault before it strands you mid-commute. For more e-bike-specific checks, see Thebeamofficial’s e-bike safety guide.
E-bike note: If the display shows an error code or the assist feels jerky or absent, do not ride. Electrical faults that appear intermittently tend to worsen under load.
Where should you place lights and reflectors for maximum visibility?
Placement matters as much as having the equipment. A rear light buried under a saddlebag is legally present but practically useless.
- Front light: Mounted on the handlebar or fork, aimed slightly downward. Pointing it straight ahead blinds oncoming riders.
- Rear light: Seat post or seat stay, unobstructed by bags or jackets. Check clearance every time you add luggage.
- Side reflectors: Wheel-mounted or reflective tire sidewalls. FRAME FLASH reflectors on the frame add a wide-angle visibility layer that wheel reflectors alone don’t cover.
- Pedal reflectors: Required by law; replace them if cracked or missing.
- Helmet-mounted lights: Permitted under Decree n°2024-1074 as supplemental lighting. A rear helmet light sits at eye level for drivers, which is more effective than a seat-post light in slow urban traffic.
Visibility quick fixes: Angle reflector strips on your fork legs outward by 15 degrees to catch headlights from side streets. Add a spare rear light to your keychain for the days you forget to charge the main one.
Under Code de la route R.313-1, the primary rear lamp must be steady red. The 2024 decree adds optional flashing turn signals and non-flashing stop lights, but does not change the primary lamp rule.
Pro Tip: Mount your rear light at hip height or above whenever possible. Drivers see it sooner, and it stays visible when you’re in a line of traffic.
What should you carry for urban repairs and emergencies?
A commuter kit should fit in a jersey pocket or small saddlebag. Prioritize by failure frequency:
Short commute (under 5 km):
- Spare inner tube (correct size)
- Two tire levers
- Mini pump or CO2 inflator
- Small plaster or bandage
Longer commute (5 km or more), add:
- Patch kit (backup to the spare tube)
- Multi-tool with hex keys and a chain tool
- Quick-link for your chain size
- Power bank for phone and lights
Pro Tip: Pack the tube and levers in a small ziplock bag. It keeps them dry and means you’re not fishing through loose tools at the roadside in the rain.
How do behavioral choices affect your safety on urban rides?
Mechanical readiness gets you out the door. Behavioral readiness keeps you safe once you’re moving.
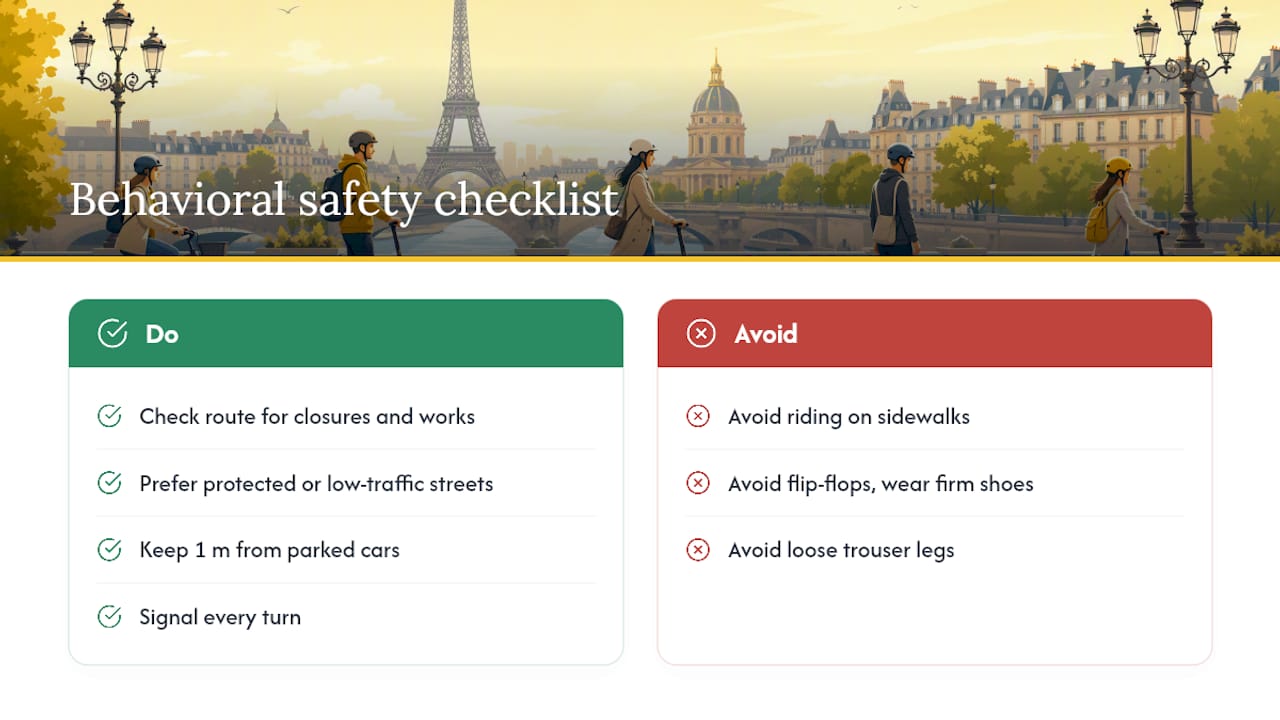
Before leaving, check your route for construction or road closures. Apps like Google Maps cycling mode or Waze flag active works. Choose streets with protected lanes or lower traffic speeds when the time difference is under five minutes.
On the bike, Paris city guidance is clear: stay on the road, not the sidewalk, signal every turn, and position yourself where drivers can see you. The door zone, the meter of space beside parked cars, is where most urban cycling injuries happen. Ride at least one meter from parked cars, even when that means taking more of the lane.
Clothing choices matter more than most riders admit. Loose trouser legs can catch a chainring; flip-flops reduce pedaling control. Fitted trousers or a trouser clip, closed shoes with a firm sole, and a high-vis layer outside built-up areas at night are the practical minimum. Mental preparation also plays a role: riders who use structured pre-ride mental routines report feeling more alert and less reactive in traffic.
Pro Tip: Before pulling into traffic, run a quick look-left, look-right, look-left again. It sounds obvious until the day it catches a cyclist running a red light on the wrong side of the road.
E-bike quick checks to add to your routine
- Battery seated and locking tab engaged.
- Display powered on, no error codes visible.
- Estimated range shown covers your trip plus a return-trip reserve.
- Short powered roll confirms assist is active.
- Mechanical brakes tested without assist.
Battery range is the most underestimated variable. A battery that shows 60% in the morning can read 20% by evening, especially in cold weather or after a hilly return. Always account for the return trip before you leave.
When should checks escalate to actual maintenance?
| Item | Check frequency | Replace or service when |
|---|---|---|
| Helmet | After any impact | Replace immediately after a crash; replace every 3–5 years regardless |
| Brake pads | Monthly | Grooves worn flat, or squealing/grinding on clean rims |
| Tires | Weekly visual | Cuts, bulges, or tread worn to wear indicators |
| Chain | Monthly | Makes a clicking sound under load or skips under power |
| Lights/batteries | Before every ride | Dim output, or battery not holding charge through a full commute |
Store batteries at room temperature when possible. Cold degrades lithium cells faster than riding does. A light left in a bag over winter often needs a full charge cycle before it performs reliably again.
Pro Tip: Set a monthly phone reminder labeled “bike check.” It takes ten minutes and catches brake wear before it becomes brake failure.
Your printable 30-second checklist
Save this to your phone’s home screen or print it and tape it near your bike.
30-second pre-ride routine:
- Lights on (front steady, rear steady red)
- Tires firm (squeeze test)
- Brakes bite (pull each lever independently)
- Helmet clipped and snug
- Bag balanced, rear light unobstructed
- Phone, keys, lock confirmed
Full packed-bag checklist:
- Spare tube and levers
- Mini pump or CO2
- Multi-tool
- Power bank
- High-vis layer
- Lock
- ID and emergency contact info
For a mobile-friendly version of these steps, Thebeamofficial’s 7-step urban cycling checklist is formatted for quick reference on a phone screen.
Pin it, print it, or save it as a screenshot. A checklist you actually use beats a detailed guide you read once and forget.
Why we built this checklist
Urban commuting in France sits at a specific intersection of legal obligation and practical risk. The Code de la route sets a clear floor; the 2024 decree raised the ceiling on what you can add. But most riders I talk to are somewhere in the middle: they have lights, they sometimes wear a helmet, and they’ve never thought about pedal reflectors.
Thebeamofficial designs and tests products in real urban conditions, which means we see where the gaps actually are. The VIRGO helmet came from a recognition that most urban helmets compromise either protection or wearability. The FRAME FLASH reflectors came from watching riders with legally compliant wheel reflectors still get missed at intersections because the reflectors only catch light from directly ahead.
This checklist reflects those lessons. It’s not a theoretical framework; it’s what we’d tell a friend before their first commute.
— Sophie
Close the checklist gaps with Thebeamofficial gear
Two items on this checklist are harder to improvise than the rest: head protection and side visibility. The FRAME FLASH bike reflectors mount directly to your frame and cover the wide-angle visibility that wheel reflectors miss, satisfying the side-reflector requirement with a cleaner, more durable solution. The VIRGO full-face helmet with MIPS technology addresses the protection gap that open-face commuter helmets leave.

Both products ship across Europe. Browse the full range at Thebeamofficial and check the FRAME FLASH product page to confirm compatibility with your frame before your next ride.
Sources
- Mandatory bicycle equipment | Service Public
- Pour meilleure visibilité des cyclistes et des trottinettistes
- Équipements obligatoires vélo — Sécurité routière
- Comment rouler à vélo en toute sécurité - Ville de Paris
- A Stress-Free Commute Begins With Performing This Simple Safety Check


