
Every parent faces the challenge of balancing fun and safety when cycling as a family through busy urban streets in France or Germany. With children at different ages and skill levels, choosing the right protection and gear can be tricky, especially where traffic and visibility risks are high. This guide helps you spot where cycling needs differ by age and environment and shows how to build a safer routine that keeps your family comfortable and visible.
Table of Contents
- Step 1: Assess Your Family’s Cycling Needs
- Step 2: Select Appropriate Safety Gear For Each Member
- Step 3: Adjust Bikes And Accessories For Maximum Safety
- Step 4: Practice Riding Together In Safe Environments
- Step 5: Verify Visibility And Review Safety Procedures
Quick Summary
| Key Takeaway | Explanation |
|---|---|
| 1. Assess your family’s cycling needs | Evaluate each family member’s skills, comfort levels, and cycling contexts to tailor safety. |
| 2. Choose appropriate safety gear | Select helmets and visibility gear specific to age, size, and riding conditions for all. |
| 3. Adjust bikes for better control | Ensure proper seat height, handlebar positioning, and maintenance for every cyclist. |
| 4. Practice riding in safe areas | Build skills and confidence in low-traffic locations before venturing into busier environments. |
| 5. Verify visibility and safety rules | Regularly check lighting and reflectors, and review safety procedures to prevent accidents. |
Step 1: Assess your family’s cycling needs
This section helps you understand what each family member needs for safe, enjoyable cycling. Whether your children are 4 or 14, your parents join occasionally, or you’re building your first family cycling routine, a proper assessment sets the foundation for everything that follows.
Your family won’t all have the same cycling needs—and that’s okay. A toddler on a balance bike faces completely different risks than a teenager on a road bike. Adults have different risk tolerances. Assessing these individual differences prevents dangerous mismatches between rider, bike, and environment.
Start by mapping out who cycles in your family and how often. Are your kids cycling to school daily? Do you take weekend trips to the park? Does your partner commute year-round? The frequency and context matter enormously because they determine exposure to traffic and environmental hazards.
Next, evaluate each person’s current skill level. Can your youngest steer smoothly? Does your older child know to check for traffic before turning? Are you confident cycling in busy urban streets? Understanding different abilities and comfort levels helps you choose appropriate routes and safety measures for everyone.
Consider the cycling environments you’ll encounter:
- Urban commuting with traffic lights and cars
- Quiet residential streets or parks
- Mixed terrain like gravel or forest paths
- Weather conditions (rain, snow, darkness)
Age and size also influence safety requirements. Bicyclist injury patterns vary significantly by age group, with young children and adolescents facing distinct risks. A 6-year-old needs different helmet sizing, visibility gear, and supervision than a 16-year-old.
Here’s how age-specific cycling needs and risks compare:
| Age Group | Unique Needs | Main Risks |
|---|---|---|
| Toddler (3-5) | Balance bike, close supervision | Poor visibility, low skill |
| Child (6-12) | Small helmet, visible gear | Unpredictable moves |
| Teen (13-17) | Proper fit, traffic instruction | Risk-taking, peer pressure |
| Adult | Comfort fit, commute equipment | Urban traffic, fatigue |
Document what you find. Write down each person’s age, cycling frequency, current skill level, and the main routes you’ll use. This becomes your reference for selecting the right helmets, visibility accessories, and protective gear in later steps.
Your assessment reveals where risks cluster in your family’s cycling habits—this is where you focus your safety efforts first.
Pro tip: Test your family’s actual cycling comfort by taking a short ride together on a quiet street; you’ll spot skill gaps and confidence issues that self-assessment alone can miss.
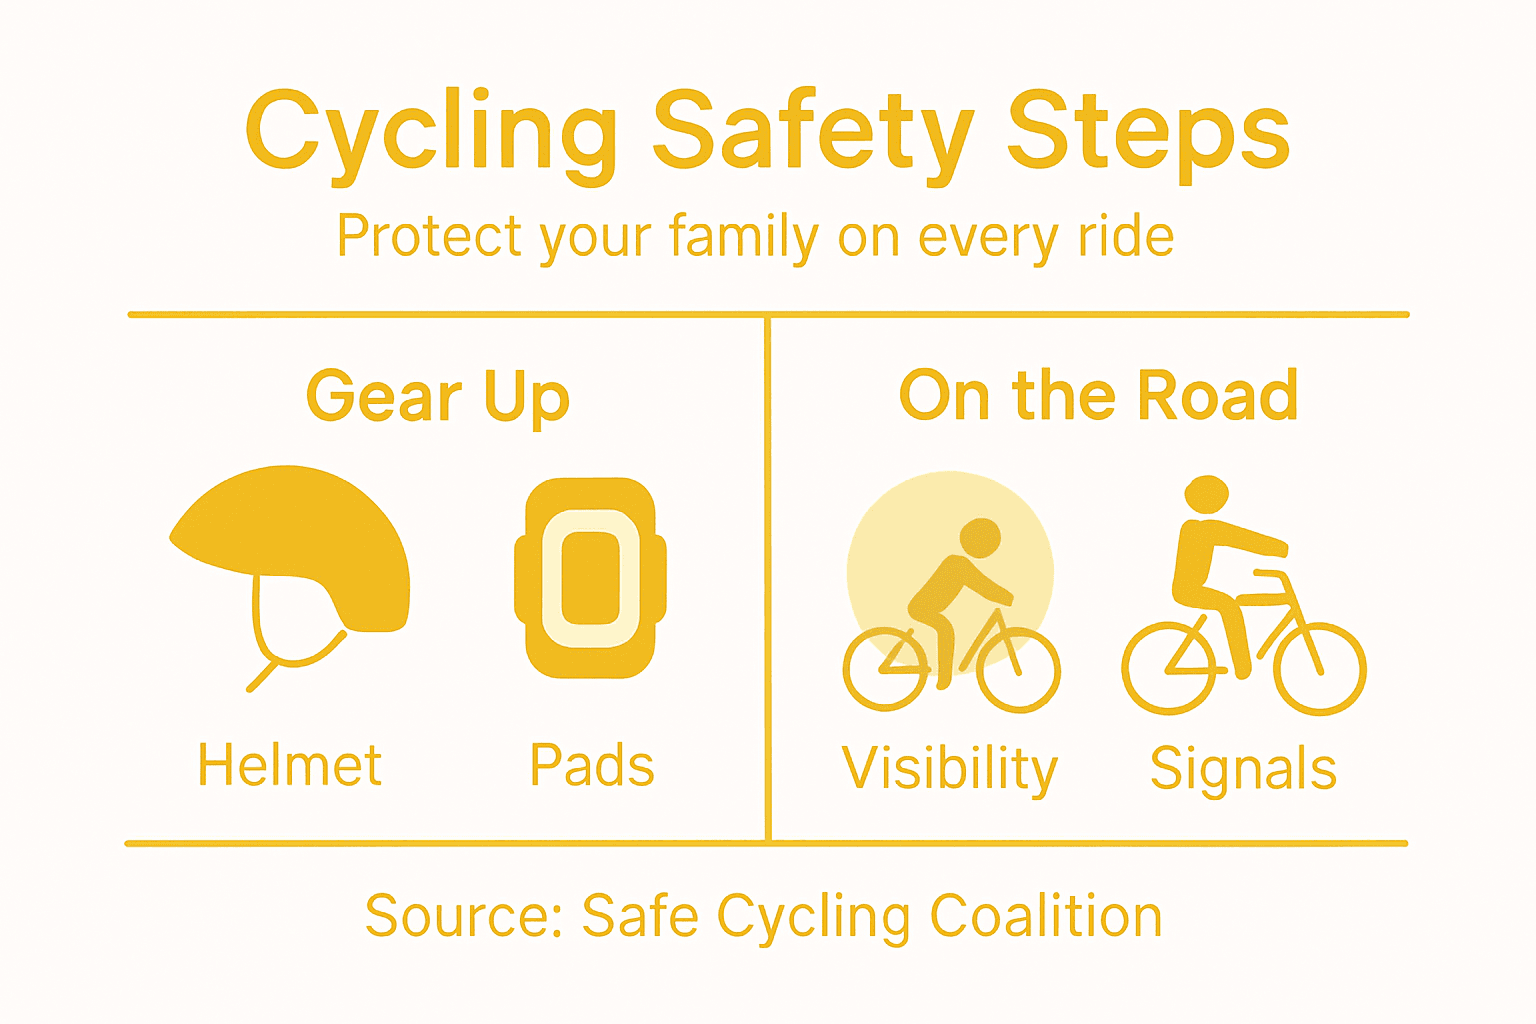
Step 2: Select appropriate safety gear for each member
Now that you understand your family’s cycling needs, it’s time to equip everyone properly. The right safety gear transforms risky situations into manageable ones, and it needs to fit each person’s age, size, and riding conditions.
Start with the foundation: helmets. A helmet is non-negotiable for every cyclist, regardless of age or experience. However, not all helmets work for everyone. Your 5-year-old needs a different size and design than your teenager, and both differ from adult requirements.
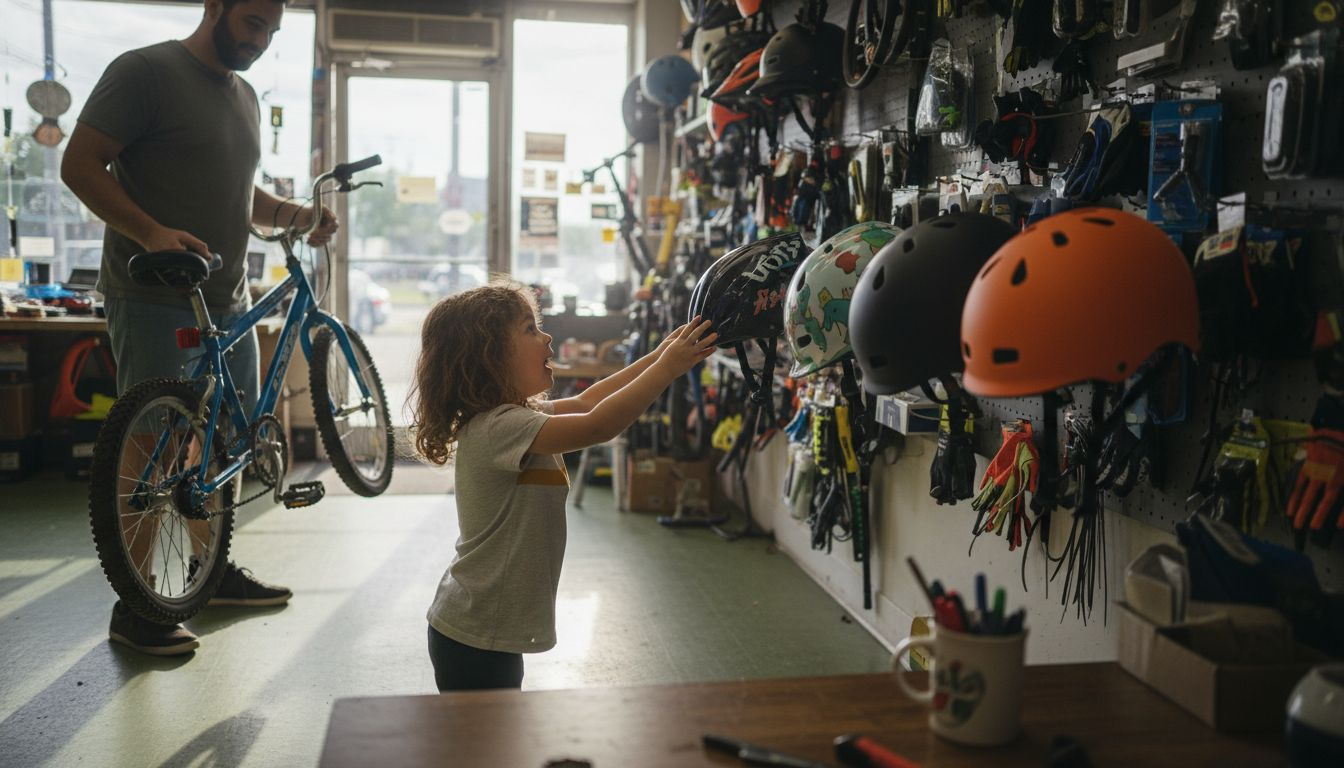
When selecting helmets, look for certification marks. Helmets meeting Consumer Product Safety Commission standards significantly reduce head injury risk and ensure you’re buying tested equipment. Check the fit carefully: the helmet should sit level on the head, not tilted back or forward, with the straps snug under the chin.
Beyond helmets, visibility gear prevents collisions in urban environments where you’ll encounter cars and pedestrians. Consider these essentials:
- Bright clothing in neon colors or high-visibility fabrics
- Reflectors on wheels, pedals, and frames
- Lights for morning commutes or evening rides
- Rear-view mirrors to monitor traffic behind you
For young children, visibility becomes even more critical because drivers have harder time spotting them. Reflective vests and ankle bands multiply visibility dramatically.
Protective gear like wrist guards, knee pads, and elbow pads matter most for younger riders still developing balance and coordination. Teenagers and adults riding confidently on familiar routes may skip these, but beginners benefit significantly.
Match your gear selections to actual riding conditions. Urban commuters need more visibility gear and mirrors than families cycling quiet park paths. Winter riders need weatherproof lights; summer riders focus on heat-reflective clothing.
See a comparison of key safety gear for different environments:
| Environment | Essential Gear | Why It Matters |
|---|---|---|
| Urban Roads | Bright lights, mirrors | High traffic, visibility |
| Parks/Trails | Reflectors, helmet | Shared paths, low speed falls |
| Mixed Terrain | Elbow/knee pads, sturdy bike | Gravel or uneven surfaces |
| Rain/Night | Waterproof jacket, hi-vis | Low light, drivers distracted |
Each family member’s safety depends on gear specifically suited to their age, size, and riding environment—generic solutions create gaps in protection.
Pro tip: Involve each family member in selecting their own gear so they feel ownership over safety and are more likely to wear everything consistently.
Step 3: Adjust bikes and accessories for maximum safety
Proper bike adjustments ensure comfort, control, and stability for every rider. A bike that fits well prevents accidents caused by poor handling, and accessories positioned correctly multiply their safety benefits.
Start with seat height. Your child’s feet should touch the ground when sitting on the saddle, with a slight bend in the knee when the pedal reaches its lowest point. This prevents leg strain and ensures they can stop quickly if needed.
Next, check handlebar position. Handlebars should be at roughly the same height as the seat, allowing riders to maintain an upright, stable posture. Too low makes control difficult; too high feels unstable. Adjust based on your child’s comfort and riding style.
Regular brake and tire inspections prevent mechanical failures that cause crashes. Test brakes by squeezing the levers firmly before every ride. Tires should have proper pressure (check the sidewall for recommended PSI) and no visible damage or excessive wear.
Accessory placement matters tremendously. Mirrors need clear sightlines to be useful, while lights must point downward and backward. Reflectors should sit on visible surfaces. Poorly positioned accessories look attached but offer no protection.
Run through these adjustments for each family member:
- Seat height matches leg length with slight knee bend at bottom of pedal stroke
- Handlebar position allows comfortable grip with upright posture
- Brake responsiveness stops the bike within a few feet
- Tire pressure matches manufacturer recommendations on sidewall
- Accessory visibility ensures mirrors, lights, and reflectors function properly
Make small adjustments and test them on quiet streets before urban riding. What feels awkward initially becomes natural once your child adapts. Watch how they handle turns, stops, and transitions between surfaces.
Proper adjustments transform bikes from generic machines into personalized safety systems matched to each rider’s size and ability.
Pro tip: Create a simple checklist card for each family member showing their specific seat height, handlebar position, and tire pressure, then check it monthly since kids grow and tires lose pressure over time.
Step 4: Practice riding together in safe environments
Skills learned in controlled settings transfer directly to real-world riding. Practicing together as a family builds confidence, teaches proper technique, and reveals gaps before you encounter traffic.
Start in the safest possible locations. Empty parking lots, quiet parks, or closed-off paths let everyone focus purely on bike handling without traffic distractions. Children need space to practice balance, braking, and turning without worrying about vehicles.
Begin with basic skills before progressing. Have riders practice stopping smoothly, turning at different speeds, and riding in straight lines. Watch for wobbling or loss of control. These early sessions reveal whether seat height or handlebar adjustments need tweaking.
Supervised practice in low-traffic areas builds confidence gradually while teaching hand signals, awareness, and safe behavior. Start with short rides of 10 to 15 minutes, then increase duration as comfort grows. Children should practice relevant skills at each location before moving to busier roads.
Progressively expose your family to more complex environments. Move from empty lots to quiet residential streets, then to busier commercial areas. Each step introduces new variables like pedestrians, parked cars, or traffic lights.
During practice sessions, focus on these core skills:
- Starting and stopping smoothly without wobbling
- Turning at various speeds while maintaining control
- Hand signals for left turns, right turns, and stops
- Looking over shoulders before changing direction
- Scanning ahead for obstacles and hazards
Ride directly in front of or alongside younger children so they can mirror your movements and see how you handle situations. Point out hazards like potholes, parked car doors, or pedestrians stepping into the street.
Practice specific scenarios your family will encounter regularly. If you commute on a particular route, practice that exact path during low-traffic hours first. If cycling to school, practice stopping at the school gate and navigating nearby intersections.
Gradual progression in safe environments transforms hesitant riders into confident cyclists ready for real-world conditions.
Pro tip: Schedule practice sessions at the same time and location weekly so family members develop muscle memory and anticipate familiar features, making transitions to new routes less intimidating.
Step 5: Verify visibility and review safety procedures
Visibility determines whether drivers and pedestrians notice your family while cycling. A well-lit, reflective cyclist is seen; a dark one blends into traffic. Before every ride, verify your visibility gear functions and refresh safety knowledge.
Start with lighting checks. Front lights illuminate your path and make you visible from ahead. Rear lights signal your presence to traffic behind. Test both before departing, ensuring batteries work and bulbs aren’t damaged.
Inspect reflective gear on each person. Reflectors on pedals, wheels, and frames work only when visible. Reflective vests, ankle bands, and spoke reflectors catch headlights from various angles. In urban German and French cities where evening commuting is common, reflectors multiply safety dramatically.
Verify bright clothing choices. Dark clothing blends into traffic; neon yellows, oranges, and whites stand out. Check weather too—rain reduces visibility further, so reflective jackets become essential.
Maintaining visibility through lights and reflective gear minimizes collision risk significantly. Position mirrors so each rider can see traffic behind them clearly. Adjust if needed before starting.
Now review safety procedures with your family. This isn’t a lecture but a conversation. Ask each person to explain rules in their own words:
- Hand signals for turns and stops
- Traffic light rules and intersection crossing
- Road positioning and lane awareness
- Hazard awareness like parked car doors or potholes
- Predictable riding without sudden movements
Consistent practice of riding predictably and signaling intentions reinforces habits until they become automatic. Ask children to demonstrate hand signals while riding. Watch for proper stopping positions at intersections.
Make this a regular ritual. Before every commute, spend 2 to 3 minutes reviewing that day’s conditions. Is it raining? Check lights extra carefully. Unfamiliar route? Review hand signals. Tired children? Plan a slower, quieter path.
Visibility and procedure reviews take minutes but prevent the accidents that take seconds.
Pro tip: Create a laminated card showing hand signals and safety rules that you keep in a backpack, then quiz family members casually during rides to reinforce knowledge without it feeling like studying.
Equip Your Family with the Best Cycling Safety Gear Today
Cycling safety for families means more than just knowing the rules. It starts with the right helmets, visibility accessories, and gear tailored to every age and ability. This article highlights challenges like fitting helmets correctly for kids, boosting visibility in urban traffic, and adjusting bikes for maximum safety. Address these pain points with THE BEAM’s specialized solutions designed with protection and real-world use in mind. Our Kids’ Helmets provide certified, comfortable protection that grows with your child. Complement your gear with our high-visibility Reflectors to stay seen in any environment.

Don’t wait for a close call to upgrade your family’s cycling safety. Visit THE BEAM Official Website now to explore innovative helmets and accessories trusted by cyclists across Europe and the United States. Take control of your family’s cycling confidence and protection starting today.
Frequently Asked Questions
How can I assess my family’s cycling needs?
To assess your family’s cycling needs, start by mapping out who cycles and how often each member does so. Document their current skill levels and the environments they’ll be riding in, so you can identify unique risks and requirements for each person.
What type of safety gear is necessary for each family member?
Each family member needs safety gear appropriate for their age and cycling conditions. Ensure that everyone has a properly fitting helmet, visibility gear like bright clothing and reflectors, as well as protective gear such as knee and elbow pads for younger riders.
How do I properly adjust bikes for maximum safety?
To adjust bikes for safety, ensure that the seat height allows each rider’s feet to touch the ground while seated and that handlebar height is comfortable for an upright posture. Regularly check brake responsiveness and tire pressure to prevent mechanical issues during rides.
What skills should we practice together as a family?
Practice fundamental skills such as stopping smoothly, turning at varying speeds, and using hand signals. Start in safe, low-traffic areas, gradually increasing complexity by introducing busier routes as everyone gains confidence.
How can I verify visibility before each cycling trip?
Before cycling, check if all visibility gear such as lights and reflectors are functioning properly. Ensure everyone wears bright clothing, especially under conditions like rain or low light, to maximize visibility and prevent accidents.
What safety procedures should we review before riding?
Regularly review key safety procedures like hand signals, traffic light rules, and road positioning with your family. Create a simple checklist of these procedures to reinforce safety habits and ensure everyone is prepared before each ride.


