
TL;DR:
- Regular helmet inspections are essential to ensure injury prevention during cycling; functional fit tests and visual checks can reveal hidden damage or degradation.
- Performing routine maintenance, such as cleaning and timely replacement after impacts or at five-year intervals, preserves helmet integrity and safety.
- Always verify proper fit and retention system functionality before every ride, as even minor oversights can compromise protection during an accident.
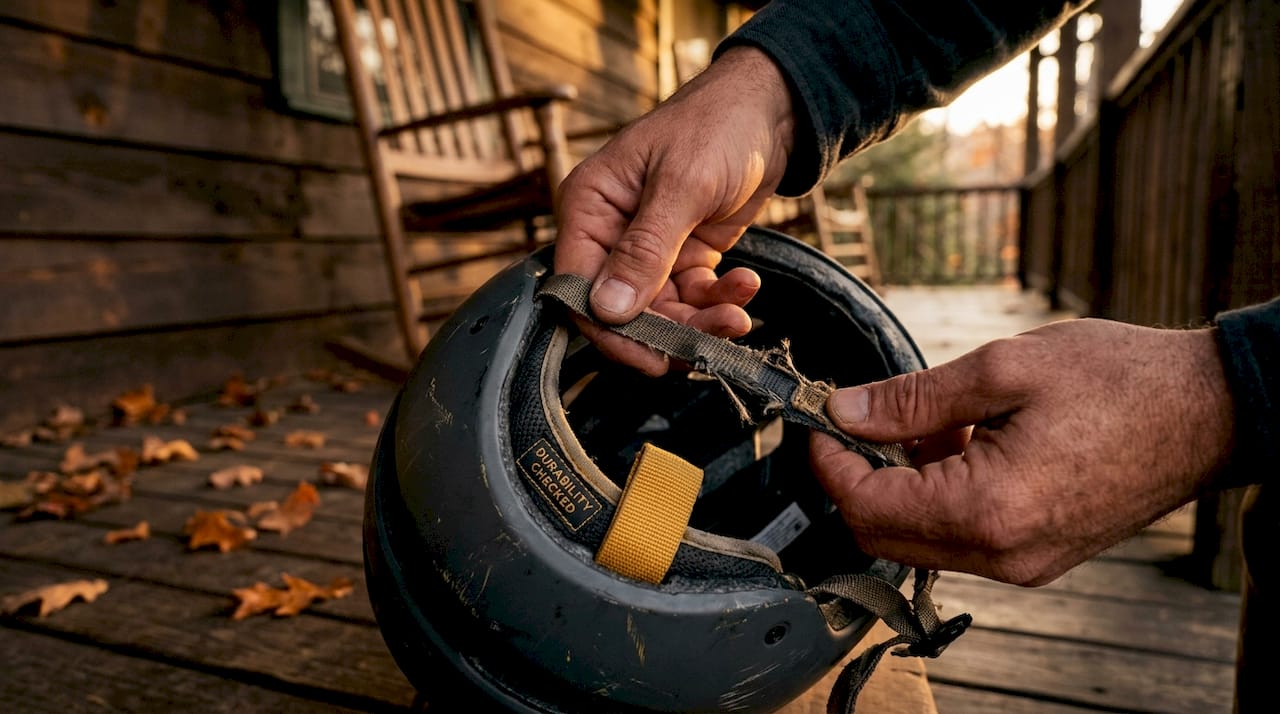
Plenty of cyclists wear their helmets every single ride without ever questioning whether that helmet is actually doing its job. A strap that’s slightly too loose, a crack hidden under a sticker, or foam that was quietly compressed by a low-speed tumble three months ago. Knowing how to perform helmet safety checks is the difference between wearing protection and thinking you’re wearing protection. This guide walks you through every step, from the tools you need before you start to the functional fit tests that most riders skip entirely.
Table of Contents
- Key Takeaways
- How to perform helmet safety checks: tools and prep
- Inspecting the shell and foam liner
- Fit and retention system checks
- Routine maintenance and when to replace
- Common mistakes during helmet safety checks
- My honest take on helmet checks
- Gear built to pass every check
- FAQ
Key Takeaways
| Point | Details |
|---|---|
| Check before every ride | A quick daily scan of shell, straps, and buckle takes under two minutes and catches obvious damage early. |
| Functional fit tests matter most | The palm test and shake test reveal whether your helmet will actually stay on during an impact. |
| Aging helmets are silently unsafe | Color fading or small cracks signal brittle plastic that can fail during a crash, even without visible structural damage. |
| Replace after any significant impact | EPS foam can absorb crush damage invisibly, meaning a helmet can look fine but offer no protection. |
| Maintenance extends helmet life | Cleaning with mild soap and water preserves materials and helps you spot wear patterns sooner. |
How to perform helmet safety checks: tools and prep
Before you touch the helmet, spend a minute on setup. Good preparation makes the difference between a thorough safety helmet assessment and a rushed look that misses the details that matter.
Here’s what you need:
- A clean, well-lit workspace (natural daylight is best for spotting discoloration)
- A mirror or second person to check strap positioning
- A soft cloth for wiping the shell clean before inspection
- A notepad or phone to record when the helmet was last inspected and its purchase date
Beyond physical tools, answer these questions before starting:
- Has the helmet taken any impact, even a slow fall or a drop from a bike?
- How old is the helmet? Most manufacturers recommend replacement after three to five years of regular use.
- Has it been stored in direct sunlight or in a hot car regularly?
The answers shape how closely you need to inspect. A helmet that’s been in two falls and is four years old needs far more scrutiny than one you bought last season and babied.
Helmet types and their inspection needs
Different helmet designs have different vulnerabilities. The table below shows what to prioritize by type.
| Helmet type | Key inspection focus |
|---|---|
| Road/aero helmet | Shell-to-foam bond, thin vent bridges for cracks |
| Gravel/all-road helmet | Strap wear from sweat and grit, retention dial function |
| Urban/commuter helmet | Buckle integrity from daily use, foam compression near edges |
| MIPS-equipped helmet | MIPS liner movement, strap routing around liner |
| Integral/full-face helmet | Chin bar attachment points, visor mounts, internal padding |
Inspecting the shell and foam liner
This is where most of the structural safety work happens. Start by wiping the outer shell clean. Dirt and grime can hide hairline cracks that would otherwise be obvious.
Work around the helmet methodically, section by section. Look for:
- Cracks or fractures, even hairline ones, especially around vent openings where material is thinnest
- Dents or flat spots on the outer shell, which often indicate crushed foam underneath
- Discoloration or fading, particularly a chalky or bleached appearance that signals UV-degraded, brittle plastic
- Delamination, where the outer shell is separating from the foam liner
Once the visual check is done, move to the tactile test. Press gently but firmly on different sections of the foam liner from the inside. Healthy EPS foam feels firm and springy. Compressed or damaged foam has what’s sometimes called a “beer can” effect. It yields slightly under pressure and doesn’t spring back the way it should. Pressing on the helmet can reveal this foam damage that no visual check will catch.
Pay particular attention to the area directly above the forehead and the sides near your temples. These are the zones most likely to absorb impact during a typical cycling fall.
For helmets with an in-molded construction, where the outer shell is fused directly to the EPS foam, cracks in the shell almost always mean the foam underneath is compromised too. These helmets need to be replaced, not repaired.
Pro Tip: Hold the helmet under a bright light at a low angle and rotate it slowly. This raking light technique makes surface cracks, dents, and texture changes visible that straight-on lighting completely misses.
Aging is a factor that many cyclists underestimate. Small cracks or color fading alone indicate plastic that has become brittle over time, even without any crash history. If your helmet looks noticeably faded compared to photos from when you bought it, that’s not just cosmetic. It’s a structural warning.
Fit and retention system checks
A helmet with a perfect shell means nothing if it comes off your head during an impact. A properly fitting helmet that stays stable during riding protects better than one with better safety ratings but poor fit. This section covers the steps for helmet safety checks that most riders never actually perform.
-
Check helmet position. Place the helmet on your head and look in a mirror. It should sit level, with the front edge two finger-widths above your eyebrows. If it tilts back or sits high, no strap adjustment will fix an underlying fit problem.
-
Check the Y-strap position. The straps on each side of the helmet should meet in a Y-shape just below each earlobe, not on it and not behind it. The Y-straps under each earlobe is one of the most commonly wrong elements on an otherwise well-fitted helmet.
-
Check chin strap snugness. Buckle the chin strap and open your mouth wide. You should feel the helmet pull down slightly against your head. If you can fit more than two fingers between strap and chin, it’s too loose.
-
Perform the palm test. Place your palm under the front of the helmet and push up and back firmly. The helmet should move no more than one inch. More than one inch of movement means the strap system is either too loose or improperly adjusted.
-
Perform the shake test. Shake your head side to side and front to back, firmly. The helmet should feel planted. If it shifts noticeably or the front drops toward your nose, the fit is off.
-
Inspect the buckle under tension. Fasten the chin strap, then tug it sharply. Buckle components can fail internally and still hold under casual use. A sharp tug test catches buckles that will fail when it counts.
-
Check the rear stabilizer. Turn the adjustment dial and confirm it moves smoothly. Then re-do the palm and shake tests. Adjustments to rear stabilizers must always be followed by new fit tests, because tightening the dial at the back can inadvertently change how straps sit and affect overall retention.
Pro Tip: If you adjust any one part of the retention system, always re-check all the other parts. Tightening the rear dial, for example, changes strap tension in ways that aren’t immediately obvious. The whole system works together.
Also inspect the straps themselves for fraying, kinks, or flattened sections where the webbing has been folded repeatedly. Worn strap webbing loses tensile strength and can tear during an impact. Check our step-by-step fitting guide for a deeper look at helmet positioning across different head shapes.
Routine maintenance and when to replace
Consistent care between rides keeps your helmet in better condition longer and makes your periodic safety helmet assessment much faster because you’re not trying to distinguish fresh damage from old.
Cleaning with mild soap and water after sweaty rides is the single most practical maintenance habit you can build. Sweat carries salts and acids that degrade both foam and strap webbing over time. Rinse the interior padding by hand, let everything air dry away from direct heat, and avoid spraying aerosols or applying sunscreen near the helmet shell.
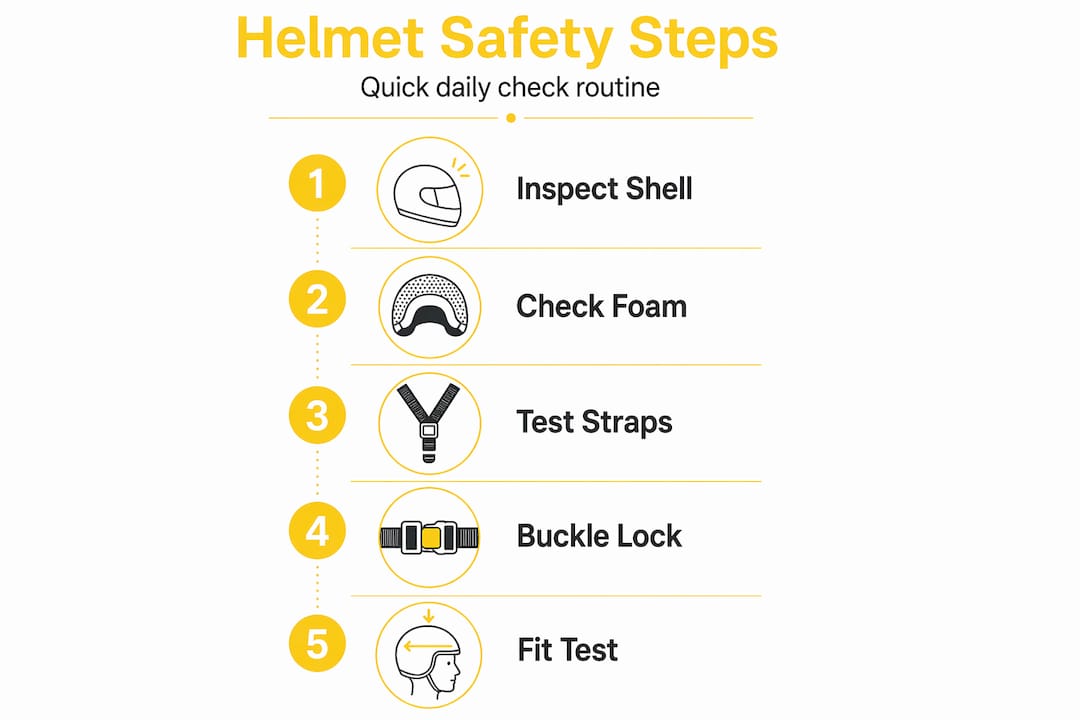
For inspection frequency, use a two-tier approach. Do a quick 60-second scan before every ride, looking for obvious shell damage, checking that the buckle clicks shut, and confirming the strap hasn’t shifted. Then do a full inspection following the complete steps for helmet safety checks every three months, or immediately after any fall or impact.
Routine inspections that include shell, liner, straps, buckles, and retention systems catch wear patterns before they become safety failures.
Replace your helmet immediately if any of the following are true:
- The helmet has been in any impact, regardless of how minor it looked
- You can see cracks, dents, or obvious shell deformation
- The foam feels soft, spongy, or uneven when pressed from the inside
- Straps are frayed, torn, or cannot be adjusted to a secure fit
- The buckle does not hold firmly under a sharp tug
- The helmet is more than five years old with regular use
- The exterior shows heavy fading or chalky discoloration
For a detailed breakdown of when visual and physical signs indicate a helmet is no longer safe, the signs it’s time to replace your helmet covers the full picture.
Common mistakes during helmet safety checks
Even cyclists who perform regular checks make the same errors repeatedly. Being aware of them makes your next inspection sharper.
The most common problem is confusing cosmetic damage with structural damage, or worse, dismissing structural damage as cosmetic. A shallow scuff on the outer shell from a hedge or a wall is usually cosmetic. A dent, a crack at a vent opening, or a flat spot that wasn’t there before is structural and means replacement.
Other frequent errors include:
- Skipping the functional tests. Looking at the helmet is not the same as testing it. The palm test and shake test take 15 seconds and reveal fit failures that no visual inspection will catch.
- Forgetting strap checks after retention adjustments. Riders often adjust the rear dial, confirm it feels snug, and call it done. They never re-check strap position or repeat the fit tests.
- Ignoring impact history. After any significant impact, EPS foam may have invisible crush damage that reduces protective effectiveness. “It looks fine” is not enough.
- Overestimating helmet age tolerance. Many cyclists ride helmets for seven or eight years. Past five years of regular use, the benefits of helmet safety checks diminish because the underlying materials are already degraded.
My honest take on helmet checks
What I’ve noticed working around cycling safety for years is that most riders treat the helmet as a binary item. Either it’s on their head or it isn’t. The question of whether it’s actually functional almost never comes up.
I’ve seen riders with cracked shells, straps adjusted so loosely the helmet could be pushed off with two fingers, and buckles that gave way the moment I tugged them. Every single one of those riders believed their helmet was protecting them.
The part that surprises me most is how few people perform the palm test. It takes five seconds and tells you more about real-world retention than any certification sticker ever will. A helmet that shifts more than an inch under palm pressure will come off your head during a real crash. That’s not a gray area.
My other strong opinion: fit matters more than ratings. I’ve handled expensive, highly certified helmets that fit the test rider’s head poorly, and more affordable helmets that locked onto a head like they were molded for it. The fit determines protection, not the price tag. Check the fit every single time. No exceptions.
Make the full check a quarterly habit. Put it in your calendar the same way you’d schedule a tire pressure check or a chain clean. Helmets don’t announce when they’ve become unsafe. That’s your job.
— Sophie
Gear built to pass every check

At Thebeamofficial, we design helmets that hold up under exactly the kind of inspection this article describes. Every helmet in our lineup is built with materials that retain their integrity over time and retention systems that perform consistently under functional fit tests. If your current helmet is raising red flags after today’s check, our adults’ helmets collection covers road, gravel, urban, and e-bike riders with MIPS-equipped options built for real protection. For younger riders, our kids’ helmets bring the same fit-first standards to smaller head sizes. And if your helmet passes the check but you want to improve visibility and confidence on the road, explore our helmet add-ons including rear-view mirrors and high-visibility reflectors.
FAQ
How often should I perform a helmet safety check?
Do a quick visual and buckle check before every ride. Perform a full safety helmet assessment including fit tests and foam inspection every three months, or immediately after any impact.
What is the palm test for helmets?
Place your palm under the helmet’s front and push up and back firmly. The helmet should move less than one inch. Greater movement indicates a strap or fit problem that needs correction before riding.
Can a helmet be safe after a crash if it looks undamaged?
No. EPS foam may have invisible crush damage after a significant impact, meaning the helmet can look fine but provide little to no protection in a second crash.
How do I know if my helmet is too old to use?
Replace any helmet after five years of regular use, or sooner if you see color fading, chalky texture, small cracks, or soft spots in the foam liner, as aging helmet plastic becomes brittle even without impacts.
What are the steps for helmet safety checks on the straps specifically?
Check that Y-straps sit just below each earlobe, the chin strap allows no more than two finger widths of slack, and the buckle holds firmly under a sharp tug. Then repeat the palm and shake tests to confirm the whole system is secure.


