

Aim front bike lights 5 to 15 degrees downward from horizontal, low enough to light the road but not blind oncoming traffic. Set rear lights level, pointed straight back for maximum visibility. Confirm the angle in under two minutes with the wall test: stand the bike where it normally rides, shine the light at a wall a few meters away, and check that the bright cutoff line sits below eye height. Rear lights should flash in daytime and switch to steady or combined modes at night.
TL;DR:
- Handlebar-mounted lights at typical riding height should be aimed 5 to 15 degrees downward, with flatter angles used for higher speeds and flatter terrain.
- The wall method involves measuring lens height, marking a wall, and adjusting the beam cutoff to sit just below that mark for correct vertical aim.
- The beam’s cutoff edge should be level with the mark, and horizontal alignment must be confirmed to prevent light spill into oncoming traffic or off-road areas.
- Aim toward the higher end of the range on urban streets and the lower end on rural, high-speed roads to match lighting needs and terrain conditions.
- Recheck and realign your bike lights after any disruptive event, such as transport or mount adjustments, to ensure consistent, safe visibility.
Table of Contents
- What’s the Correct Way to Aim Bike Lights?
- The Wall Method: How to Calibrate Your Light Step by Step
- Adjusting Your Aim for Different Riding Conditions
- Rear Light Placement and Aim That Actually Gets Noticed
- Testing and Verifying Your Aim on the Road
- Keeping Your Aim Right Over Time
- Why Beam Shape and Careful Aim Matter More Than Lumen Count
- Get the Aim Right, Then Worry About Everything Else
- Sources
- FAQ
What’s the Correct Way to Aim Bike Lights?
Getting the angle right starts with knowing where your light actually sits and how that height changes the math. A light mounted low on a fork crown throws a different beam than one clamped to your helmet or perched on your handlebar stem, even at the identical downward angle.
Mounting position changes everything about aim. Handlebar mounts, the most common setup, typically sit somewhere between 400 and 1,200 millimeters off the ground depending on your frame size and bar height, and that range changes the beam geometry significantly. A higher mount needs a slightly flatter angle to land the beam at the same distance ahead. A lower mount, like a fork crown light, can point a bit steeper without throwing light into a driver’s eyes because it’s already closer to the ground.
Here’s how the baseline breaks down by mount type:
- Handlebar mounts sit at typical riding height and work well with the standard 5 to 15 degree downward aim.
- Helmet mounts move with your head, which helps you scan intersections but means the beam isn’t fixed on the road ahead.
- Fork crown mounts sit lower and closer to the wheel, useful for illuminating potholes and surface changes right in your path.
- Seatpost or saddle-rail mounts apply to rear lights only and need a level, not downward, aim.
Inside that 5 to 15 degree window, pick the lower end for slow urban riding where you’re weaving around pedestrians and parked cars, and the higher end for open roads where you want the light concentrated closer to your front wheel to avoid dazzling oncoming drivers on straightaways.
Lumen output matters less than people assume, but it still needs a rough target. For most night rides on lit streets, 200 to 600 lumens covers the job without excessive glare. Unlit rural roads at higher speeds justify pushing toward 800 to 1,200 lumens, paired with a flatter aim so the extra output doesn’t scatter into everyone’s eyes. Daytime running mode can run brighter and higher since ambient light swallows stray beam edges that would blind someone at night.
Beam shape deserves as much attention as angle. A shaped beam with a flat cutoff, the kind found on most quality commuter and road lights, throws light evenly across the pavement while keeping the top edge sharp and low. A round, spot-style beam has no such cutoff. It throws a hot center that can wash out a driver’s vision even when the light is aimed correctly, simply because there’s no clean edge to control where the brightness stops.
The Wall Method: How to Calibrate Your Light Step by Step
This is the same technique bike shops and manufacturers use, and you can run it in your garage or driveway with tools you already own.
What you need: a flat vertical wall, a tape measure, painter’s tape or chalk, and the bike loaded exactly as it rides normally, panniers, bags, and all. Sit on the saddle while you do this. Rider weight compresses the fork and changes handlebar height slightly, and manufacturer guidance backs sitting on the bike rather than calibrating a bike standing upright with nobody on it.
- Measure your lens height off the ground while seated in normal riding position. Write the number down in centimeters or inches.
- Wheel the bike back until the front light sits roughly 7 to 8 meters (about 25 feet) from the wall. Some sources suggest 5 meters as a workable minimum for e-bikes with lower speeds, so scale the distance down slightly if you ride a cargo or e-bike that rarely exceeds city speeds.
- Mark the wall at the same height as your lens measurement. This mark represents where a perfectly horizontal beam would land.
- Turn on the light and look at where the bright cutoff sits relative to your mark. The top edge of the beam should land at or just below that line, not above it.
- Adjust the mount angle in small increments, usually a few degrees at a time, until the cutoff consistently sits below the mark with no bright spill above it.
- Check horizontal centering by confirming the brightest part of the beam lines up with your direction of travel, not skewed toward one side of the wall.
- Tighten the mount fully once you’re satisfied, then nudge the bar or light housing by hand to confirm nothing shifts.
Pro Tip: Take a photo of the beam pattern on the wall once you’ve got it right. Next time you swap the light between bikes or reinstall it after cleaning, you have a visual reference instead of guessing from memory.
Horizontal spill matters more than most riders realize. A beam that’s centered vertically but skewed left or right wastes light on the shoulder or opposite lane while leaving your actual path dimmer than it should be. Fix horizontal aim before you fine tune the vertical angle. It’s easier to correct one axis at a time than to chase both simultaneously.
Adjusting Your Aim for Different Riding Conditions
The 5 to 15 degree baseline is a starting point, not a fixed rule. Real roads throw enough variation at you that a static setting rarely stays optimal everywhere you ride.
On urban streets and shared paths, aim toward the higher end of that range, closer to 10 to 15 degrees down. You’re moving slower, dodging pedestrians and car doors, and need to see the ground immediately in front of your wheel more than you need long throw. Flood-pattern modes, where available, spread light wider at the cost of distance, which suits stop-and-go city riding better than a tight beam built for highway speeds. A helmet light adds real value here too, since it follows your head movement and helps you scan intersections as you check for turning cars, something a fixed handlebar light can’t do on its own.
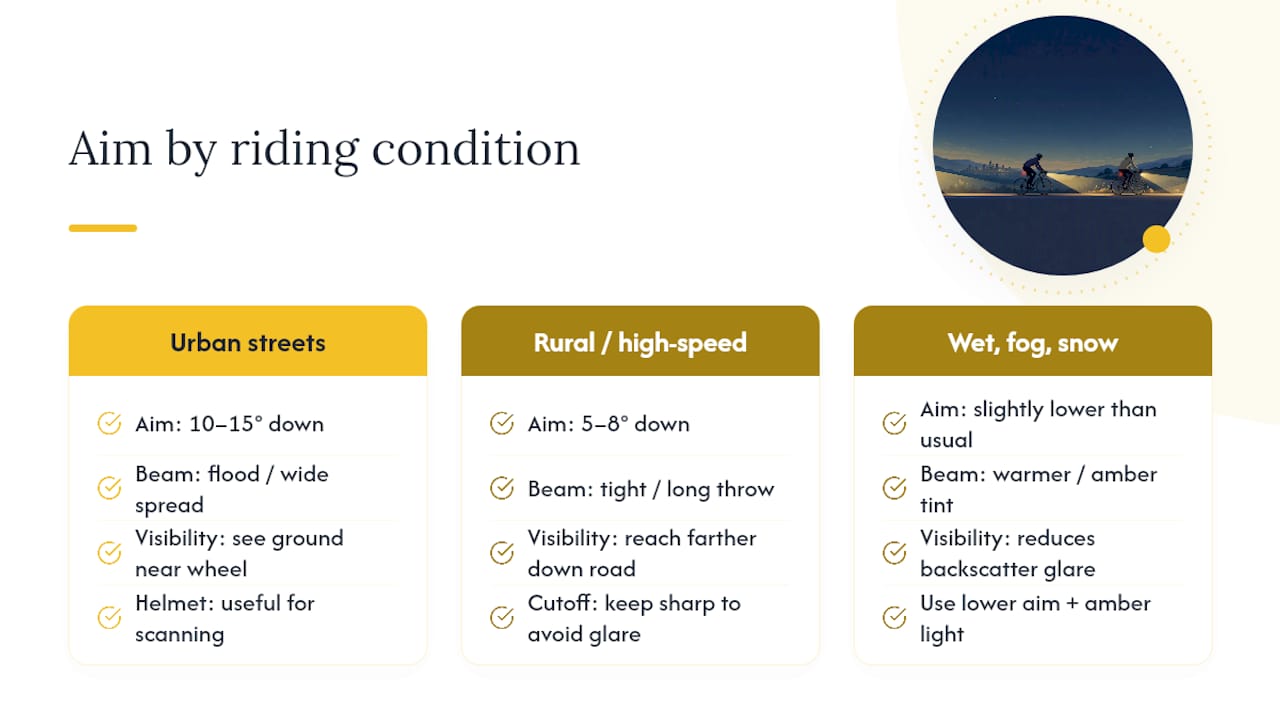
Rural and high-speed riding calls for the opposite adjustment. Flatten the beam toward 5 to 8 degrees so the light reaches farther down the road, giving you more time to spot debris, potholes, or wildlife at speed. Keep the cutoff sharp even at this flatter angle. A blurry or undefined beam edge on a flat aim is exactly what blinds oncoming drivers on rural roads with no streetlights to compete with your beam.
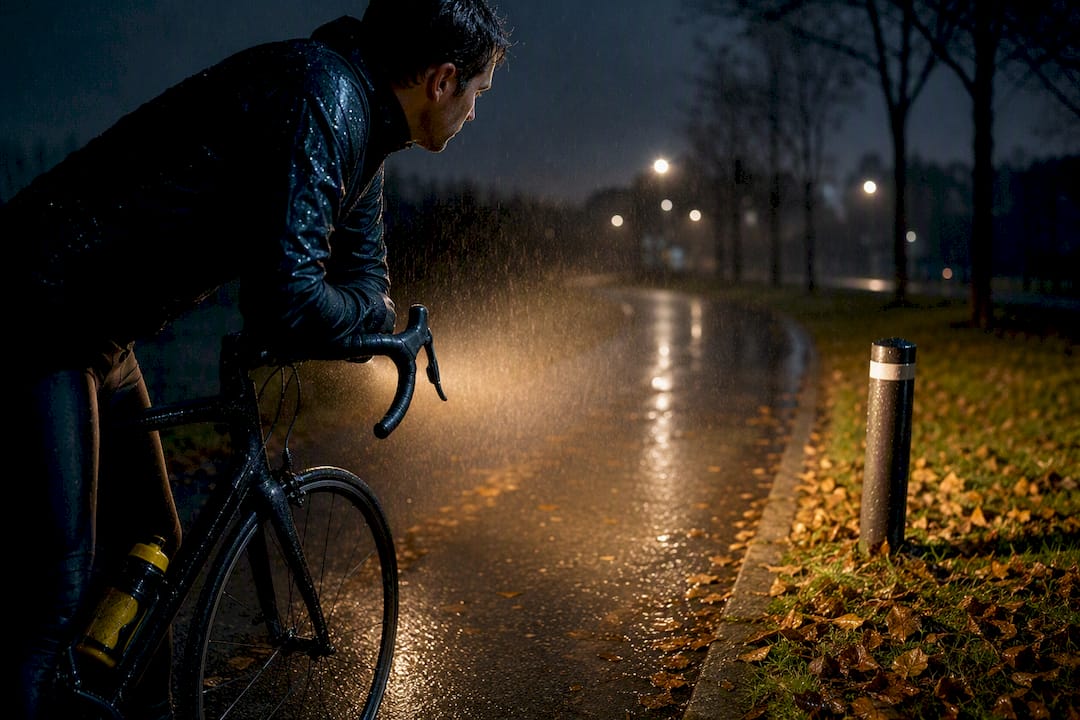
Wet weather, fog, and snow change the physics of how light behaves. Water droplets and airborne particles scatter light back toward your eyes, a phenomenon called backscatter, so aiming slightly lower than your usual setting reduces the glare bouncing back at you. Warmer color temperatures, amber or yellow-tinted beams instead of stark white or blue-white, cut through fog more cleanly and reduce that scatter effect.
For mounting choices, handlebar and helmet lights serve different jobs rather than competing for the same role. Many experienced commuters run both: a handlebar light with a shaped beam for consistent road illumination, and a helmet light for scanning side streets and signaling turns to drivers who track head movement.
Rear Light Placement and Aim That Actually Gets Noticed
Mount your rear light at an appropriate height below the saddle on the seatpost, in a spot that stays clear of most saddlebags and panniers and puts the light at a height drivers naturally scan when checking their mirrors.
Aim it level, straight back, not angled up or down. A rear light aimed toward the ground loses most of its visibility to anyone more than a few meters behind you, while one aimed too high can wash out over the heads of following traffic instead of catching their eye. Some side spill helps too. A light visible from a slight angle off center gets noticed by cars merging or turning across your path, not just vehicles directly behind you.
- Rapid flash modes work best in daylight, where steady light gets lost against a bright background.
- Steady or combined steady-plus-flash modes suit nighttime riding, since constant flashing can make it harder for drivers to judge your speed and distance in the dark.
- Check lumen output separately from your front light. Rear lights need less raw power than front lights to be effective, since they’re working against a driver’s peripheral vision rather than lighting a path.
Test your rear light with a simple roll back check. Wheel the bike backward away from a wall or a friend standing at a distance, and confirm the light stays centered and visible as the angle to the viewer changes slightly. If it disappears or dims noticeably at an angle, the mount has drifted or the aim was off to begin with.
Testing and Verifying Your Aim on the Road
The wall test gets you close. Riding at actual speed on an actual road is what confirms whether the aim holds up when it matters.
- Run the walk-back check first. Have a friend stand about 10 meters ahead while you switch on the light at normal riding position, and ask them if the beam is comfortable to look at or glaring.
- Take a short ride at your normal cruising speed on a familiar street with some ambient light, and watch how far ahead you can clearly spot curbs, potholes, or debris.
- Compare that distance to your riding speed. Slow urban riding should let you spot hazards 5 to 10 meters out, while faster road riding needs 20 meters or more of clear detection distance to react safely.
- Re-aim immediately if anything feels off, whether that’s a driver flashing their headlights at you, a friend reporting glare, or the beam visibly drifting during the ride.
Pro Tip: Once you land on a setting that works, write down the angle in plain terms, “roughly two finger-widths below level” or “bar clamp mark aligned with the second notch”, so you can reset it fast after a crash, a bike swap, or a simple lens cleaning.
Documenting your preferred setup saves real time down the line. Mounts loosen, lights get swapped between bikes, and a five second glance at your notes beats redoing the entire wall test from scratch every time something shifts.
Keeping Your Aim Right Over Time
Recheck your light’s aim any time it’s been through something disruptive: transported in a car, swapped between bikes, dropped, or reinstalled after a battery change. Vibration from rough roads and gravel sections loosens mount bolts gradually, and a light that was perfect last month can drift a few degrees without you noticing until a driver flashes their brights at you.
Build a habit around three quick checks before you roll out:
- Give the mount a firm squeeze or twist test to confirm it hasn’t loosened since your last ride.
- Wipe the lens clean, since dust, mud, or water spots scatter light unpredictably and can make a correctly aimed beam look glaring or dim in patches.
- Glance at the beam against a wall or the ground for two seconds before you set off, just enough to catch obvious drift.
Battery condition affects beam shape more than most riders expect. A light running low on charge often dims unevenly rather than uniformly, which can make a properly aimed beam appear to have a weaker cutoff than it actually does. Charge before longer rides rather than assuming a partial charge behaves the same as a full one.
Why Beam Shape and Careful Aim Matter More Than Lumen Count
A shaped beam with a defined flat cutoff does something a round spot beam simply cannot: it delivers strong, even light across the road surface while keeping the brightest portion below eye level for anyone approaching. CyclingSavvy’s technical breakdown of bicycle lighting makes the case plainly, aiming the flat top of the beam just below horizontal is the rule of thumb that separates a light that helps you see from one that also blinds everyone coming the other way.
This is the same logic that shapes how some cycling safety gear brands discuss lighting on their blogs. Raw lumen figures get too much attention online, when beam direction and optical design determine what a light actually does on the road far more than the number printed on the box. A 1,000-lumen light aimed carelessly can be more dangerous to oncoming traffic than a 400-lumen light with a properly shaped and aimed beam.
A few practical points worth holding onto:
- Prefer lights with a visible, defined cutoff over unshaded round beams whenever you’re choosing new gear.
- Repeat the wall method any time you install a light, not just once when you buy it.
- Recheck aim seasonally, since temperature changes affect mount plastics and rubber grommets over months of use.
- Trust a driver’s flashed headlights or a cyclist’s frown as real feedback that your aim needs adjusting, not an overreaction.
Reflectors and lights aren’t interchangeable, either. Passive reflectors only work when another light source hits them, while an active light source stays visible under a much wider range of conditions, which is worth knowing if you’re deciding what to prioritize on a limited budget.
Get the Aim Right, Then Worry About Everything Else
Most riders obsess over lumen counts and skip the one adjustment that actually determines whether their light helps or hurts: the angle. A 1,500-lumen headlight aimed straight at eye level does more harm on a shared path than a modest 300-lumen light with a clean cutoff sitting where it belongs. That’s the gap the industry rarely talks about plainly enough.
The wall method isn’t glamorous, but it’s the only calibration technique that accounts for your actual bike, your actual riding position, and your actual mount height, rather than a generic setting stamped on a product page. Riders who skip it and eyeball the angle by feel are the ones who end up adjusting mid-ride when a driver flashes their brights, which is a worse time to fix the problem than five minutes in a driveway beforehand.
If there’s one habit worth building, it’s rechecking aim after any disruption, a transport trip, a mount swap, a battery change, rather than assuming a light that worked last month still works today. Mounts drift. Bolts loosen. The five second glance costs you nothing and saves you from riding half blind or blinding someone else without realizing it.
— Sophie
Sources
- Aiming for good bicycle lighting — CyclingSavvy
- How to aim handlebar lights for best visibility — BikeBesties
- Setting light height — Rose Bikes support
FAQ
How Should I Aim My Bike Headlights?
Aim the front light 5 to 15 degrees downward from horizontal, with the beam’s bright cutoff landing below eye level for anyone approaching. Confirm the angle using the wall method, measuring your lens height and marking a wall roughly 7 to 8 meters away.
Where Should Bike Lights Be Positioned?
Front lights typically mount on the handlebar, fork crown, or helmet, each offering different beam geometry and mounting heights between roughly 400 and 1,200 millimeters off the ground. Rear lights belong on the seatpost, about 15 to 25 centimeters below the saddle, clear of bags and panniers.
How Do I Set Up Bike Lights Correctly?
Start by measuring your light’s lens height while seated on the bike in normal riding position, then use the wall method to mark a target line and adjust the mount until the beam cutoff sits at or just below that mark. Finish with a short road test at riding speed to confirm the aim holds up under real conditions, not just in a driveway.
How Many Lumens Do I Need for Night Riding?
Most night rides on streets with some ambient lighting work well with 200 to 600 lumens, while unlit rural roads at higher speeds often call for 800 lumens or more. Beam direction and shape matter more than the lumen number itself, since a poorly aimed high-output light can create more glare than a well-aimed lower-output one.


