

Clip-on spoke rods, rim decals, and homologated catadioptres are the three real options for wheel-level bike safety, and each does something the others don’t. Motion-powered prismatic designs, like The Beam’s WHEEL FLASH and FRAME FLASH, take the same reflective principle and engineer it for stronger side visibility without the flimsy plastic feel of basic clips. If you want the fastest path to good coverage, pair a homologated reflector with one of these engineered options. Keep reading for how the types differ, how many you need, and how to fit them.
TL;DR:
- Combining homologated catadioptres with motion-powered or engineered reflectors provides the best legal compliance and side visibility.
- Plastic clip-on rods are easy to install but offer intermittent flashing; decals offer continuous reflectivity but require careful application and surface cleaning.
- The number of reflectors needed varies from six per wheel for basic coverage to twelve or more for cargo and family bikes, with spacing based on spoke count.
- Compatibility depends on spoke diameter and spoke shape, with prismatic films lasting longer and reflecting more directly back at headlights.
- Reflectors are passive safety tools that improve visibility in light conditions but do not replace active lighting in low-light or unlit scenarios.
Table of Contents
- What are the different types of réflecteurs roues vélo?
- How many reflectors do you need and where should they go?
- What should you check before buying a reflector pack?
- How do you install spoke reflectors and rim decals?
- How long do wheel reflectors last?
- Where can you buy reflectors and what should you expect to pay?
- What do wheel reflectors actually solve, and what do they miss?
- Get engineered side visibility with the WHEEL FLASH and FRAME FLASH
- Sources
What are the different types of réflecteurs roues vélo?
Wheel and spoke reflectors, known in French as réflecteurs roues vélo, fall into three main categories, and understanding how each one throws light back at a driver changes what you’ll pick.
Clip-on spoke rods snap directly onto a spoke without tools. They’re usually a few inches of rigid plastic tubing with a reflective coating, and they come in short and long formats to fit different spoke diameters, typically around 1.8 to 2 millimeters. Because they sit at a fixed point on the wheel, they flash intermittently as the wheel turns rather than glowing continuously.
Rim stickers and decals work differently. They wrap around the rim itself, so as the wheel spins, they create a continuous circular reflection instead of a series of blinks. That steady ring effect tends to catch a driver’s eye sooner than scattered clip-on points, though the peel-and-stick application means you need a clean surface and a rim brake clearance check first.
Homologated catadioptres are the orange or red reflectors mandated by French road-safety regulation, mounted on the wheel or frame. They cover less surface area than a decal, but they exist to satisfy the law, not to maximize visibility on their own.
Motion-powered and prismatic products sit in a different class. The Beam’s WHEEL FLASH uses engineered prismatic reflectivity rather than a flat sticker, and the brand’s testing describes detection distances up to roughly 150 meters under headlight conditions, a meaningful jump over basic clips.
| Type | Visibility | Durability | Theft Risk | Brake Compatibility |
|---|---|---|---|---|
| Clip-on rods | Intermittent flash | Moderate | Low (easy to remove) | Not affected |
| Rim decals | Continuous ring | High if applied well | Low | Must avoid braking track |
| Homologated catadioptre | Limited but legal | High | Low | Not affected |
| Motion/prismatic (WHEEL FLASH) | Strong, engineered | High | Low | Not affected |
How many reflectors do you need and where should they go?
There’s no single legal count for supplementary reflectors, but a few baseline setups cover most riding situations well.
- Basic commuter coverage: six short clip-on rods per wheel, spaced evenly across the spokes, gives intermittent flash visibility without cluttering the wheel.
- Denser coverage for low-light commuting: a denser coverage of rods or a full rim decal produces a near-continuous visual signal that’s easier for drivers to register at a glance.
- Family and cargo bikes: because these bikes move slower and carry precious cargo, err toward the denser option, twelve rods or a decal, on both wheels.
- E-bikes: higher average speeds mean side visibility matters more at intersections; pair a decal with a homologated catadioptre rather than relying on clips alone.
- Spacing rule of thumb: divide your spoke count by the number of reflectors you’re installing to keep gaps even. A 36-spoke wheel with six rods means one every sixth spoke.
- Legal plus coverage combo: mount one homologated catadioptre as required, then add decorative rods or a decal for the visibility boost that regulation alone doesn’t guarantee.
Retailers consistently recommend combining a homologated catadioptre with additional clip-on rods or decals, since the legal piece and the visibility piece solve different problems.
What should you check before buying a reflector pack?
A pack of reflectors is only as good as its fit on your specific wheel, so run through this checklist before you order.
- Mounting compatibility: standard clip-on rods fit spokes around 1.8 to 2 millimeters, but modern aero blade spokes often won’t accept them, so measure your spoke profile first.
- Reflective technology: glass-bead coatings are the classic, budget approach; prismatic film, like the material in The Beam’s products, reflects more directly back at a headlight and tends to hold its brightness longer.
- Weatherproofing and adhesive life: check whether a decal is rated for rain and temperature swings, since a cheap adhesive can lift within a season.
- Warranty and returns: a return policy matters more than it sounds, since fit issues (especially with aero spokes) only show up after you try to install the thing.
- Homologation versus coverage: decide whether you need a legally compliant catadioptre, maximum visibility, or both, because chasing only coverage can leave you technically noncompliant.
- Price per unit of visibility: a $6 clip-on pack of twelve and a $25 premium prismatic set solve different problems. Compare cost per reflector against the actual coverage or brightness you’re getting.
Pro Tip: Measure one spoke with a caliper or a coin as a rough gauge before ordering clip-on rods. Aero and bladed spokes are flat, not round, and no clip will grip them properly.
How do you install spoke reflectors and rim decals?
Fitting most reflectors takes less than fifteen minutes per wheel, and neither common method requires tools.
- Clip-on rods: wipe the spoke clean, position the clip at roughly the mid-radius point of the spoke, and press until it snaps shut around the wire.
- Spin the wheel slowly to confirm the rod sits straight and doesn’t rub against neighboring spokes.
- Ride a short distance and recheck the clip. Installation guides note that a fresh clip can loosen slightly after the first real-world vibration.
- Adhesive rim decals: clean the rim thoroughly with isopropyl alcohol or soapy water and let it dry completely before applying anything.
- Align the decal along the rim, keeping it clear of the braking track. On rim-brake bikes, maintain at least 6 millimeters of clearance from the braking surface to avoid contaminating brake pads.
- Press firmly from one end to the other to push out air bubbles, then let the adhesive cure for several hours before riding in wet conditions.
- Homologated catadioptres typically bolt or clip onto the wheel hub or spoke nipple; follow the manufacturer’s mounting point exactly, since placement affects legal compliance.
If a clip keeps sliding, try a slightly smaller size or reposition it closer to a spoke intersection for extra friction.
How long do wheel reflectors last?
Material choice determines most of a reflector’s lifespan. Thin plastic clips degrade faster under UV exposure and road grit, while prismatic film and glass-powder pigments hold their reflective punch considerably longer.
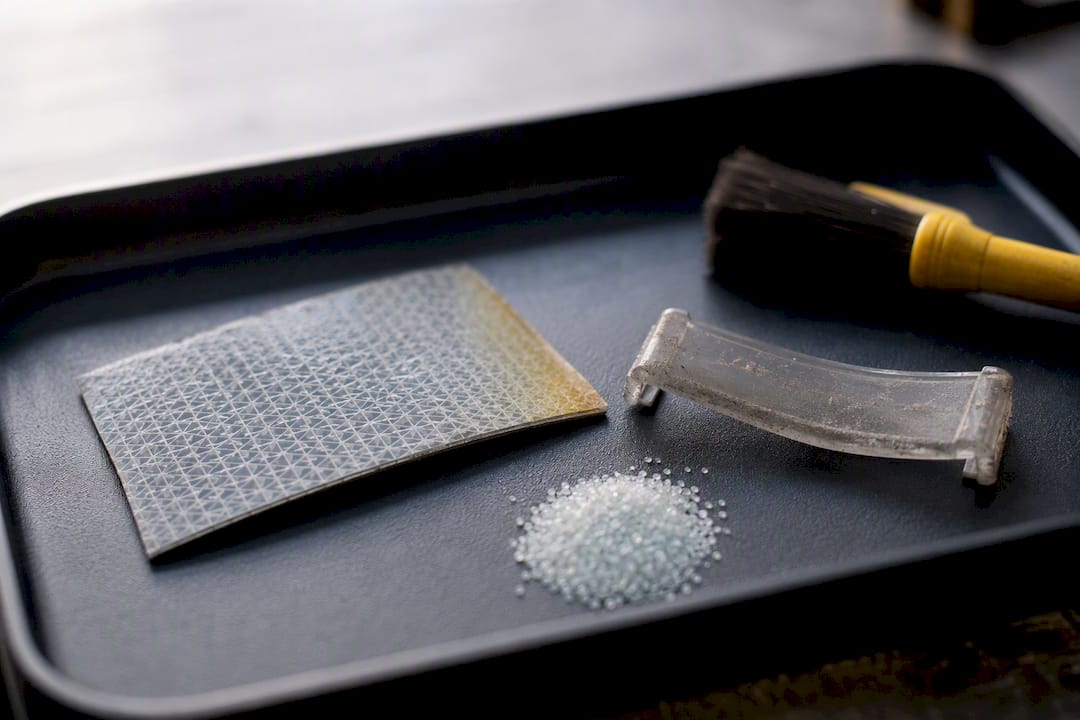
Adhesive decals face a different enemy: temperature swings and road salt. A decal applied in summer can lift at the edges once winter cold makes the adhesive brittle, so a seasonal check is worth the two minutes it takes.
Watch for a few clear replacement signs:
- Visible cracking or fading in the reflective surface.
- A dulled, chalky look instead of a sharp mirror-like reflection under direct light.
- Adhesive lifting at the corners or edges of a rim decal.
- A clip that spins loosely instead of gripping the spoke tightly.
Some higher-end catadioptres also double as anti-theft tools. One design hides a GPS tracker inside the reflector housing, which is worth considering if theft is a real concern in your area, though it’s a niche feature rather than something every rider needs.
Where can you buy reflectors and what should you expect to pay?
Reflector packs come in a range of sizes depending on whether you’re outfitting one bike or a family fleet.
- 12-piece packs: the standard starter size for a single wheel or light coverage, usually the cheapest per-unit option.
- 24 and 36-piece packs: better for full dual-wheel coverage or households with more than one bike.
- 72-piece bulk packs: aimed at families, bike co-ops, or shops restocking inventory.
- Price range: basic clip-on packs run just a few euros, while premium prismatic sets can reach 20 to 30 euros depending on the technology and brand.
You’ll find these products at specialist bike shops, big-box sports retailers, and brand direct stores. Before buying, confirm the spoke diameter fit listed on the product page, check the return policy, and note whether homologation is mentioned if legal compliance matters for your ride. If you’re outfitting several bikes at once, a bulk pack of basic clips makes more financial sense than buying premium units for every wheel. For a single higher-end road or commuter bike, a single engineered product often beats a dozen cheap clips.
What do wheel reflectors actually solve, and what do they miss?
Reflectors are a passive safety layer. They only work when another light source hits them, which means they do nothing on a pitch-black rural road with no headlights sweeping past. That’s the gap most cyclists underestimate: a reflector is a backup system, not a primary one.
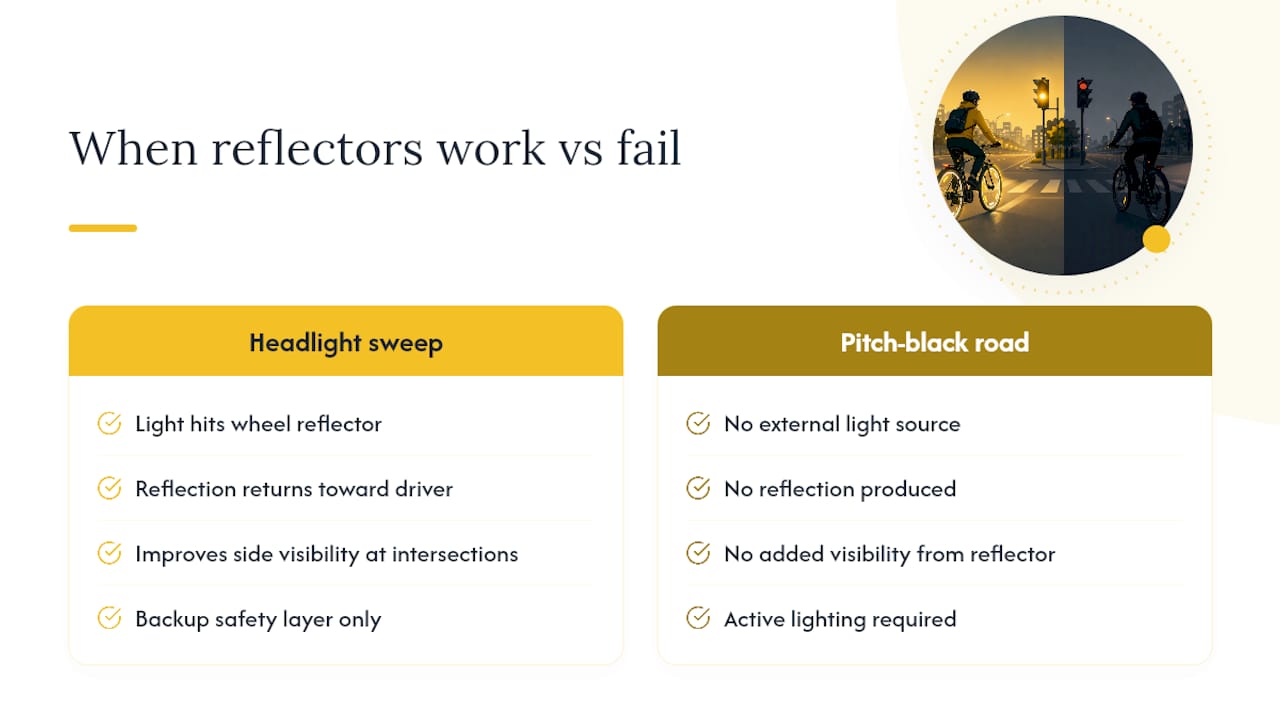
Where The Beam’s approach differs is treating wheel visibility as an engineering problem rather than an afterthought sticker. Motion-based prismatic designs are built to catch light at more angles than a flat decal, which matters most exactly where side visibility fails most often, at intersections where a car’s headlights sweep across the wheel rather than hitting it head-on.
Reflectors are enough for daytime commuting and well-lit urban riding. Once you’re riding before sunrise, after sunset, or on unlit roads, active lighting stops being optional. For more on that distinction, our guide to reflective gear for cyclists and our piece on how reflectors affect urban cyclist safety at night go deeper into where the line sits.
— Sophie
Get engineered side visibility with the WHEEL FLASH and FRAME FLASH
Some brands build wheel visibility with motion-activated prismatic reflection instead of a flat, static surface that only works at the right angle.

Certain spoke-mounted products use engineered prismatic panels to throw reflection back at drivers from a wider range of angles than a standard clip or decal, with weatherproof adhesive built to handle rain and temperature swings. Some motion-powered visibility products extend coverage to the bike frame, giving commuters and e-bike riders a second layer where side-on detection matters most. Families outfitting multiple bikes can start with one WHEEL FLASH per wheel; solo commuters wanting maximum coverage often add a FRAME FLASH as well. Check the WHEEL FLASH product page or the FRAME FLASH 2.0 listing for sizing details and to place an order.
Sources
For spoke diameter compatibility and homologation notes, JE SUIS À VÉLO’s reflector guide covers pack formats in detail. BikeTro’s installation walkthrough shows clip and decal fitting step by step. For broader night-visibility habits beyond bikes, MBH Moto’s guide on night visibility for scooters offers useful cross-modal safety context for families with mixed transportation.
- Réflecteurs rayons roue de vélo | JE SUIS À VÉLO
- How To Install Spoke Reflectors: Easy Step-by-Step Guide - BikeTro
- Reflecteur velo – Decathlon


