
TL;DR:
- Proactive cyclist safety involves anticipating hazards through dynamic positioning, early communication, and visibility strategies. Consistent practice reduces collision risks at intersections, door zones, and during close passes by assessing route danger and using appropriate gear. Building habits like signaling early, scanning proactively, and performing quick pre-ride checks enhances safety and confidence on urban and variable roads.
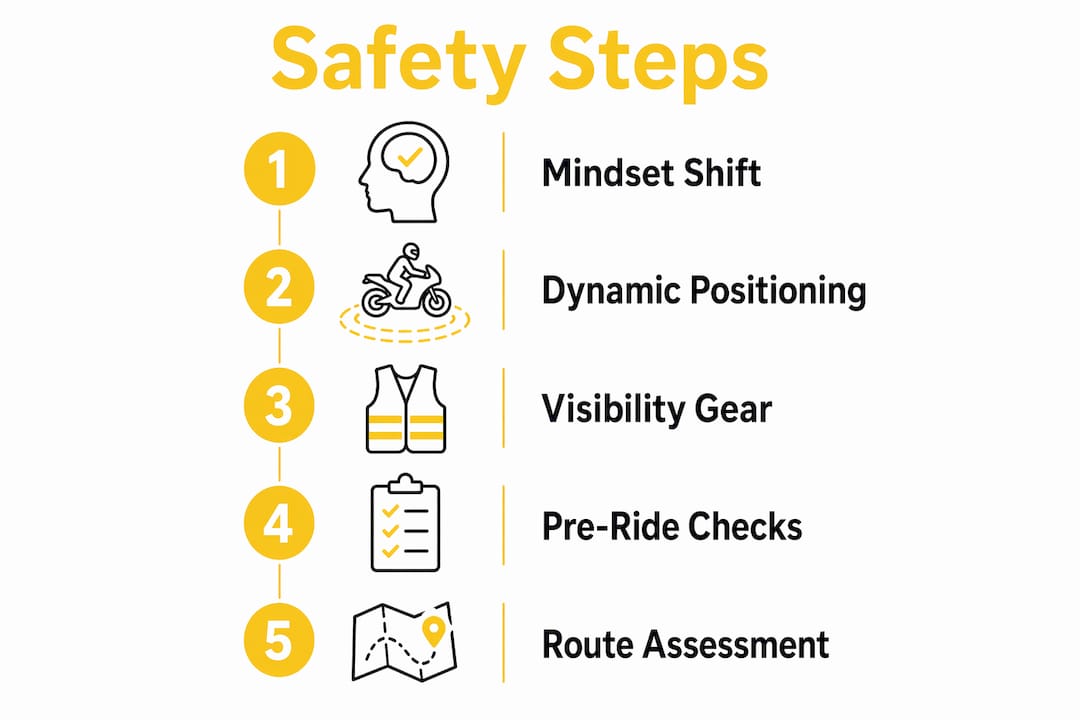
Proactive cyclist safety is the practice of anticipating and managing road hazards before they become collisions, rather than simply reacting to danger as it appears. This approach, also called defensive cycling in professional road safety circles, combines dynamic lane positioning, early signaling, visibility enhancement, and probability-based risk assessment into a deliberate skillset. Riders who practice it consistently reduce their exposure to the most common collision types: intersection conflicts, dooring incidents, and close passes. The core tools are positioning, scanning, hi-vis gear, and predictable behavior. Each one compounds the others.
What proactive cyclist safety actually means
Explaining proactive cyclist safety starts with a shift in mindset. Most cyclists think in binary terms: a road is either safe or it is not. Probability-based risk assessment replaces that with a more nuanced approach, scoring each road segment by traffic density, sightline quality, and available escape options. The result is a tactical, real-time decision process rather than a fixed judgment.
Predictability is the strongest safety signal you can send to motor traffic. Consistent lane positioning, clear signaling, and controlled speed tell drivers exactly what you plan to do next. Drivers who can predict your behavior have more time to adjust. Drivers who cannot are the ones who cause close passes and turning conflicts.
Proactive safety is also a skill that builds over time. Scanning, signaling, and pre-ride checks become muscle memory with practice, which means the cognitive load drops and your situational awareness actually improves as you ride more. Think of it less as a checklist and more as a set of habits that gradually become automatic.
How to use dynamic lane positioning to increase safety
Lane positioning is the single most powerful tool available to a cyclist. Dynamic lane positioning means alternating between two positions based on road width, hazards, and traffic conditions rather than staying fixed in one spot.
The two positions work like this:
- Primary position: The center of the lane. Use this on narrow roads, at intersections, when passing parked cars, and anywhere a driver might otherwise attempt a dangerous squeeze past you. This position forces drivers to treat you as a vehicle and wait for a safe opportunity to pass.
- Secondary position: Roughly one meter from the curb. Use this on wide roads with good sightlines where faster traffic can pass you safely without conflict.
Gutter riding is the habit of riding as far left (or right, in the U.S.) as possible, and it is one of the most dangerous things a cyclist can do. It places you in the door zone of parked cars, exposes you to road debris, and makes you nearly invisible to drivers at junctions. The false sense of courtesy it creates is not worth the risk.
Timing your lane changes matters as much as the position itself. Move to the primary position at least 50 meters before an intersection. This prevents last-second overtakes and eliminates the conditions that cause right-hook collisions, where a driver turns across your path.
Pro Tip: When you take the primary position, hold it with confidence and a steady line. Wobbling or drifting signals uncertainty to drivers and increases the chance of a close pass.
What visibility strategies actually reduce collision risk?
Visibility is not just about being seen at night. It is about being seen early enough for drivers to make good decisions.
Daytime running lights, particularly flashing rear lights, reduce collision risk by up to 33%. That figure reflects improved driver detection and reaction time, not just awareness. A flashing rear light in daylight is processed faster by the human visual system than a steady one, which is why it outperforms static lights in real-world conditions.
Clothing choice carries equal weight. Fluorescent yellow or orange clothing can reduce collision rates by approximately 50%, particularly at dawn, dusk, and under overcast skies when contrast between a cyclist and the road environment drops sharply. This is not about aesthetics. It is about being processed as a hazard by a driver’s peripheral vision before they even consciously register you.
A few visibility practices that go beyond the basics:
- Biomotion patterns: Reflective ankle bands and knee bands exploit the way the human brain detects movement. The brain recognizes the biological motion of cycling limbs faster than it recognizes a static reflective vest.
- Helmet visibility: A reflective or brightly colored helmet sits at the highest visible point of your body. Thebeamofficial’s VIRGO helmet with MIPS technology combines structural protection with a profile that supports visibility-enhancing add-ons.
- Light strategy: Run a steady front light for road illumination and a flashing rear light for driver detection. In low-light conditions, add a steady rear light as well so drivers can judge your distance accurately.
A properly fitted helmet also reduces serious head injury risk by approximately 60% and fatal head injury by 73% according to research. Models with MIPS technology add rotational impact protection, which standard helmets do not address.
How does proactive communication reduce cycling hazards?
Communication between cyclists and drivers is mostly non-verbal, and most cyclists underuse it. The techniques below are the ones that make the biggest measurable difference.
- Shoulder check every 5 to 10 seconds. Frequent shoulder checks reduce close passing crashes by alerting you to approaching vehicles. The torso rotation that comes with a shoulder check is also visible to drivers, signaling that you are aware of your surroundings. Drivers are less likely to crowd a cyclist who is clearly paying attention.
- Signal 30 to 50 meters before every turn. Early hand signals give drivers enough time to adjust speed and position. Signaling at the last second is nearly useless because it does not give drivers the reaction time they need.
- Make eye contact at intersections. Eye contact confirms that a driver has seen you. A driver looking at their phone or checking a blind spot has not registered your presence, regardless of where you are positioned.
- Scan 20 to 30 meters ahead continuously. Proactive hazard scanning at that distance gives you time to make smooth, controlled evasive maneuvers instead of abrupt braking or swerving. Look for side mirrors angled outward on parked cars, wheels turning on stationary vehicles, and pedestrians stepping toward the road.
- Use a radar tail light. Devices like the Garmin Varia detect vehicles approaching from behind and alert you before you can see or hear them. This is particularly useful on fast rural roads where shoulder checks alone are insufficient.
Pro Tip: Treat every intersection as a potential conflict point regardless of your right of way. Slow slightly, make eye contact with any waiting driver, and confirm they are yielding before you commit to crossing.
How should you assess route risk before riding?
Route planning is where proactive cycling strategies begin, before you turn a pedal. Scoring route segments by conflict frequency and severity shifts your thinking from “is this road safe?” to “what is the probability of a serious conflict on this segment, and is there a better option?”
| Route factor | Risk level | Proactive response |
|---|---|---|
| High traffic density, no bike lane | High | Choose parallel quieter road or ride primary position |
| Parked cars on both sides | Medium-high | Maintain 3ft clearance, scan mirrors |
| Poor sightlines at junctions | High | Slow to walking pace, confirm eye contact |
| Wet or loose surface | Medium | Reduce speed, increase following distance |
| Low-light conditions | Variable | Add lights, wear hi-vis, reduce speed |
Slower speeds in complex environments increase your reaction time and lower crash severity if contact does occur. Experienced cyclists do not push pace through high-conflict zones. They wait, reroute, or slow down when the odds turn unfavorable, minimizing last-second maneuvers that compress safety margins to zero.
A mental checklist before each ride takes under two minutes and covers the highest-risk scenarios you are likely to face. Identify the two or three segments on your route with the highest conflict potential, decide your positioning strategy for each, and note any conditions (weather, time of day, construction) that change the risk profile.
Practical tips for urban and variable environment riding
Urban riding concentrates the highest density of conflict scenarios into the shortest distances. These bicycle safety practices address the most common ones directly.
- Intersections: Take the primary position at least 50 meters before every junction. This prevents right-hook collisions and forces drivers to acknowledge your presence before turning.
- Parked car zones: Maintain a minimum of 3 feet from parked vehicles at all times. Door strikes are a leading cause of urban cycling accidents, and the door zone extends further than most riders expect.
- Wet conditions: Braking distances increase significantly on wet pavement. Reduce speed before corners, not during them, and give yourself extra stopping distance behind vehicles.
- Aggressive drivers: Stay calm, hold your line, and do not engage. Erratic responses to aggressive drivers create unpredictability, which is the condition most likely to cause a collision.
- Pre-ride ABCD check: Air (tire pressure), Brakes (function and pad wear), Chain (lubrication and tension), Drop/Bolts (quick releases and stem bolts). This pre-ride check takes 90 seconds and eliminates the mechanical failures that cause crashes in traffic.
For urban commuting specifically, the cycling security guide from Thebeamofficial covers route-specific strategies in detail.
Pro Tip: In windy conditions, position yourself slightly further from the curb than usual. Crosswinds can push you laterally without warning, and the extra margin prevents you from being blown into the gutter or into a parked car.
Key takeaways
Proactive cyclist safety requires combining dynamic positioning, early communication, high-visibility gear, and probability-based route assessment into a single, practiced skillset.
| Point | Details |
|---|---|
| Dynamic lane positioning | Alternate between primary and secondary positions based on road width, hazards, and traffic. |
| Visibility gear matters | Fluorescent clothing and flashing lights can cut collision risk by up to 50% and 33% respectively. |
| Signal and scan early | Hand signals 30 to 50 meters before turns and shoulder checks every 5 to 10 seconds reduce surprises. |
| Assess route risk | Score segments by conflict frequency and choose safer alternatives when odds turn unfavorable. |
| Pre-ride checks | The ABCD check takes 90 seconds and eliminates the mechanical failures most likely to cause crashes in traffic. |
What I’ve learned about proactive cycling that most guides miss
Most cycling safety content focuses on rules: wear a helmet, use lights, signal your turns. That advice is correct, but it misses the deeper principle. Proactive safety is not about compliance. It is about reading traffic the way a chess player reads a board, several moves ahead.
The habit that changed my riding most was not better gear or a new route. It was learning to watch driver behavior rather than just vehicle position. A driver checking their mirror before opening a door, a wheel turning slightly before a vehicle pulls out, a pedestrian glancing over their shoulder before stepping off the curb. These are the cues that give you two or three extra seconds, and two or three seconds is the difference between a smooth evasion and a crash.
Confidence and caution are not opposites in cycling. The most confident riders I have observed are also the most cautious, because they understand the odds well enough to know when to hold their position and when to yield. That judgment comes from practice, not from reading about it. Start with one technique, whether it is the shoulder check cadence or the 50-meter primary position rule, and build from there. The urban cycling safety resource from Thebeamofficial is a solid reference for applying these principles across different riding environments.
— Sophie
Gear that supports your proactive safety strategy
Proactive safety habits work best when your equipment matches your intentions. A helmet that fits correctly and meets current impact standards is the foundation. Thebeamofficial’s VIRGO helmet collection includes MIPS-equipped models designed for road, gravel, and urban riders who want protection that does not compromise on fit or visibility profile.

Beyond the helmet, visibility accessories make a measurable difference. Thebeamofficial’s safety accessories include high-visibility reflectors, rear-view mirrors, and connected products designed to extend your detection range in traffic. These are not optional extras for safety-conscious riders. They are the physical layer that supports every positioning and communication technique covered in this article. Gear that works reliably every ride removes one more variable from an already complex equation.
FAQ
What is proactive cyclist safety?
Proactive cyclist safety is the practice of anticipating and managing road hazards before they become collisions, using dynamic positioning, early signaling, visibility gear, and route risk assessment. It is also called defensive cycling in road safety literature.
How does lane positioning prevent bike accidents?
Taking the primary position (center of lane) at intersections and on narrow roads forces drivers to treat you as a vehicle, preventing dangerous squeeze passes and turning conflicts. Moving to primary position at least 50 meters before a junction eliminates the conditions that cause right-hook collisions.
What visibility gear reduces collision risk most?
Fluorescent yellow or orange clothing reduces collision rates by approximately 50%, and flashing rear lights reduce collision risk by up to 33%. Combining both provides the strongest visibility profile across daylight, dawn, dusk, and overcast conditions.
How often should cyclists check behind them?
Shoulder checks every 5 to 10 seconds reduce close passing crashes by alerting you to approaching vehicles and signaling your awareness to drivers. The torso rotation involved in a shoulder check is visible to drivers and discourages aggressive passing behavior.
What is the ABCD pre-ride safety check?
The ABCD check covers Air (tire pressure), Brakes (function and pad condition), Chain (lubrication and tension), and Drop/Bolts (quick releases and stem bolts). It takes under two minutes and eliminates the mechanical failures most likely to cause crashes in traffic.


