

Choose a smart rear bike light that combines accelerometer-based brake detection, automatic brightness adjustment, and a mount that won’t rotate under load. That combination does more for your safety than any single lumen figure. If you want a US-available option built around those priorities, the FRAME FLASH from Thebeamofficial belongs at the top of your list.
Why those three features matter most:
- Brake detection fires a brightness spike the instant you slow down, giving drivers behind you a distinct visual cue rather than a steady glow they’ve already tuned out
- Auto brightness keeps you visible in daylight without draining the battery at night
- A stable mount preserves your effective warning distance; a light that rotates 20 degrees under load loses a significant portion of its forward-facing beam
Pro Tip: Before you buy, simulate a hard stop with the light in your hand and watch for the brake-flash response. If it takes more than half a second or doesn’t noticeably brighten, the sensor is too slow for city traffic.
Key Takeaways
Smart rear bike lights deliver real safety gains when brake detection, mounting stability, and auto-brightness work together — not when any single spec is maximized in isolation.
| Point | Details |
|---|---|
| Brake detection over lumens | A brightness spike on deceleration alerts drivers at the critical moment; peak lumen count alone does not. |
| IP rating and USB-C are non-negotiable | IPX6 waterproofing and USB-C charging are the baseline for any light used in real commuting conditions. |
| Mount stability affects warning distance | A light that rotates under load loses effective beam coverage even at high lumen ratings. |
| Test on delivery, not on the road | Run the six-point check (brake flash, ambient sensor, mode memory, mount shake, battery indicator) before your first ride. |
| Thebeamofficial FRAME FLASH | Pairs with smart taillights as a passive reflector backup; available in the US through the Thebeamofficial accessories store. |
Table of Contents
- How do smart rear bike lights actually work?
- What specs actually matter when comparing smart taillights?
- How to choose a smart rear light: criteria and red flags
- Mounting, installation, and keeping it working
- What U.S. safety rules apply to smart rear bike lights?
- The Thebeamofficial FRAME FLASH: the recommended pick
- Six checks to run when your smart light arrives
- Why brake detection is the feature that actually saves you
- Get the FRAME FLASH and complete your visibility setup
- Sources and further reading
How do smart rear bike lights actually work?
The intelligence in a smart taillight comes from a small stack of sensors, not from a Bluetooth app. Most models combine at least two of the following: an accelerometer (detects deceleration), a gyroscope (tracks orientation changes), an ambient light sensor (reads surrounding brightness), and a vibration sensor (detects motion to trigger auto on/off).
The brake-detection logic works like this: the accelerometer monitors your deceleration rate continuously. When it crosses a threshold, typically a sustained drop in speed rather than a single bump, the firmware fires a high-brightness flash. Accelerometer-based detection is more reliable than pure vibration sensing because vibration alone triggers false positives on rough pavement. Models using a high-precision accelerometer, like those found in ultra-light designs weighing as little as 23 g with 280° visibility, tend to produce fewer phantom brake flashes on cobblestones.
Ambient-light auto-adjust is the feature most riders underestimate. A light that runs at full power in a dark tunnel and then dims automatically in bright afternoon sun extends battery life and keeps the output calibrated to what actually catches a driver’s eye in each condition.
Pro Tip: Test ambient-light response by covering the sensor with your thumb for three seconds, then uncovering it. The output should shift noticeably within one second. If it doesn’t, the sensor is either slow or absent.
What specs actually matter when comparing smart taillights?
The must-check features are brake-detection type, lumen output and visibility angle, battery capacity and runtime, charging type, IP rating, mounting options, mode memory, and a lock function. Here’s what typical ranges look like across the current market:
| Spec | Entry-Level Range | Mid-Range | High-End |
|---|---|---|---|
| Peak output (lumens) | 15 lm to 30 lm | 50–90 lm | 90+ lm |
| Brake-flash output | Marginal boost | 50–90 lm spike | 90+ lm spike |
| Visibility angle | 120°–180° | 180°–270° | 270° |
| Battery capacity | 100–250 mAh | 250 mAh to 400 mAh | 400 mAh to 560 mAh |
| Runtime (high mode) | 2–8 hrs | 8–20 hrs | 20 hrs to 100 hrs (eco) |
| IP rating | IPX4 | IPX5–IPX6 | IPX6+ |
| Charging | Micro-USB | USB-C | USB-C |
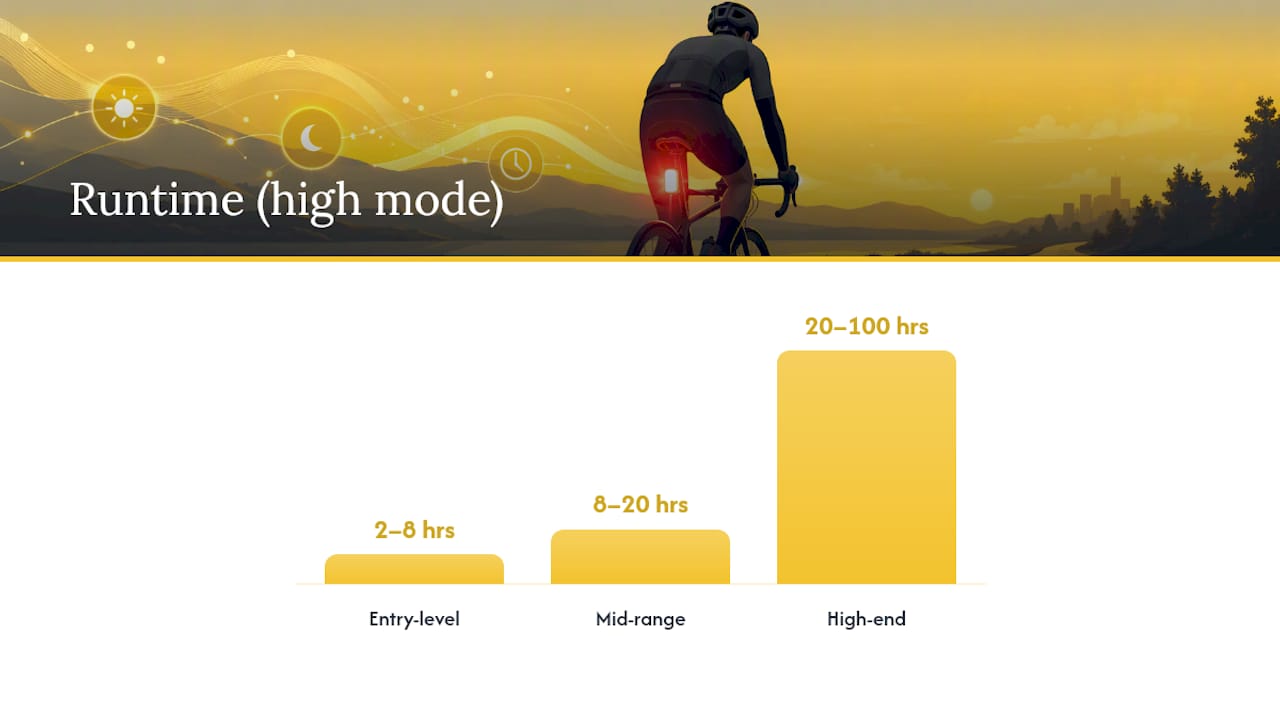
Battery capacities from 250–560 mAh are common across mid-range smart taillights, with runtime ranging from around 8 hours in high mode to over 100 hours in eco modes. High-end models like the SEEMEE 300 add motion-sensor auto on/off and ambient-light auto-dimming on top of those specs.
Mode behavior matters as much as peak output. A good smart taillight offers at least: steady, flashing, intensified brake flash, and a stationary distress flash. Mode memory (the light returns to your last setting after power-off) and a lock function (prevents accidental activation in a bag) are small features that become genuinely useful on daily commutes.
Visibility angle is often undersold. A 270° spread means drivers approaching from the side at intersections can see you. A 120° beam is fine for straight roads, not for urban riding.
How to choose a smart rear light: criteria and red flags
Prioritize brake-detection quality, mounting security, and auto-brightness over maximum lumen claims. A light that flashes 90 lumens on braking and sits rock-solid on your seatpost outperforms a 150-lumen unit that wobbles and has no brake detection.
Red flags to watch for:
- “Motion sensing” described vaguely with no mention of accelerometer or gyroscope
- No IP rating listed, or only “splash resistant” with no standard cited
- Proprietary charging cable instead of USB-C
- No runtime figures broken down by mode
- No mode memory or lock function mentioned in specs
- Mounting hardware that relies on a single rubber strap with no secondary retention
Questions worth asking before you buy:
- Does brake detection use an accelerometer or vibration sensing, and can sensitivity be adjusted?
- What does the IP rating cover — full submersion, rain, or just splashes?
- What is the warranty period and return window if brake detection fails on delivery?
- Does the mount fit both 27.2 mm and 31.6 mm seatpost diameters?
Some ultra-light designs trade raw lumen output for wide-angle optics and specialized brake-flash algorithms, which is a reasonable trade-off for road cyclists who prioritize weight. For urban commuters, a heavier mount with better stability usually wins.
Pro Tip: Check whether the light’s mounting bracket is sold separately. If it is, that’s a sign the manufacturer expects the bracket to wear out — factor replacement cost into your total price.
Mounting, installation, and keeping it working
Mount securely to avoid rotation, then test brake-detection and auto-on before your first ride.
Installation steps by mount type:
- Saddle rail mount: Thread the bracket under both rails, tighten until the light doesn’t rotate when you twist it firmly with two fingers. Check clearance from the rear tire.
- Seatpost clamp: Match the bracket to your post diameter (27.2 mm or 31.6 mm are most common). Tighten to the torque spec if listed; finger-tight plus a quarter turn is a reasonable baseline.
- Rack mount: Use the supplied hardware and add a zip tie as a secondary retention point if the rack surface is uneven.
- Clip mount: Clip mounts are fast but rotate under load. Reserve them for casual rides; use a strap or clamp mount for commuting.
Maintenance checklist:
- Charge lithium batteries before they drop below 20% to extend cycle life
- Wipe the charging port and seals dry after wet rides before plugging in
- Inspect rubber straps every 30 days for cracking; UV exposure degrades them faster than water
- Check for firmware updates if the light pairs to an app; brake-detection sensitivity is sometimes tunable via software
Pro Tip: After installation, do a rolling brake test in a parking lot: ride at 10 mph and stop hard. The brake flash should fire within 0.3–0.5 seconds of deceleration onset. If it doesn’t, check that the light is mounted upright, not tilted more than 30 degrees from vertical.
The urban cycling protection guide from Thebeamofficial covers mounting preferences and accessory pairings in detail, including how to combine lights with reflectors for commuter setups.
What U.S. safety rules apply to smart rear bike lights?
Most U.S. states require a visible red rear light or reflector when riding at night, and smart taillights satisfy that requirement when they meet basic visibility standards. The specific language varies by state: California Vehicle Code, for example, requires a rear red reflector visible from 500 feet and a rear red light visible from 500 feet when riding after dark. Smart taillights with auto-brightness and brake detection exceed those minimums in most conditions.
Practical visibility best practices:
- Mount between 18 and 48 inches off the ground for maximum driver sightline coverage
- Use a 180°–270° visibility angle light for urban riding where cross-traffic is a real hazard
- Run a daytime flash mode on urban commutes; studies on driver attention consistently show flashing lights register faster than steady beams in daylight
- Never rely on the smart light alone when stopped — add a reflector for parked or stationary visibility
Pairing a smart rear light with high-visibility reflectors covers the gap when the battery dies or the light is in a bag. The urban cyclist safety checklist from Thebeamofficial lists intelligent rear lights as essential urban safety gear alongside reflectors and helmets.
Pro Tip: If you ride in multiple states, default to the strictest standard you know — typically 500 feet visibility for rear lights. A mid-range smart taillight at 50+ lumens with a 270° spread clears that bar comfortably in most conditions.
The Thebeamofficial FRAME FLASH: the recommended pick
The FRAME FLASH from Thebeamofficial is the brand’s high-visibility reflector and safety accessory, designed to integrate with the rest of the Beam safety system. Thebeamofficial positions it as a visibility-first accessory for urban and road cyclists, with a minimalist form factor that pairs well with a dedicated smart taillight.
Why it fits the buying criteria:
- Designed for high-visibility performance with a minimalist profile that doesn’t add bulk
- Pairs with smart taillights and helmets as part of a layered visibility system
- Available directly through Thebeamofficial’s US-facing e-commerce store
- Built by a brand whose entire product line focuses on cycling safety, from MIPS helmets to rear-view mirrors
Thebeamofficial’s FRAME FLASH reflectors are part of a broader accessories line that includes helmet add-ons and connected safety gear. For riders building a complete visibility setup, pairing the FRAME FLASH with a smart taillight covers both active (powered) and passive (reflective) visibility.
Pro Tip: Use the FRAME FLASH on your frame tubes in addition to a powered rear light. If your battery dies mid-ride, the reflectors keep you visible to headlights without any power source.
For riders also considering outdoor headwear for sun and weather protection on longer rides, pairing the right cap with a helmet and visibility accessories rounds out a practical commuter kit.
Six checks to run when your smart light arrives
Run these immediately. They take under five minutes and confirm the light works before you depend on it in traffic.
- Power-on check: Hold the button until the light activates. Confirm the indicator shows battery level and the default mode is what you expect.
- Brake-detection test: Hold the light in your hand, accelerate it forward, then decelerate sharply. The output should spike within half a second. Repeat three times.
- Ambient-light test: Cover the sensor with your thumb for five seconds, then uncover it. Brightness should shift noticeably within one second.
- Mode-memory test: Cycle to your preferred mode, power off, wait 10 seconds, power back on. Confirm it returns to that mode.
- Mount-shake test: Install the light and grip the mount firmly. Twist and push. If it rotates more than a few degrees, tighten or adjust before riding.
- Battery-indicator check: Charge to full, confirm the indicator shows full charge, then run the light in high mode for 10 minutes and recheck the indicator.
Pro Tip: If brake detection fails the test, record a short video showing the failed response before contacting support. Most warranty claims for sensor failures are processed faster with video evidence than with a written description alone.
What to document for a warranty claim:
- Video of the failed brake-detection test (three attempts minimum)
- Photo of the mount showing the light’s orientation
- Screenshot of the order confirmation with purchase date
Why brake detection is the feature that actually saves you
The conventional wisdom on smart bike lights focuses on lumens. More lumens, more visible, safer. That’s not wrong, but it misses the point.
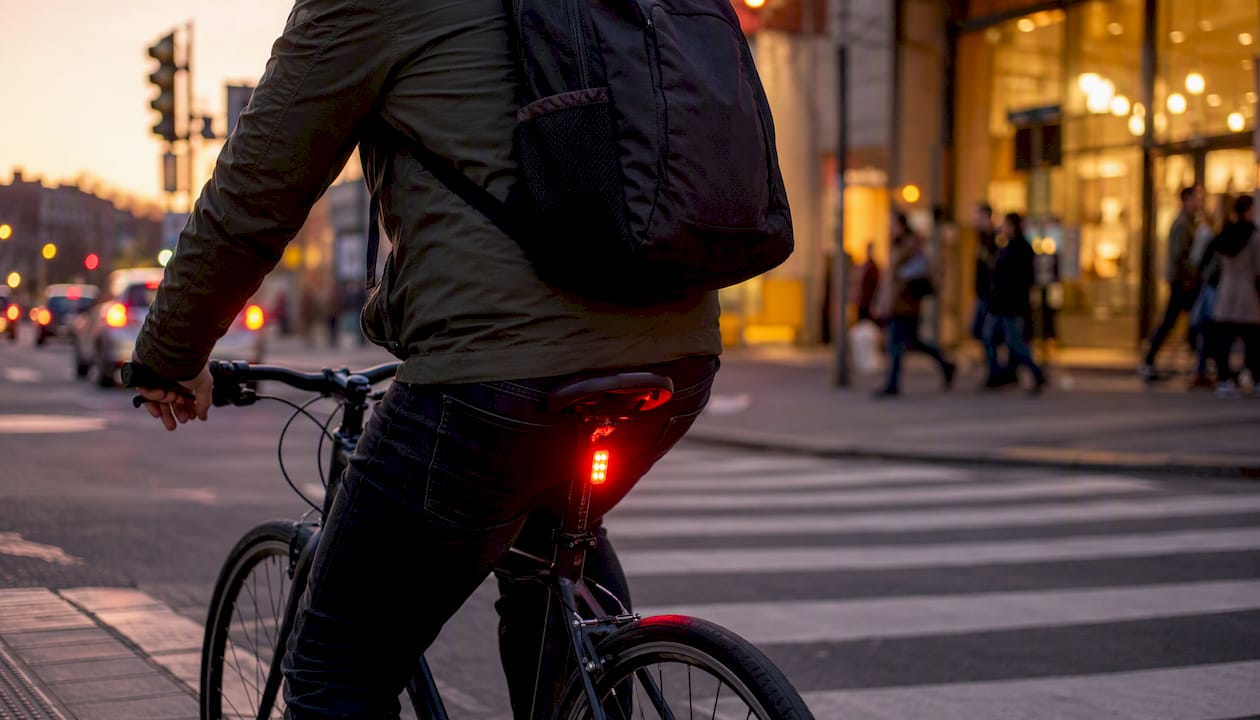
A driver following you at 40 mph has roughly two seconds to react before closing the gap you create when you brake hard. A steady 100-lumen light gives them the same visual input at the moment of braking as it did 30 seconds before. A brake-detection flash that spikes from 30 to 90 lumens in under half a second gives them a new signal at exactly the moment they need it.
The spike is the point. Not the peak number.
What most riders also underestimate is mounting stability. A light that rotates 20 degrees under load on a rough road is effectively pointing at the sky or the pavement for stretches of your ride. The role of smart sensors in bike safety matters only when the light is aimed correctly. Mounting security and sensor quality are equally important, and most buyers check one while ignoring the other.
The riders who benefit most from a smart taillight are urban commuters stopping at lights every two minutes and road cyclists on fast descents where following drivers have less reaction time. For a casual weekend path rider, a basic flashing light is probably fine. For anyone mixing with car traffic regularly, brake detection isn’t optional.
Get the FRAME FLASH and complete your visibility setup

Thebeamofficial ships the FRAME FLASH and its full accessories line to the United States directly through its e-commerce store. The brand’s safety-first design philosophy runs through every product, from MIPS-certified helmets to the FRAME FLASH reflectors built to pair with smart taillights.
For riders building a complete visibility system, the all accessories collection is the right starting point. You’ll find the FRAME FLASH alongside helmet add-ons, rear-view mirrors, and connected safety gear, all designed to work together. If you’re also in the market for a helmet, the adults’ helmets collection covers road, urban, and e-bike options with MIPS protection.
Visit Thebeamofficial to check current availability, review the return policy, and place your order directly.
Sources and further reading
- Urban cyclist safety checklist: Essential tips and gear – The Beam
- Urban cycling protection guide: gear for safety and style – The Beam
- All Accessories – The Beam
This article provides general information on smart rear bike lights and visibility accessories. Specific state and local regulations on bicycle lighting vary. Confirm current requirements with your local vehicle code or a qualified legal source before riding.


