

For most commuters and road riders, a MIPS-equipped helmet, a bright front light, a visible rear light or camera, and a compact commuter kit are the non-negotiables. That’s the short answer. CPSC certification is the legal floor in the United States, NHTSA recommends helmets on every ride, and Virginia Tech helmet testing shows rotational-mitigation tech consistently outperforms conventional foam liners. Here’s the full cycling safety equipment checklist:
- Helmet: CPSC-certified, with MIPS or equivalent rotational-mitigation tech
- Lights: Daytime-visible front light (400+ lumens), bright rear light (50+ lumens)
- Rear awareness: Rear-facing camera or handlebar/glasses mirror
- Commuter kit: Spare tube, mini pump, multi-tool, lock, ID
Pro Tip: Buy the helmet first. No light or camera compensates for a head injury from a crash without proper protection.
Key Takeaways
A MIPS-equipped, CPSC-certified helmet combined with active front and rear lights, a rear awareness device, and a two-minute ABC pre-ride check covers the vast majority of preventable cycling incidents.
| Point | Details |
|---|---|
| Helmet first, always | Buy a CPSC-certified, MIPS-equipped helmet before any other safety item. |
| Active lights beat reflectors | Run a 400+ lumen front light and 50+ lumen rear light; charge after every ride. |
| Camera plus mirror | A seatpost rear camera deters close passes; a mirror adds zero-battery awareness. |
| ABC check every ride | Air, Brakes, Chain — two minutes before rolling catches the failures that cause crashes. |
| Thebeamofficial VIRGO | THE BEAM’s MIPS-equipped VIRGO helmet and accessory range cover the full recommended kit. |
Table of Contents
- What should you look for in a cycling helmet?
- How do you choose and position lights and reflectors?
- Rear camera or mirror: which one do you actually need?
- What goes in a commuter kit, and how do you run the ABC check?
- How do you build a buying checklist by rider type and budget?
- Why THE BEAM built its gear around these exact priorities
- THE BEAM’s ready-to-buy safety kit
- Sources
What should you look for in a cycling helmet?
The single most important upgrade you can make to your helmet is rotational-mitigation technology. Standard EPS foam absorbs linear impact well, but most real-world crashes involve an oblique hit that generates rotational forces — and those are the forces most strongly linked to concussions and traumatic brain injuries.
Multiple peer-reviewed studies confirm the difference. MIPS significantly reduces peak rotational acceleration (PRA) in lab impact tests versus conventional EPS liners, with results reaching statistical significance (p < 0.01) across multiple test conditions. A separate overview of bicycle helmet designs found that MIPS and WaveCel both showed significantly lower PRA and GAMBIT scores than conventional helmets across many drop-test datasets. Controlled drop-test research also shows that performance varies by impact location and velocity, so no single technology is perfect — but all tested rotational systems outperformed bare EPS in most conditions.
CPSC certification is the U.S. legal minimum. Rotational tech sits on top of that standard — it doesn’t replace it. When you shop, look for both: the CPSC sticker inside the shell, plus a MIPS badge or equivalent system listed in the specs.
Fit checklist:
- Helmet sits two finger-widths above your eyebrows
- Side straps form a V just below each ear
- Chin strap allows only two fingers between strap and chin
- Retention dial (if present) snugs the back of the skull without pressure points
- Try with your normal riding hair or liner; sizing can shift by half a shell size
Replacement rules: Replace after any crash, even with no visible damage — internal EPS structure can be compromised without cracking the shell. Replace every 5–10 years per manufacturer guidance, or sooner if the liner feels soft or the shell shows crazing.
Pro Tip: A heavier helmet you never wear is worse than a lighter one you wear every ride. Test ventilation and weight before buying — comfort drives consistency.
How do you choose and position lights and reflectors?
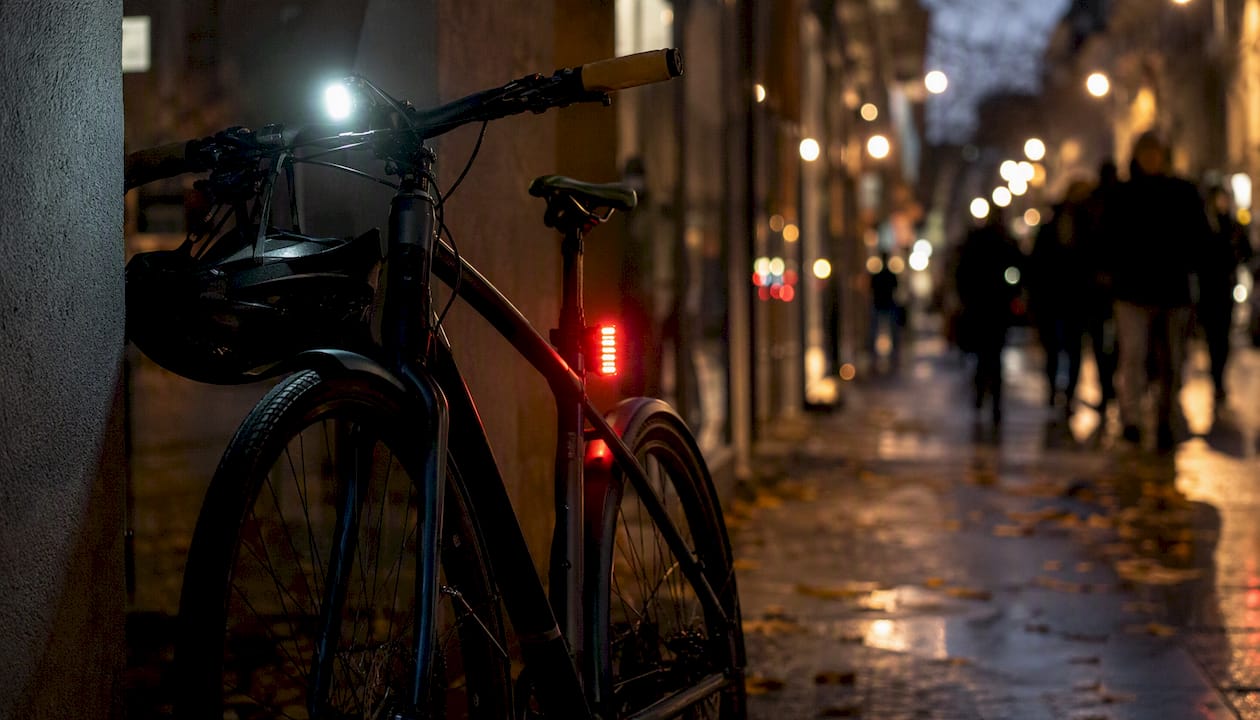
Active lights beat passive reflectors at night. A rear light visible from 200+ feet materially increases driver reaction time, and a daytime-visible front light reduces your risk in low-sun and overcast conditions when reflectors are nearly useless.
Practical specs by use case:
Flash mode improves daytime conspicuity. Steady mode is better at night because oncoming drivers can judge your distance more accurately. Many riders run flash during the day and switch to steady after dark.
Battery management: Charge lights after every ride if you commute daily. A light that dies mid-route is worse than no light at all — it creates false confidence. Aim for lights with USB-C charging and at least 6 hours of runtime at your typical mode.
Passive reflectors and clothing:
- Reflective tape on fork legs, chainstays, and helmet sides adds 360-degree visibility at low cost
- High-visibility vests with retroreflective strips are the fastest upgrade for low-light commuting
- Helmets with integrated reflectors (rear and side panels) eliminate one mounting decision
Pro Tip: If you want one-mount simplicity, look for an integrated rear camera-light unit. One charge, one mount, one routine.
Rear camera or mirror: which one do you actually need?
Both. But if you can only pick one, the choice depends on your riding environment.
A rear-facing camera provides evidence after an incident and acts as a deterrent. Research suggests drivers give more room to cyclists they perceive to be recording, and visible cameras can increase passing distance. A mirror gives you instant, zero-battery situational awareness with no charging or setup.
Mirrors — pros and cons:
- Instant glance, no battery, no setup
- Low cost, lightweight, works in any weather
- Blind spots exist; requires practice to read accurately
- Handlebar mirrors vibrate on rough roads; glasses-mounted mirrors stay stable
Rear cameras — pros and cons:
- Deterrent effect on close-passing drivers
- Video evidence if you’re involved in an incident
- Requires charging, adds weight, costs more
- Loop recording prevents storage from filling; incident detection auto-saves clips
Practical camera specs to prioritize: Seatpost mounting gives the most stable rear footage. Target 5–7 hours of battery life for a full commute day. Resolution should be high enough to read a license plate at 30 feet. Loop recording and incident detection (G-sensor triggered) are worth paying for.
Mirrors and cameras are aids, not replacements for shoulder checks and good lane positioning. Use them together with active scanning.
Pro Tip: Buy a seatpost rear camera first if you’re starting from scratch. If you already run a front action camera, add a mirror for rear awareness — the two complement each other without overlap.
What goes in a commuter kit, and how do you run the ABC check?
A solid commuter kit takes about 90 seconds to pack and covers the failures that actually strand riders.
The ABC pre-ride check (takes under two minutes):
- Air: Squeeze both tires. Road tires should feel rock-hard; MTB/gravel tires firm but with slight give. Pump to the PSI printed on the sidewall.
- Brakes: Squeeze each lever. Neither should reach the handlebar. Spin each wheel and apply the brake — it should stop cleanly with no rubbing at rest.
- Chain: Spin the cranks. The chain should run smoothly with no skipping or grinding. Check for stiff links by backpedaling slowly.
Stop-riding criteria: Brake lever touches the bar = do not ride. Tire won’t hold pressure = do not ride. Chain skips under load = do not ride. These aren’t judgment calls.
The ABC check is an industry-standard pre-ride routine that catches the mechanical failures most likely to cause crashes or leave you stranded.
Commuter kit essentials:
- Spare inner tube (correct size for your wheel)
- Tire levers (two)
- Mini pump or CO2 inflator
- Multi-tool with hex keys and chain tool
- Rear light (backup)
- Lock (U-lock or folding lock rated for your area)
- ID and emergency contact info
- Small first-aid item (adhesive bandages, antiseptic wipe)
E-bike riders: Add a battery charge check to the ABC routine. Verify assist mode is set for your route’s terrain, and if you’re carrying cargo, check that racks and panniers are secured before rolling.
How do you build a buying checklist by rider type and budget?
Buy in this order: helmet first, then lights, then rear awareness device, then commuter kit extras. Every other item is secondary to head protection.
Step-by-step buying checklist:
- Confirm your primary use (commute, road, gravel, e-bike) — it determines lumen needs and helmet style
- Measure your head circumference and match to the manufacturer’s size chart before ordering
- Verify CPSC certification and check for MIPS or equivalent rotational tech in the spec sheet
- Test the fit with your normal riding hair; check the retention system and strap V
- Run one short road test before committing — a helmet that causes pressure points won’t get worn
- Check battery life and mounting compatibility for lights and cameras before checkout
- Read the return and warranty policy; helmets with crash-replacement programs offer real long-term value
Price ranges (approximate, USD):
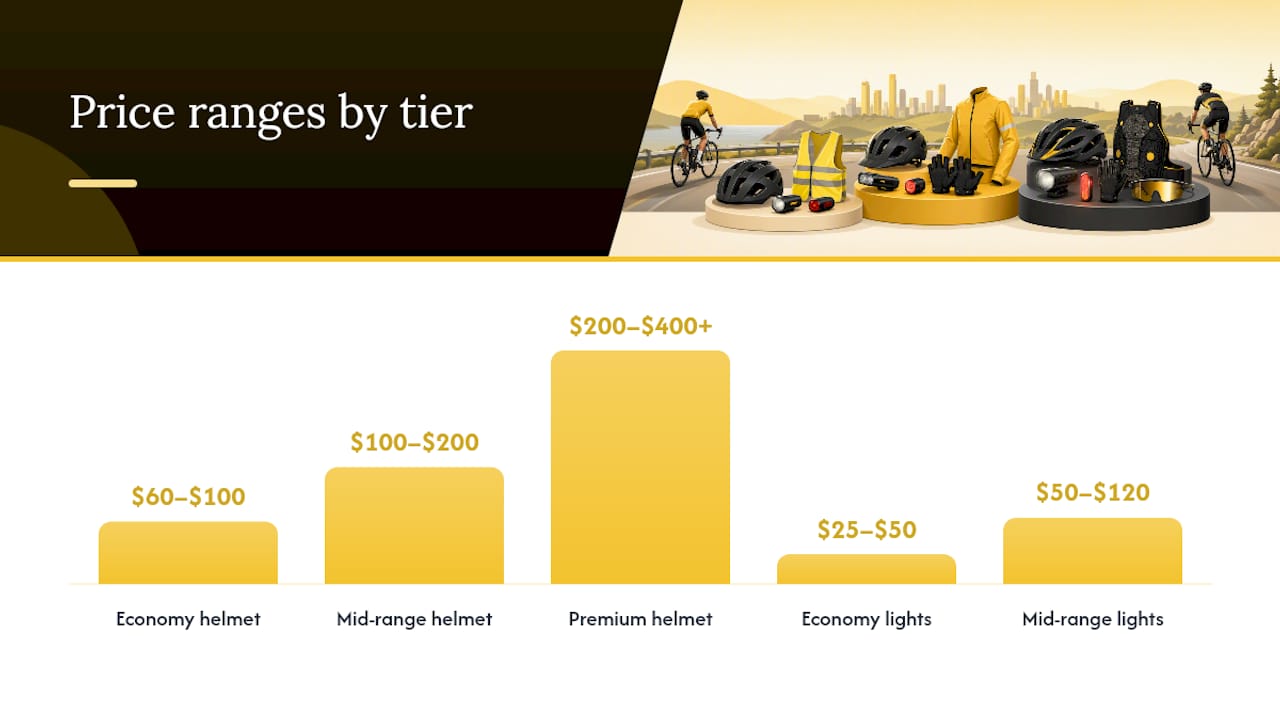
- Economy: Helmet $60–$100, lights $25–$50 per unit, basic mirror $15–$30
- Mid-range: Helmet $100–$200, lights $50–$120 per unit, rear camera $80–$150
- Premium: Helmet $200–$400+, integrated camera-light systems $150–$300, full-face MIPS helmets $300+
Weight and comfort drive real-world safety more than spec sheets do. A 50-gram lighter helmet worn on every ride protects you more than a heavier one left at home.
Pro Tip: For urban cyclist safety, prioritize a helmet with integrated rear reflectors and a compact rear camera. You get passive and active visibility in one setup.
Why THE BEAM built its gear around these exact priorities
The safety gap that motivated THE BEAM wasn’t a lack of helmets on the market. It was a lack of helmets that took rotational-force mitigation seriously while remaining wearable enough for daily use. The VIRGO integral helmet addresses that directly: full-face protection, MIPS technology, and a design built for road, gravel, urban, and e-bike riders who won’t compromise on either protection or comfort. You can read more about how MIPS technology works and why THE BEAM integrates it across its helmet range.
The accessory range follows the same logic. Rear-view mirrors, high-visibility reflectors, and connected products exist because a great helmet is only one layer of a complete safety setup. THE BEAM’s products are designed to work together as a system, not as isolated purchases.
THE BEAM’s ready-to-buy safety kit
THE BEAM offers a direct path to the recommended gear in this guide. The VIRGO MIPS helmet, rear-view mirrors, and visibility accessories are available through the brand’s e-commerce platform, shipping to the U.S. and Europe with clear warranty and return policies.

Start with the VIRGO helmet if you’re upgrading head protection, then add a rear mirror or connected visibility accessory from the THE BEAM range. For riders planning longer events or ultracycling challenges, the THE BEAM event page connects you to the brand’s community and full product lineup. Every order ships internationally, and the brand’s crash-replacement guidance means your investment is protected beyond the first ride.
Sources
- An overview of the effectiveness of bicycle helmet designs in impact testing
- Evaluation of two rotational helmet technologies to decrease peak rotational acceleration in cycling helmets
- Bike safety checklist — Icebike
- Cycling & bike camera safety guide


