
TL;DR:
- Your helmet’s internal foam is designed for only a single impact and may be compromised even without visible damage.
- Cyclists should replace their helmets immediately after any crash, inspect regularly for cracks or strap failure, and follow the 3 to 5-year recommendation to ensure safety.
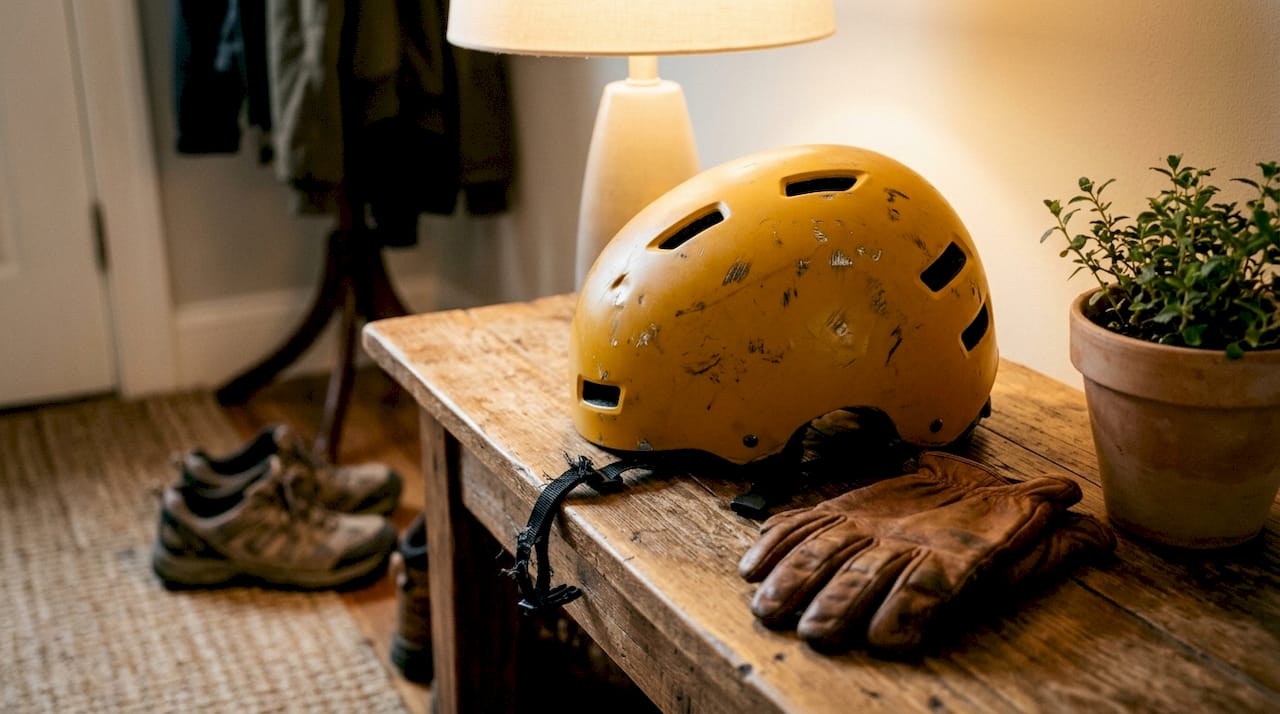
Your helmet may look fine from the outside, but the foam inside tells a different story. Most cyclists have no idea that EPS foam, the material that actually absorbs impact, is designed for a single crash. After that, it’s done. This bike helmet replacement guide walks you through exactly when to replace your helmet, how to inspect it for hidden damage, and how to choose a certified replacement that genuinely protects you. Whether you ride daily or on weekends, the decisions you make about your helmet directly affect your safety on every ride.
Table of Contents
- Key takeaways
- Your bike helmet replacement guide: when damage demands action
- How to inspect your helmet for wear and damage
- Understanding helmet age and manufacturer timelines
- Choosing a new helmet: certifications, fit, and features
- Maintenance and storage to extend helmet life
- My honest take on helmet replacement
- Ready to upgrade your protection?
- FAQ
Key takeaways
| Point | Details |
|---|---|
| Replace after any crash | Even without visible damage, internal foam may be compromised and no longer protective. |
| Inspect regularly at home | Check for foam cracks, UV fading, strap fraying, and fit issues before every season. |
| Follow the 3 to 5 year rule | Most manufacturers recommend replacement every 3 to 5 years due to material wear and safety advances. |
| Certification labels matter | A valid CPSC or CE label inside your helmet confirms it meets current protection standards. |
| Fit is as critical as foam | A loose helmet shifts during a crash and misses the protection zones it was designed for. |
Your bike helmet replacement guide: when damage demands action
The single most misunderstood fact about bike helmets is their design limit. Single-impact foam design means EPS liner can absorb one major crash before its protective structure collapses permanently. You cannot see this damage from the outside. The shell may look pristine, the straps perfectly intact, but the foam has already done its job and cannot do it again.
Here are the conditions that require immediate replacement:
- Any crash or impact. If your helmet hit the ground, a car, a curb, or anything with force during a fall, retire it now. This applies whether the accident happened at 5 mph or 25 mph.
- Visible shell damage. Dents, deep scratches, or small cracks around vent openings are signs of structural compromise. Run your fingers along the edges and around each vent.
- Foam separation or cracking. Peel back the comfort liner and check whether the EPS foam has cracked, separated from the shell, or shows any white stress marks.
- Retention system failure. If your buckle cracks, won’t click flat, or your straps fray and lose tension, the helmet will not stay in place during a crash. A loose helmet shifts off your protection zones the moment it matters most.
- Missing certification labels. No CPSC sticker, no CE mark, no EN 1078 label? That helmet belongs in the trash, regardless of how it looks or how old it is.
- Pre-2000 helmets. Helmets from the 1970s through the late 1990s predate modern safety standards entirely. If you found one in a garage or inherited it, it does not provide meaningful protection by today’s criteria.
Pro Tip: If you’re unsure whether your helmet took a significant impact, hold it up to a bright light and flex the shell gently with both hands. Any crackling sound or visible whitening in the foam means the structure is compromised. When in doubt, replace it.
The urgency here is not manufacturer fearmongering. It’s physics. You wouldn’t trust a deployed airbag to deploy again. Your helmet works on the same principle.
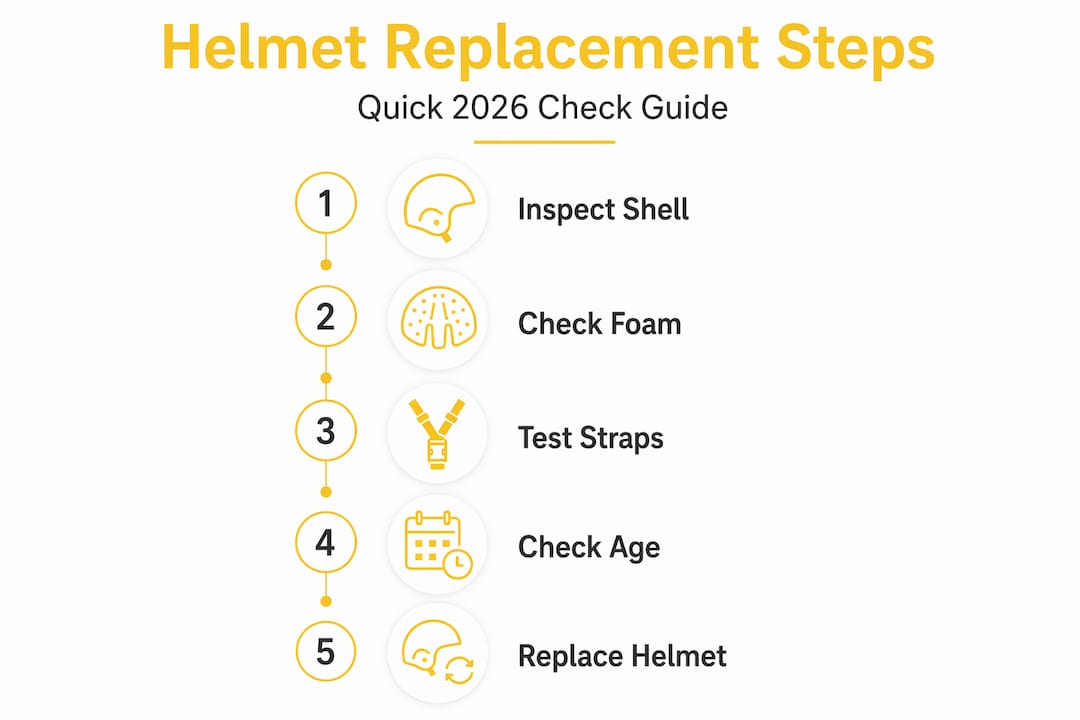
How to inspect your helmet for wear and damage
A thorough inspection takes about five minutes. Do it at the start of every riding season and after any incident. Here is a step-by-step process you can do at home:
- Remove the comfort padding. Most pads attach with Velcro and pull off easily. Set them aside so you can see the bare EPS foam.
- Check the outer shell. Look for fading, yellowing, or chalky patches. UV degradation signs like these indicate the plastic is weakening. Pay special attention to vent edges, where stress concentrates.
- Inspect the EPS foam. Look for cracks, compressed areas, or places where the foam has pulled away from the inner surface of the shell. Press lightly on different areas. It should feel uniformly firm, not soft or hollow in spots.
- Test the retention straps. Pull each strap firmly. It should hold without stretch or slip. Check for any fraying, cuts, or stiffness that would prevent adjustment. Nylon degrades over time and loses elasticity.
- Check the buckle. Click it open and shut several times. It should snap cleanly and lie flat against your chin without pinching. Any cracking in the plastic warrants replacement.
- Perform the shake test. Put the helmet on and fasten it as normal. Shake your head vigorously side to side and front to back. If the helmet shifts more than an inch in any direction, the fit is compromised.
- Verify the certification sticker. Look inside the helmet for a CPSC certification label or the equivalent standard for your region. Faded, missing, or unreadable labels should raise concern.
Pro Tip: Take photos of your helmet during each inspection, including close-ups of the foam and shell. You’ll be able to compare season over season and catch gradual degradation you might otherwise miss.
For a deeper breakdown of what to look for, helmet wear signs are worth reviewing in detail before your next inspection.
Understanding helmet age and manufacturer timelines
There is no law that says your helmet expires on a specific date. But replacement every 3 to 5 years is the consensus recommendation across most manufacturers and safety organizations. The reasons are more nuanced than a simple countdown.
| Factor | Effect on helmet lifespan |
|---|---|
| Daily commuting use | Accelerates wear on straps, buckles, and foam padding from heat and sweat |
| UV and heat exposure | Degrades outer shell plastics and adhesives; visible fading signals real material loss |
| Infrequent use and proper storage | May allow a helmet to remain structurally sound closer to or beyond 5 years |
| Sweat and moisture | Foam stability under sweat is well established; foam does not degrade from sweat alone |
| Advances in safety tech | Newer helmets include MIPS or similar systems not available in older models |
The honest answer is that age alone is not a reliable trigger. Condition and use history matter more. A five-year-old helmet ridden three times and stored indoors in a cool dry space may be in better shape than a two-year-old helmet worn daily in summer heat and left in a hot car repeatedly.
That said, helmet lifespan guidance exists for a reason. Material science has limits, and even undamaged foam can lose some performance characteristics over time as the binder agents in EPS slowly break down. Use the 3 to 5 year window as a prompt to inspect carefully, not as a hard expiration date.
Choosing a new helmet: certifications, fit, and features
Knowing when to replace is only half the work. Choosing the right replacement is where many cyclists make costly mistakes, usually by prioritizing style over protection standards.
Start with certifications. Any helmet sold for cycling in the United States must carry a CPSC sticker. European markets require CE marking under EN 1078 or EN 1080 for children. If you’re buying online, confirm the listing explicitly states the applicable standard. A cycling helmet certification confirms the helmet was independently tested to withstand impact at defined energy levels. Without it, you’re buying a decorative shell.
Here is what to evaluate when selecting a replacement:
- Head circumference. Measure at the widest point, roughly one inch above your eyebrows. Use a flexible tape measure and check against the size chart for any helmet you’re considering.
- Fit on your head shape. Round, oval, and long oval heads fit differently in the same size. Try the helmet before purchasing if possible.
- Strap geometry. The straps should form a clean V shape just below your ear. The chin strap should hold two fingers flat, not loose and not pinching.
- Intended use. A commuting helmet looks different from a road racing helmet and an e-bike helmet. E-bike riders travel faster and face higher impact forces. Look for helmets certified to higher speed standards like NTA 8776 or EN 1078 extended ratings.
- MIPS or rotational impact technology. MIPS protection advances address angled impacts, which cause most real-world brain injuries. If your current helmet lacks this technology, upgrading to one that includes it is a genuine safety improvement, not just marketing.
Pro Tip: After fitting a new helmet, wear it indoors for 20 minutes before committing to the purchase. Pressure points that feel minor at first often become painful on longer rides. A helmet you find uncomfortable will be worn loosely or not at all.
Maintenance and storage to extend helmet life
The goal of proper care is not to avoid replacement indefinitely. It’s to keep your helmet performing at its designed protection level for as long as it genuinely can. That distinction matters.
Follow these practices to get the most out of your current helmet:
- Store away from heat and sunlight. UV light degrades polycarbonate shells and accelerates adhesive breakdown. Keep your helmet in a bag, in a closet, or under a cover. Never leave it on a car dashboard or in a hot trunk for extended periods.
- Clean with mild soap and water only. Solvents, alcohol-based sprays, and harsh degreasers break down the foam bonding agents and the shell. A damp cloth with a small amount of dish soap handles most residue effectively.
- Don’t hang your helmet by a strap. Prolonged tension on a single strap point can stress the webbing and distort buckle alignment over time. Store it resting naturally, flat or in a helmet bag.
- Replace comfort pads when they degrade. The padding does not protect you directly, but padding that compresses flat changes how the helmet sits on your head. Most manufacturers sell replacement pads for their models.
- Inspect retention components every few months. Buckles, adjustment dials, and strap sliders take daily abuse. Catching a cracked buckle during routine helmet maintenance checks is far better than discovering it during a ride.
Pro Tip: Remove your helmet’s comfort pads and wash them separately in a mesh laundry bag on a gentle cycle every month during heavy use seasons. Fresh pads restore helmet fit and eliminate odor without affecting the shell or foam at all.
My honest take on helmet replacement
I’ve reviewed a lot of helmets over the years, and the pattern I keep seeing is the same. Riders replace their helmets when they can see damage. Not before. That logic works for tires and cables, but it’s exactly backwards for helmets.
The whole point of EPS foam is that it crushes on impact to absorb energy before it reaches your skull. Once it’s done that, even once, the structure is gone. You cannot see it, you cannot feel it, and no amount of inspection will reveal it unless you cut the helmet open. That’s the uncomfortable truth most riders never sit with long enough to act on.
What I’ve found genuinely useful is treating helmet replacement less like a repair decision and more like a subscription to your own safety. Set a calendar reminder for every three years. Inspect after every crash, no matter how minor the fall felt. Retire the helmet without negotiating with yourself about whether the impact was “hard enough.”
The riders I’ve spoken with who hesitate to replace usually frame it as a cost issue. A quality certified helmet runs between $60 and $200 depending on features. That’s a rational investment relative to the alternative. If you’re spending money on a quality bike, a power meter, or carbon components, the helmet protecting everything above your shoulders deserves the same attention.
— Sophie
Ready to upgrade your protection?
If this guide confirmed that your helmet needs replacing, the next step is finding one you’ll actually trust on every ride. Thebeamofficial designs certified helmets built for real-world cycling, from daily urban commutes to longer road and gravel rides.

Their range of certified adults’ helmets includes options with MIPS technology, adjustable retention systems, and CPSC and CE compliance built in. For families replacing helmets at once, their kids’ helmets collection offers certified protection sized for younger riders. Every helmet in their lineup ships with the certification documentation you need to confirm compliance before your first ride. Pair any helmet with a high-visibility reflector from their safety accessories range for complete visibility on the road.
FAQ
When should I replace my bike helmet after a crash?
Replace your helmet immediately after any crash where your head hit a surface, even at low speed. EPS foam is single-use by design and cannot reliably absorb a second impact after the first.
How do I know if my helmet still fits correctly?
Put the helmet on and shake your head firmly in all directions. If the helmet shifts more than one inch or feels loose at any point, the fit is no longer adequate and the helmet should be replaced or refitted with a proper size.
What certifications should my new helmet have?
In the United States, look for the CPSC sticker. In Europe, look for CE marking under EN 1078. Certification labels confirm the helmet was independently tested and meets current impact protection standards.
Does sweat damage my bike helmet over time?
No. Lab testing consistently shows that EPS foam is stable when exposed to sweat and moisture. The greater risks are UV exposure and heat, which degrade the outer shell and adhesives. Store your helmet away from direct sunlight to preserve its structure.
How often should I replace my bike helmet if I haven’t crashed?
Most manufacturers and safety organizations recommend replacement every 3 to 5 years, factoring in UV exposure, material aging, and advances in protection technology. Conduct a thorough inspection each year and replace sooner if you detect any damage, fit changes, or missing certification labels.


