

Lock the frame (not just a wheel) to an immovable object using a hardened U-lock, then remove every detachable high-value accessory before you walk away. That’s the short version. Here’s the complete picture for riders who’ve invested in premium kit.
Before you leave your bike unattended, run through these steps:
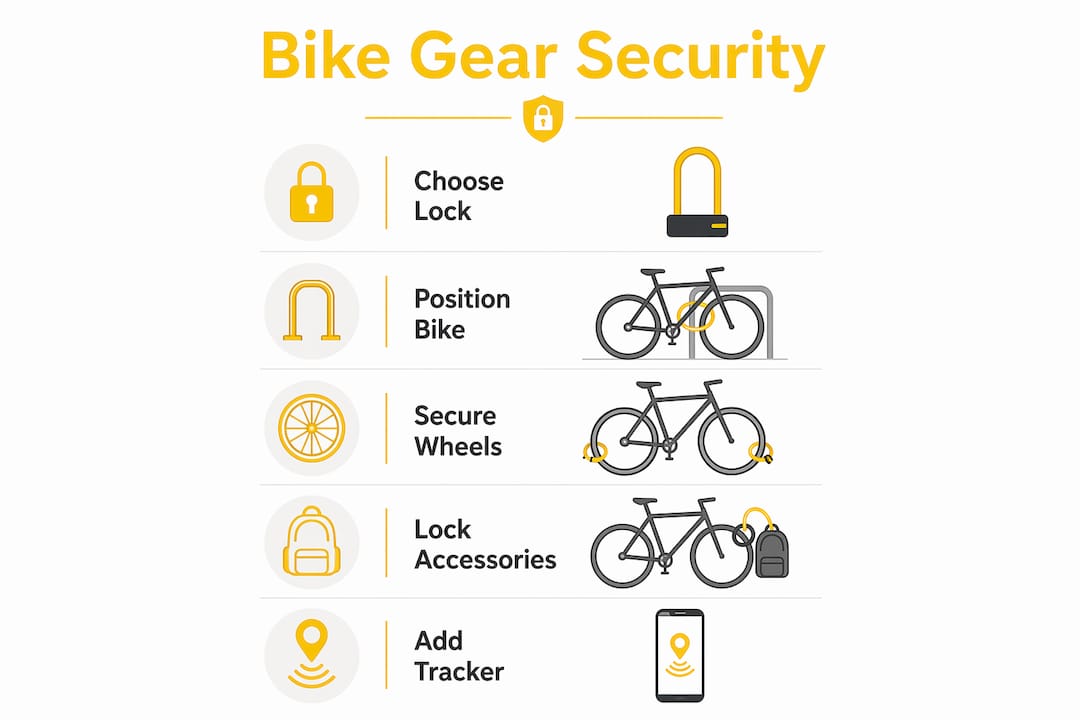
- Lock the frame first. Route your primary U-lock through the rear triangle and rear wheel, anchored to a fixed rack or post. A secondary cable or chain captures the front wheel.
- Remove everything detachable. Lights, GPS units, cameras, and bags come off every time. Never rely on accessory locks alone for high-value electronics.
- Replace quick-release skewers. Swap wheel and seatpost quick-releases for keyed security skewers. A thief can strip a quick-release wheel in seconds.
- Register and track. Add your bike to Bike Index and hide a GPS tracker in the steerer tube or seat tube for recovery if the worst happens.
- Carry your helmet. A premium helmet like the THE BEAM VIRGO integral helmet should never be left on the bike. Carry it or lock it inside a bag.
Pro Tip: Leave your bike in a high gear and secure the brake levers with a hair tie or Voile strap. It won’t stop a determined thief, but it creates immediate friction that deters opportunists during short stops.
Table of Contents
- How do thieves actually target bikes and gear?
- How to lock your bike on the street
- Which components should you harden with security skewers?
- How to protect lights, GPS, cameras, bags, and your helmet
- How to store your bike at home overnight
- What to do when your bike is stolen
- Monthly security checks that keep your setup working
- Your pre-park checklist
- Key Takeaways
- The habit gap nobody talks about
- Gear that fits your security workflow
- Useful sources and registries
How do thieves actually target bikes and gear?
Theft is fast and selective. A thief scanning a rack isn’t looking for a challenge — they’re looking for the easiest win. Security is a relative deterrent; the practical goal is to make your bike slower and harder to steal than the one next to it.
Quick-release wheels can be removed very quickly. Saddles, lights, and GPS units are stripped just as fast. Locking only the front wheel is one of the most common and costly mistakes — a thief simply removes the wheel and rides off with the rest of the bike.
High-end helmets and connected accessories raise the stakes. A VIRGO helmet, a rear-view dashcam, or a premium GPS unit are prime resale targets. Owning visible, high-value kit makes your bike more attractive, not less. Residential and shared-space thefts account for a large share of overall bike thefts — garages, shared hallways, and apartment bike rooms are not safe by default.
- Thieves exploit quick-release hardware, unlocked saddles, and visible accessories
- Shared parking areas carry higher risk than most riders assume
- Premium connected accessories increase resale appeal and theft attractiveness
- The goal is deterrence and delay, not absolute protection
How to lock your bike on the street
Always anchor the frame. Specifically, route your U-lock through the rear triangle and rear wheel to a fixed rack. Fill the shackle tightly — the less empty space inside, the harder it is to insert a pry bar or bottle jack.
Step-by-step:
- Confirm the anchor is genuinely immovable. Tug it hard. Avoid loose signposts, thin meter posts, or wooden structures.
- Route the U-lock through the rear triangle and rear wheel, then close it around the rack.
- Secure the front wheel with a secondary cable or a second U-lock through the front wheel and frame.
- Position the lock off the ground with the keyhole facing down. Ground contact gives thieves leverage and exposes the keyway to rain.
- Do a quick pull test before walking away.
Lock selection matters. U-locks resist cutting and leverage attacks better than cable locks. Heavy chains are harder to cut but awkward to carry. Cable locks are secondary protection only — never a standalone solution. For urban commuting, a Sold Secure Gold-rated U-lock paired with a cable for the front wheel covers most scenarios. For overnight or long-duration parking, a heavy chain adds meaningful resistance.
Pro Tip: Lock mid-row on a rack, not at the end. End positions give thieves room to work. Mid-row forces them into a tighter, more visible space.
Which components should you harden with security skewers?
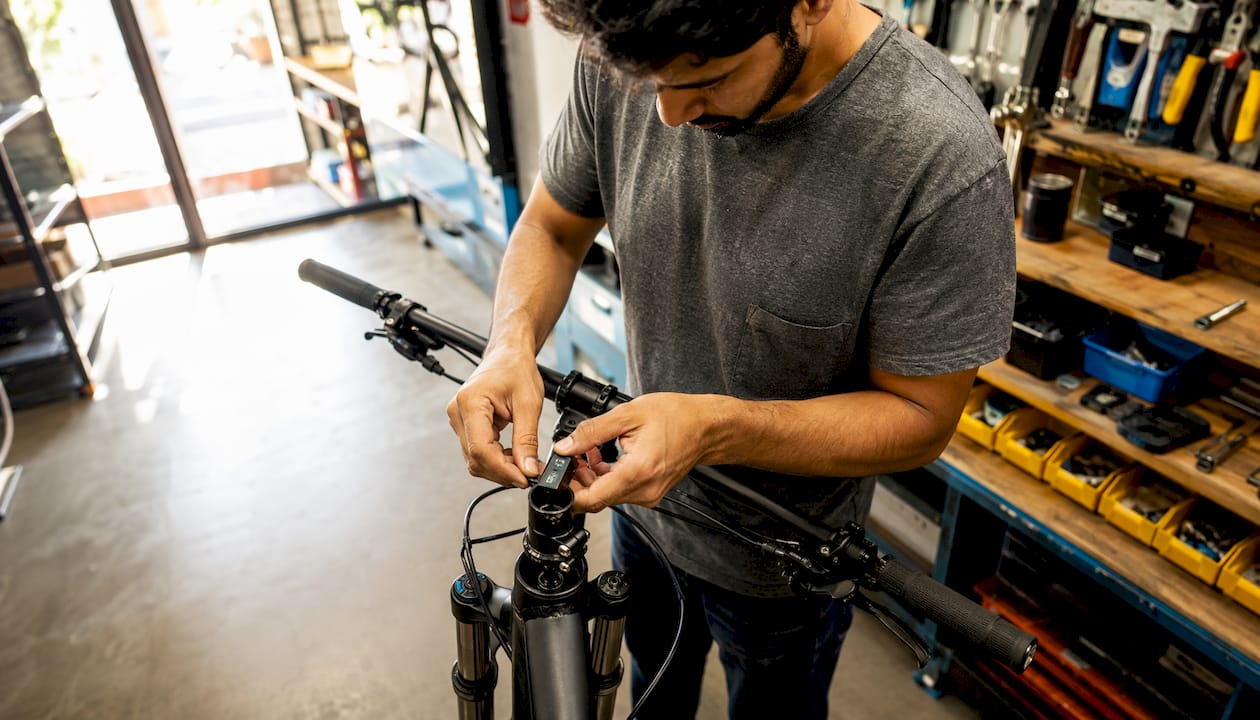
Replace every piece of quick-release hardware on the bike. As of 2026, experts recommend swapping quick-release wheel and seatpost skewers for keyed security skewers because thieves can remove standard hardware in seconds without any tools.
- Front and rear wheel skewers or axles — the most common theft point
- Seatpost clamp — saddles and posts are stripped fast and sell easily
- Saddle bolts — worth addressing on high-value saddles
- Stem and headset bolts — relevant on bikes with exposed cockpit hardware
A system approach is what separates real protection from a patchwork fix. One unsecured component is all a thief needs. Brands like Pinhead offer complete kits covering wheels, seatpost, and headset with a single proprietary key.
Installation notes: measure your axle standard before ordering, follow manufacturer torque specs (especially critical on carbon frames), and keep your original hardware until the new kit is tested and confirmed secure. Record your key codes somewhere separate from the bike.
Pro Tip: For headset or stem work that affects steering, have a qualified bike shop do the installation. Getting torque wrong on a carbon steerer is a safety issue, not just a security one.
How to protect lights, GPS, cameras, bags, and your helmet
Remove detachable accessories every time you leave the bike. That’s the rule. If removal isn’t possible for a very short stop, keep the bike in direct line of sight.
- Lights and cameras: unclip and pocket them. Takes five seconds.
- GPS and cycle computers: remove the head unit; leave the mount.
- Bags and panniers: detach and carry. For bags that stay on, use lockable zippers and a secondary cable through the mounting points.
- Removable e-bike batteries: use the manufacturer’s lock if available; remove the battery entirely when possible.
- Helmets: never leave a premium helmet on the bike. The THE BEAM VIRGO integral helmet is a high-value, easily grabbed item. Carry it inside with you or secure it in a locked bag.
For GPS trackers, hide them inside the steerer tube or seat tube where they’re not visible. Trackers are a recovery tool, not a theft prevention guarantee. If your bike is stolen and you have location data, share it with police. Do not attempt recovery yourself.
How to store your bike at home overnight
Keep high-value bikes inside your living space when you can. That single habit eliminates the majority of residential theft risk. If indoor storage isn’t possible, lock the bike to an immovable point inside a locked garage or shed and secure the door with a quality padlock.
- Ground anchors bolted into concrete offer the strongest fixed point for home storage. Install them in a garage floor or shed base.
- Floor-to-ceiling anchors work well in apartments where drilling into concrete isn’t an option.
- Indoor wall racks keep the bike off the floor and harder to grab quickly, though they need a lock point to be genuinely secure.
Treat shared bike rooms as high-risk. Use the same layered approach indoors — frame anchor plus component locks — that you’d use on the street. Keeping bikes inside living spaces dramatically reduces risk compared to any shared access area. Store accessories separately, and photograph your serial numbers now, before you need them. A solid cycling gear organization routine makes this habit easy to maintain.
Pro Tip: A battery-operated alarm on a shed door costs very little and deters casual thieves effectively. Pair it with a quality padlock that can’t be unscrewed with a standard screwdriver.
What to do when your bike is stolen
Register first, document everything, then report fast.
Before theft happens:
- Register with Bike Index — free, U.S.-based, and used by police departments nationwide.
- Photograph the serial number (stamped on the bottom bracket shell), the full bike from multiple angles, and every accessory with its own serial.
- Record key codes for security skewers and any locked hardware in a secure location separate from the bike.
- Pair registration with dedicated cycling insurance that covers replacement value and accessories — standard homeowners or renters policies often cap payouts well below the actual value of a premium bike and its kit.
After theft:
- File a police report immediately. Get a case number.
- Alert Bike Index and update the listing as stolen.
- Monitor local Facebook Marketplace, Craigslist, and eBay listings for your make and model.
- Share photos and descriptions with local cycling groups and neighborhood apps.
- If you have GPS tracker data, provide it to police. Do not pursue the thief yourself.
Check any insurance policy for replacement-value coverage, accessory coverage, and worldwide theft protection if you travel with your bike.
Monthly security checks that keep your setup working
A lock that hasn’t been maintained or a skewer that’s worked loose defeats the purpose of having them.
- Confirm wheel security skewers are properly seated and haven’t loosened from vibration
- Check that the seatpost hasn’t slipped and the clamp is still torqued correctly
- Clean lock keyways with a dry lubricant spray; oil occasionally to prevent seizing in winter
- Inspect shackles and chain links for visible wear, rust, or deformation
- Replace any lock where the key sticks, the mechanism feels loose, or a key has been lost or potentially copied
Upgrade your setup when your exposure changes: moving to a higher-crime area, buying a more valuable bike, or shifting to a commute that means longer unattended parking all justify stepping up to a heavier lock or a more complete component security kit. For urban commuters, improving cycling security is an ongoing process, not a one-time purchase.
Your pre-park checklist
Run through this before every stop.
- [ ] Frame locked to a fixed, immovable anchor
- [ ] Rear wheel captured by the primary lock
- [ ] Front wheel secured by secondary lock or cable
- [ ] All detachable accessories removed (lights, GPS, camera, bags)
- [ ] Helmet carried or secured inside a locked bag
- [ ] GPS tracker enabled and charged
- [ ] Serial numbers and photos stored in a secure location
| Security layer | What it protects |
|---|---|
| Primary U-lock | Frame + rear wheel |
| Secondary cable or chain | Front wheel |
| Security skewers | Wheels, seatpost, saddle, stem |
| Accessory removal | Lights, GPS, cameras, bags, helmet |
| GPS tracker | Recovery after theft |
| Registration (Bike Index) | Identification and police reporting |
Touring and bikepacking exception: when there’s nothing to lock to, secure the rear wheel to the frame to prevent a quick ride-away. Keep valuables in a handlebar bag that never leaves your person. For a full secure bikepacking checklist, the approach shifts from fixed anchors to visibility and constant proximity.
Key Takeaways
Effective bike security combines a hardened primary lock on the frame, keyed component hardware on every removable part, and the habit of carrying high-value accessories rather than leaving them on the bike.
| Point | Details |
|---|---|
| Lock the frame first | Route your U-lock through the rear triangle and rear wheel to a fixed anchor every time. |
| Remove accessories without exception | Lights, GPS, cameras, and helmets come off the bike before you walk away. |
| Harden every component | Replace quick-release skewers on wheels, seatpost, and saddle with keyed security hardware. |
| Register and insure | Add your bike to Bike Index and choose cycling-specific insurance with replacement-value coverage. |
| Thebeamofficial VIRGO helmet | Carry the VIRGO integral helmet with you rather than leaving it on the bike — it’s a high-value target. |
The habit gap nobody talks about
Most theft guides focus on hardware. Buy a better lock, get security skewers, add a tracker. That advice is correct, and you should follow it. But the riders who consistently keep their gear are the ones who’ve built automatic habits, not the ones with the most expensive locks.
The real vulnerability isn’t the lock you own. It’s the one stop where you decide the café is close enough, the errand is quick enough, and the helmet can stay on the bike just this once. That’s when things go missing.
For urban commutes, varying your parking spot matters more than most riders realize. A bike locked in the same place at the same time every day gives a motivated thief a planning window. Mixing locations, even slightly, removes that predictability. UV marking and distinctive stickers on a frame and helmet make resale harder and recovery easier — not glamorous, but genuinely effective.
On the accessory side, high-visibility reflectors like THE BEAM Frame Flash serve a dual purpose: they improve your visibility to drivers at night, and a well-lit, conspicuous bike parked in a busy area is a less appealing target than one tucked in a dark corner. Visibility and security overlap more than riders expect.
Gear that fits your security workflow
THE BEAM builds safety equipment designed to work with the security habits this guide describes. The VIRGO integral helmet is built to be carried, not left behind — its design makes it practical to take inside rather than clip to the bike and hope for the best.

Le site Frame Flash reflectors add high-visibility presence that keeps your parked bike conspicuous in busy areas, reducing the low-profile anonymity that makes bikes easy targets after dark. Compact and lightweight, they integrate with the kind of layered security approach this guide recommends without adding bulk to your setup.
For riders preparing for longer events or ultracycling challenges, the Thebeamofficial ultracycling event page offers community resources and safety guidance built around real riding conditions. Browse the full range at thebeamofficial.com and start with the gear that fits your daily security routine.
Useful sources and registries
- Bike Index — free U.S. national bike registry used by police departments; register your serial number and photos here before anything else.
- BikeRegister — widely used registry with dedicated cycling insurance partnerships and replacement-value coverage guidance.
- UW–Madison bicycle security guide — illustrated, evidence-based guide to lock placement, anchor selection, and deterrence strategy.
- Pinhead locking systems — component security hardware and installation guidance for wheels, seatpost, and headset.
- Cycling UK locking guide — practical street-locking technique with Sold Secure rating explanations.
- road.cc locking guide — real-world tested advice on lock types, anchor selection, and accessory removal.
- Local bike shops — for professional installation of headset and stem security hardware where steering components are involved.


