
TL;DR:
- Proper installation relies on surface cleaning and correct mounting methods for helmet lights to ensure safety.
- Use isopropyl alcohol for cleaning, select compatible mounts, and avoid drilling or chemical adhesives to prevent safety risks.
Installing helmet lights is the process of securely attaching illumination devices to your cycling helmet to improve visibility during low-light rides. Whether you ride at dawn, dusk, or after dark, a properly mounted helmet light makes you visible to drivers from a greater distance than a handlebar-mounted unit alone. The three most common types are adhesive LED strips, clip-on mounts, and strap-based lights. Each method works differently, and choosing the right one depends on your helmet model and riding style. This guide walks you through how to install helmet lights correctly, from surface prep to final beam check, without compromising your helmet’s protective structure.
How to install helmet lights: tools and materials you need
The right preparation prevents the most common installation failures. Gather everything before you start so you are not stopping mid-install with adhesive already exposed.
What you need:
- Isopropyl alcohol (70% concentration or higher)
- Lint-free cloth or microfiber towel
- Adhesive mounts or 3M VHB tape (if your light uses adhesive)
- Cable clips or hook-and-loop straps for wire management
- Mounting brackets (if your light uses a clip system)
- Your helmet light kit (front white light, rear red or amber light)
Helmet model compatibility matters more than most riders expect. Some helmets have deep vent channels that make flat adhesive mounting difficult. Others have proprietary clip rails, like those found on certain road helmets, that only accept specific bracket systems. Check your helmet’s manual or the manufacturer’s website before buying a DIY helmet light kit.
Pro Tip: Buy a light kit that lists your helmet model as compatible. Generic kits often ship with adhesive pads that are too small for curved helmet surfaces, which leads to early peel-off.
How should you clean and prepare your helmet surface?
Surface preparation is the single biggest factor in adhesive mount longevity. Skip this step and even the best 3M tape will fail within a few rides.
- Wipe the mounting area with a lint-free cloth dampened with 70%+ isopropyl alcohol. This removes road film, sunscreen, sweat, and any wax coating that would prevent the adhesive from bonding. Cleaning with isopropyl alcohol is the industry-standard first step for any adhesive helmet light installation.
- Let the surface dry completely. Allow 2–3 minutes at room temperature before touching the area or applying any adhesive. Rushing this step traps solvent residue under the pad, which weakens the bond.
- Check the temperature. Adhesive bonding fails below 10°C (50°F) unless you warm both the adhesive backing and the helmet surface first. If you are installing in a cold garage or outdoors in winter, bring the helmet inside for 30 minutes before starting.
- Warm the adhesive backing if needed. Hold it in your palm for 60 seconds or use a hair dryer on low heat for 10 seconds. This softens the adhesive and dramatically improves initial tack.
- Do a dry fit. Hold the light in position before peeling the adhesive. Confirm the placement looks centered and the cable will reach your battery pack without pulling tight.
Pro Tip: Run your finger across the cleaned surface after it dries. If it squeaks slightly, the surface is clean enough. If it feels slick or waxy, repeat the alcohol wipe.
What are the best mounting methods for helmet lights?
Three mounting systems dominate the helmet mounted light installation market. Each has a clear use case, and the wrong choice for your helmet type will cost you time and money.
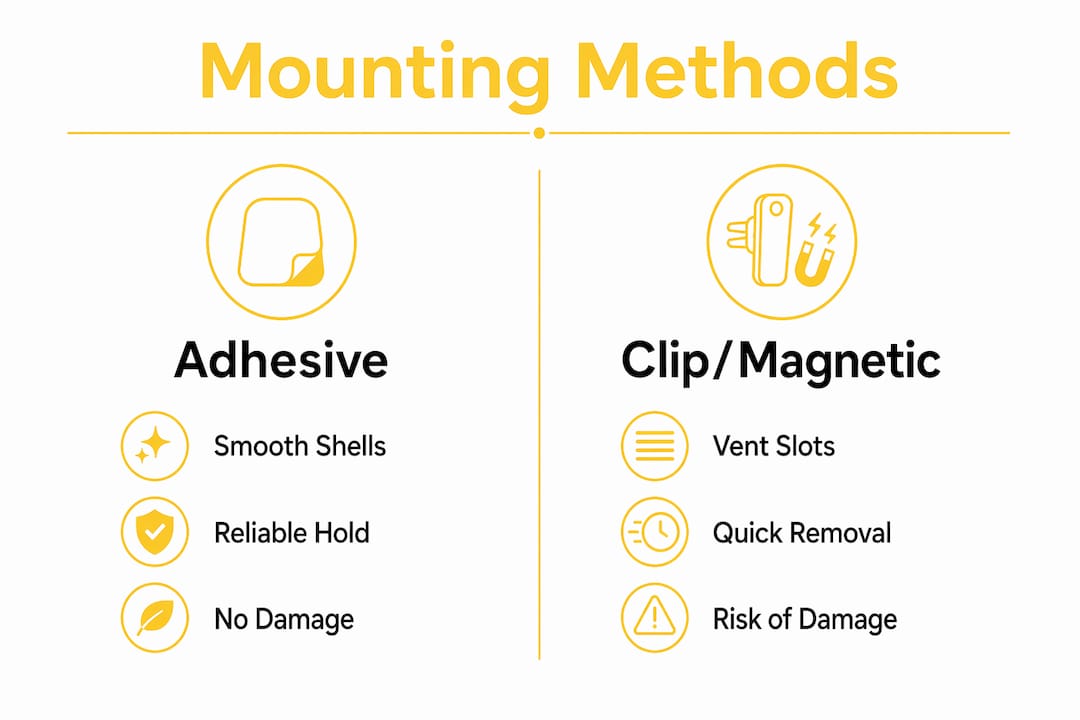
| Mount type | Best for | Pros | Cons |
|---|---|---|---|
| Adhesive strip (3M VHB tape) | Smooth helmet shells, urban commuters | No tools needed, low profile, removable | Weakens with repeated removal, fails in cold |
| Clip-on bracket | Helmets with vent rails or proprietary slots | Secure, repositionable, no adhesive | Requires compatible helmet, can stress shell |
| Strap or hook-and-loop band | Any helmet, temporary setups | Universal fit, zero surface contact | Can shift during rides, adds bulk |
Flexible waterproof LED strips with 3M tape or magnetic bases are the most popular choice for urban cyclists. They avoid permanent modifications and deliver strong visibility without altering the helmet’s structure. Strap-based mounts suit riders who swap lights between helmets or need a quick setup for occasional night rides.
Where should you place the light on your helmet?
Front-center placement balances helmet weight and aligns the beam with your line of sight. This reduces neck fatigue on long rides because the weight sits symmetrically rather than pulling to one side. For rear lights, mount them at the back center of the helmet, angled slightly downward so drivers behind you see the beam without it projecting upward into the sky.
Color rules matter for road legal compliance. White or yellow faces forward. Red or amber faces rear. Mounting a red light at the front violates traffic regulations in most U.S. states and European countries. Rear-facing red or amber lights enhance traffic safety without breaking these color rules.
Never drill into your helmet shell or use strong chemical adhesives like super glue. Drilling compromises the EPS foam liner that absorbs impact energy. Chemical adhesives can dissolve the shell material. Both actions void most helmet safety certifications, including CPSC and EN 1078. Stick to surface mounts with 3M VHB tape or manufacturer-approved clip systems. For a deeper look at how lighting fits into broader helmet safety, the helmet safety guide from Thebeamofficial covers urban-specific considerations in detail.
How to manage wiring and secure your mounts
Wiring is where most DIY helmet light installs go wrong. A loose cable acts as a lever that slowly peels adhesive edges away from the helmet surface with every ride.
Follow these rules for clean wire management:
- Route wiring flat along the helmet surface, following the contour of the shell rather than crossing vent channels at an angle.
- Keep wires away from visor attachment points and chin strap paths. Both areas flex repeatedly during rides, and a wire caught in that movement will pull on the mount.
- Use cable clips or hook-and-loop straps every 3–4 inches along the cable run to hold it flush against the shell.
- Never let excess cable loop freely. Coil any slack and secure it with a small clip near the battery pack.
Loose wiring peels adhesive edges over time and shortens the lifespan of both the mount and the light. Systematic routing prevents this lever effect entirely.
When pressing the adhesive mount into place, apply firm pressure for at least 30 seconds, moving from the center outward. This removes air bubbles and creates full contact between the pad and the helmet surface. Do not press from one edge to the other, which traps air in the middle.
Pro Tip: After pressing the mount, run your thumbnail around the full perimeter of the adhesive pad. Any edge that lifts slightly needs another 15 seconds of direct pressure before the adhesive sets.
Forcing clip mounts can crack the EPS foam or outer shell, which permanently weakens the helmet. If a clip does not slide into position with moderate hand pressure, check for debris in the channel or a misalignment between the bracket and the rail before applying more force.
Troubleshooting and maintenance tips after installation
A good install does not end when the light is mounted. Regular checks keep your setup safe and functional.
- Let adhesive cure fully. Allow 24–72 hours before riding in wet conditions or flexing the helmet aggressively. Moisture and movement during the cure window reduce final bond strength significantly.
- Test beam angle before your first ride. Adjust the beam slightly downward so it illuminates the road ahead without shining directly into oncoming drivers’ eyes. A beam aimed too high blinds other road users and reduces your own visibility of the road surface.
- Check light modes. Cycle through steady and pulse modes to confirm all functions work. A light that only flashes in one mode may have a loose connection at the battery pack.
- Re-seat wobbling mounts immediately. A mount that rocks side to side has lost adhesive contact on at least one edge. Clean the area again with isopropyl alcohol and apply a fresh adhesive pad rather than pressing the old one back down.
- Avoid repositioning adhesive mounts repeatedly. Each removal weakens the pad. After two repositions, replace the adhesive entirely.
Perform a quick 10-second check before every ride: press the mount lightly to confirm it is solid, power the light on to verify the mode, and glance at the cable to make sure nothing has worked loose overnight.
Testing light function and beam angle before the first ride is not optional. A misaligned beam is a safety hazard for drivers and reduces your own ability to read the road. Pair your helmet light with bike reflectors for a layered visibility system that works even when batteries run low.
Key takeaways
Proper helmet light installation requires clean surfaces, correct placement, and secure wiring to deliver reliable visibility without compromising helmet safety.
| Point | Details |
|---|---|
| Clean before you mount | Wipe with 70%+ isopropyl alcohol and allow 2–3 minutes to dry before applying any adhesive. |
| Match mount type to helmet | Use adhesive strips for smooth shells, clip brackets for rail-compatible helmets, and straps for universal fit. |
| Place front-center for balance | Center placement aligns the beam with your vision and prevents neck fatigue on long rides. |
| Secure all wiring flat | Route cables flush to the shell and clip every 3–4 inches to prevent the lever effect that peels adhesive. |
| Check before every ride | A 10-second pre-ride check of mount stability, light mode, and beam angle keeps your setup safe and legal. |
What I have learned from years of watching cyclists get this wrong
Most helmet light failures come down to two things: skipping surface prep and ignoring wire management. Riders buy a quality light, peel the adhesive, press it on for five seconds, and wonder why it falls off during a wet commute. The prep work is not glamorous, but it is the entire job.
The other mistake I see constantly is mounting the light wherever it fits rather than where it should go. A light jammed into a side vent channel because the center was awkward will shift your helmet’s balance and point the beam at a 20-degree angle off your riding line. That is worse than no light at all on a dark road.
My honest recommendation is to avoid invasive methods entirely. No drilling, no chemical adhesives, no zip ties threaded through vent holes. The advantages of integrated helmet lights are real, but only when the installation preserves the helmet’s certified protection. A cracked EPS liner from a forced mount is a helmet you need to replace immediately, even if it looks fine on the outside.
Routine maintenance is what separates riders who get a full season out of their setup from those who lose a light on a pothole in week three. Thirty seconds before each ride. That is the entire commitment.
— Sophie
Gear designed to work with your helmet lighting setup

Thebeamofficial designs helmets and accessories with real-world lighting integration in mind. The VIRGO integral helmet with MIPS technology features a shell geometry that works with adhesive and clip-based mounts without compromising its certified protection. If you want a setup that works from day one without guesswork, the helmet add-ons collection includes mounts, cable management clips, and visibility accessories built specifically for Thebeamofficial helmets. For riders starting from scratch, the full adults’ helmets range pairs well with the lighting accessories to give you a complete, safety-compliant setup for road, gravel, urban, or e-bike riding.
FAQ
What is the best way to attach a light to a bike helmet?
Adhesive mounts using 3M VHB tape are the most reliable method for smooth helmet shells. Clean the surface with 70%+ isopropyl alcohol, let it dry for 2–3 minutes, then press the mount firmly for 30 seconds from center outward.
Can I drill into my helmet to mount a light?
No. Drilling into a helmet shell compromises the EPS foam liner and voids most safety certifications, including CPSC and EN 1078. Use surface mounts or manufacturer-approved clip systems instead.
How long does helmet light adhesive take to cure?
Allow 24–72 hours for full adhesive cure before riding in wet conditions or putting the helmet under heavy stress. Moisture and flexing during this window reduce final bond strength.
Where should a front helmet light be positioned?
Mount the front light at the center of the helmet’s forehead area. Front-center placement balances weight evenly and aligns the beam with your natural line of sight, reducing neck fatigue on longer rides.
How do I stop my helmet light from falling off?
Route all wiring flat against the shell and secure it with cable clips every 3–4 inches. Loose wiring creates a lever effect that peels adhesive edges over time. Also confirm the surface was fully clean and dry before the initial mount.


