
TL;DR:
- Proper helmet maintenance involves gentle cleaning and regular inspections to ensure safety.
- Avoid damaging methods like dishwasher cleaning, abrasive scrubbing, and harsh chemicals.
- Replace helmets after crashes or every three to five years to maintain protective integrity.
Most cyclists who take a shortcut and toss their helmet into the dishwasher or scrub it down with a disinfectant wipe believe they’re doing the right thing. The reality is the opposite. Dishwashers damage bike helmets through a combination of heat, water pressure, and chemical detergents that quietly compromise the protective foam and adhesives inside. This guide walks you through what actually works, what to avoid at every stage, and how routine maintenance turns a good helmet into reliable, long-lasting protection for every ride.
Table of Contents
- Why helmet maintenance matters
- The biggest mistakes: how NOT to clean your helmet
- The right way: step-by-step helmet cleaning for cyclists
- Dealing with odors, sweat, and hygiene challenges
- When to maintain vs. when to replace your helmet
- What most cyclists miss about helmet maintenance
- Gear up for safety: The Beam solutions for every cyclist
- Frequently asked questions
Key Takeaways
| Point | Details |
|---|---|
| Avoid machine cleaning | Never use a dishwasher, washing machine, or dryer, since they can ruin helmet safety materials. |
| Use gentle methods | Clean with mild soap, water, and air drying to maintain quality and hygiene. |
| Recognize replacement signs | Know when to replace your helmet, as even well-maintained gear has a safety limit. |
| Maintenance is protection | Regular care not only extends helmet life but reinforces safe riding habits. |
Why helmet maintenance matters
Helmet safety is not just about the moment of impact. It starts long before any crash, in the daily and weekly decisions you make about how you store, clean, and inspect your gear. A helmet that looks fine on the outside can have degraded internal foam, weakened adhesive bonds, or a compromised retention system that will fail to absorb energy the way it was designed to in a real collision.
The protective core of most helmets is made from EPS foam, which stands for expanded polystyrene. This material is engineered to crush in a controlled way during an impact, absorbing the force that would otherwise reach your skull. Heat, harsh chemicals, and physical agitation can change the density and structure of this foam without leaving any visible mark. You would never know the protection was gone until it was too late.
- A helmet that has been exposed to aggressive cleaning agents may look undamaged but have weakened inner foam.
- Poor ventilation maintenance can trap moisture, which accelerates material breakdown over time.
- A retention system that is never cleaned or checked can seize up or slip at the wrong moment.
Understanding why helmet ventilation matters is part of the bigger picture here. When vents are clogged with road debris or compacted foam particles, airflow drops and so does your comfort, which leads to distraction on the road.
“Consistent helmet care is not vanity. It is the baseline that keeps every ride’s protection working as intended.”
Proper care also protects your financial investment. A high-end helmet can cost several hundred dollars. Following essential helmet care tips consistently can extend that helmet’s usable and safe life by a meaningful margin. Think of it the same way experienced riders approach mini bike maintenance steps: prevention is always cheaper and safer than replacement after the fact.
The biggest mistakes: how NOT to clean your helmet
Understanding the importance of helmet maintenance, the next step is to recognize common mistakes to avoid. The most damaging habits are often the most convenient ones, and many cyclists have no idea they are doing harm.
The top mistakes cyclists make when cleaning their helmets:
- Putting the helmet in a dishwasher or washing machine. The combination of heat, high water pressure, and agitation physically stresses the EPS foam and loosens adhesives. As dishwashers damage bike helmets through all three of these mechanisms at once, this is the single worst thing you can do.
- Using a dryer or direct heat. Even brief exposure to the heat of a dryer can warp plastic shell components and cause foam to lose its structural density.
- Scrubbing with abrasive materials. Steel wool, rough sponges, or stiff brushes can scratch the outer shell, create micro-cracks, and wear down reflective surfaces.
- Applying solvents or strong cleaners. Products like WD-40, alcohol, bleach, or acetone-based cleaners will eat into foam and dissolve adhesive bonds.
- Soaking the helmet in water. Extended submersion allows water to penetrate the foam and adhesive layers in ways that simple rinsing does not.
Safe vs. unsafe cleaning methods at a glance:
| Method | Safe? | Reason |
|---|---|---|
| Mild soap and warm water | Yes | Gentle enough not to damage foam or adhesives |
| Dishwasher cycle | No | Heat and agitation destroy EPS and adhesives |
| Washing machine | No | Agitation weakens structural components |
| Dryer | No | Heat warps shell and degrades foam density |
| Disinfectant wipes | No | Harsh chemicals compromise EPS and adhesives |
| Damp microfiber cloth | Yes | Safe for exterior shell wipe-downs |
| Air drying (room temp) | Yes | Preserves all materials without heat risk |
| Direct sunlight drying | Caution | Prolonged UV exposure can degrade outer shell |
Pro Tip: Keep a small bottle of baby shampoo in your cycling bag. It is gentle enough for helmet pads and liners, effective at cutting through sweat and oils, and leaves no residue that could irritate your skin on the next ride.
For additional guidance on recognizing when cleaning has gone too far and damage has already occurred, check out this resource on spotting helmet wear before it becomes a safety issue.
The right way: step-by-step helmet cleaning for cyclists
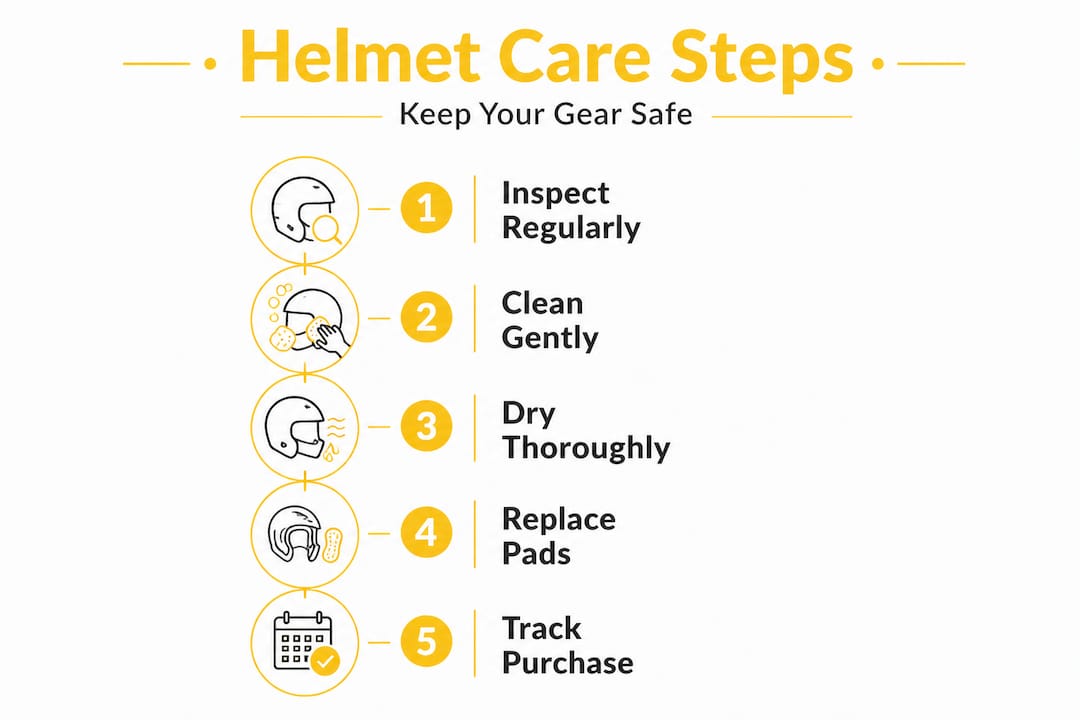
Having ruled out risky cleaning methods, let’s focus on the safe and proven approach. The good news is that proper helmet cleaning is simple, requires nothing expensive, and takes less than fifteen minutes.
Step-by-step helmet cleaning process:
- Remove the pads and liner. Most modern helmets allow you to detach the interior pads with simple press-and-pull connections. Remove them first so you can clean them separately.
- Wash pads by hand. Use a small bowl of warm water with a drop of mild soap or baby shampoo. Gently squeeze the pads through the water rather than rubbing them. Rinse thoroughly.
- Wipe the helmet shell. Use a damp cloth with a tiny amount of mild soap. Work in smooth strokes across the outer surface. Pay attention to vent openings where grime collects.
- Clean the retention system. The dial or strap system at the back often collects sweat and skin oils. Wipe it down with the same damp cloth. If it is stiff or sticky, rinse it gently under cool running water.
- Rinse everything with clean water. Use a damp, soap-free cloth to remove any detergent residue from the shell and straps.
- Air dry completely before reassembling. Place pads and helmet in a well-ventilated area at room temperature. Do not stack or compress them while wet.
Cleaning products and tools: what to use and what to skip:
| Item | Use it? | Notes |
|---|---|---|
| Baby shampoo | Yes | Gentle, effective, skin-safe |
| Mild dish soap | Yes | Use sparingly and rinse well |
| Microfiber cloth | Yes | Ideal for shell and strap wipe-downs |
| Old toothbrush | Yes | Good for vent channels, use gently |
| Bleach-based cleaner | No | Destroys foam structure and adhesives |
| Alcohol spray | No | Dries and cracks foam; weakens adhesives |
| Paper towel (rough) | No | Can scratch glossy shell surfaces |
For hygiene-focused cleaning, the key principle is clear: gentle soap and thorough air-drying beats any disinfectant approach, because harsh chemicals and heat compromise the EPS foam and adhesive layers that protect you. For more in-depth guidance, more helmet care tips are available on our blog.
Pro Tip: After cleaning, inspect each vent opening with a small flashlight. Debris that packs into narrow channels during rides can restrict airflow and is easy to miss during a standard wipe-down.
Dealing with odors, sweat, and hygiene challenges
After mastering standard cleaning, there’s one more concern for frequent riders: hygiene. If you ride several times a week, especially in warm weather, sweat buildup inside your helmet becomes a real challenge. Odors develop quickly, pads can feel damp, and bacteria thrive in warm, enclosed spaces.
The temptation is to reach for heavy-duty solutions: antibacterial sprays, baking soda paste, or even rubbing alcohol. These may eliminate the smell short-term, but avoiding harsh chemicals is critical because even common household disinfectants can compromise the EPS foam and the adhesive bonds that hold your helmet’s structure together.
Safe ways to manage helmet odor and hygiene:
- Wash removable pads after every two to three rides during hot months, and after every significant sweat session year-round.
- Let your helmet air out completely after each ride before storing it. Never seal it immediately in a bag while still warm and damp.
- Use a very light mist of diluted white vinegar (one part vinegar, three parts water) on pads as a natural deodorizer, then rinse and air dry before reassembling.
- Store your helmet in a cool, dry location away from direct sunlight and away from the car’s rear shelf, where heat builds up rapidly.
- Consider using a thin cycling cap under your helmet to absorb sweat directly and reduce how much reaches the foam and pads.
What to avoid entirely for hygiene purposes:
- Febreze or similar fabric sprays contain alcohols and propellants that are not safe for EPS foam.
- Antibacterial wipes, while effective at killing bacteria, carry solvents that soften adhesive bonds over time.
- Drying pads in the microwave or oven is a surprisingly common shortcut that warps the pad shape and accelerates foam breakdown.
Pro Tip: If your pads have developed a permanent odor that mild soap cannot remove, replace them rather than trying to rehabilitate them. Most helmet manufacturers sell replacement pad sets, and this is the one component that genuinely benefits from a fresh start.
For broader advice on keeping your helmet in top condition for the long term, our guide on long-term helmet care offers a full seasonal maintenance framework.
When to maintain vs. when to replace your helmet
While proper care extends helmet life, some helmets must be retired for safety. Maintenance is not a cure for everything. Knowing when to stop caring for a helmet and start shopping for its replacement is just as important as knowing how to clean it.
Signs that no amount of cleaning or care will fix:
- Visible cracks in the outer shell, even hairline fractures, indicate that structural integrity is compromised.
- Deep gouges or indentations in the EPS foam mean the impact-absorption layer has already partially failed.
- Straps that are frayed, torn, or have buckles that no longer lock securely cannot be repaired and represent a serious safety gap.
- A retention system that is cracked, missing pieces, or no longer holds firmly against your head needs replacement, not repair.
- Fading, chalking, or crumbling foam around vents suggests UV degradation and material breakdown.
The post-crash rule is non-negotiable. Even if your helmet looks completely fine after a fall, replace it. The EPS foam is designed to crush on impact, and that crushing is often invisible from the outside. A helmet that has absorbed one impact will not perform the same way in a second crash. This is not a marketing claim; it is structural physics.
Spotting helmet wear early is a skill that every serious cyclist should develop. Schedule a ten-minute inspection every three months, and check for all of the warning signs above.

Pro Tip: Write the purchase date on a small piece of tape and place it inside your helmet where it won’t peel off. Most manufacturers and safety standards recommend replacing helmets every three to five years, regardless of how well they have been maintained.
The uncomfortable reality is that over-maintaining an old helmet gives you false confidence. A clean, well-stored helmet that is six years old is still a six-year-old helmet. Materials age. Adhesives dry out. Foam loses resilience. Cleaning keeps a good helmet good. It cannot make an expired helmet safe.
What most cyclists miss about helmet maintenance
Here is the perspective that most how-to guides skip entirely: the real value of helmet maintenance is not about preserving gear. It is about building a safety habit that makes you a more attentive cyclist overall.
Think about what happens when you inspect your helmet before every ride. You check the straps. You press the retention system. You glance at the shell. In those thirty seconds, you are reinforcing a mindset that carries over into how you position yourself in traffic, how you choose your route, and how you respond to risk on the bike. The inspection is not the point. The habit of attention is the point.
Most guides focus on the technical steps, which are important, but they miss the bigger truth: a cyclist who takes maintenance seriously is already a safer cyclist. The habit signals something about how you value your own safety.
There is also a widespread myth that new, premium helmets require less maintenance attention. This is backwards. A high-end helmet with advanced materials, MIPS technology, and precision fit systems has more components that need to be checked and kept clean. The more sophisticated the protection, the more there is to monitor. Habitual helmet care matters even more when you have invested in quality gear, not less.
Finally, maintenance creates documentation. If you know when you bought your helmet, when it was last cleaned, and whether it has ever been in a crash, you can make confident decisions about replacement. That knowledge is rare, and it is entirely within your control.
Gear up for safety: The Beam solutions for every cyclist
If you’re ready to put these protective habits into action, consider these resources from The Beam. Consistent care only gets you so far if the helmet or gear you’re maintaining is not built to last. That is exactly where we focus our design work.

At The Beam, we design high-end helmets and safety accessories built for road, urban, e-bike, and gravel cyclists who take protection seriously. Our VIRGO integral helmet with MIPS technology is engineered for both real-world durability and precise fit, which makes it easier to maintain and inspect. You can explore the full range of cycling accessories including our popular FRAME FLASH bike reflectors, which add high-visibility protection without any maintenance complexity. If you want to connect with a community of safety-focused cyclists, check out The Beam ultracycling event and see how we bring these values to life on the road.
Frequently asked questions
Can I clean my helmet with disinfectant wipes?
No. Disinfectant wipes contain solvents and harsh chemicals that damage your helmet’s foam and weaken adhesive bonds, reducing the helmet’s protective capacity even when it looks unchanged.
How should I dry my helmet after cleaning it?
Always air dry at room temperature in a well-ventilated space. Dryers damage foam and adhesives, and even direct sunlight over extended periods can degrade the outer shell.
What is the safest way to remove sweat odor from my helmet?
Hand wash removable pads with mild soap and water, then air dry thoroughly before reinstalling. Avoid any spray-on deodorizers or disinfectants, which compromise the foam over time.
How often should a bike helmet be replaced even if it looks good?
Replace your helmet every three to five years and immediately after any crash, even a minor one, because internal foam damage is invisible to the naked eye.


