
TL;DR:
- Effective cycling safety requires layered gear combining impact protection and visibility tools.
- Upgrading helmets, adding visibility accessories, and ensuring proper fit significantly reduce injury risk.
- Continuous assessment and adaptation of safety equipment are essential as riding environments and conditions change.
Cycling carries real risks that most riders consistently underestimate, particularly as e-bikes push speeds higher and urban traffic grows denser. Helmet use improves clinical outcomes in e-bike-related injuries, yet thousands of cyclists still roll out with outdated helmets, zero visibility gear, and a false sense of security. This article walks you through the advanced steps that actually move the needle on ride protection, from choosing the right multi-certified helmet to layering visibility tools with physical armor, so every ride ends the same way it started.
Table of Contents
- Gear up: Essential equipment and modern protection options
- See and be seen: Layering visibility with physical protection
- Step-by-step guide: Upgrading your ride protection
- Troubleshooting and common mistakes in ride protection
- Why real ride protection is a multi-layered strategy
- Upgrade your protection with innovative cycling gear
- Frequently asked questions
Key Takeaways
| Point | Details |
|---|---|
| Layer protection strategies | Combining impact gear with high-visibility tools is shown to significantly improve cycling safety. |
| Choose proven safety equipment | Evidence shows helmeted riders experience better injury outcomes, so prioritize certified helmets. |
| Update and check gear regularly | Routine equipment checks and timely upgrades are crucial to keeping ride protection effective. |
| Avoid common safety pitfalls | Steer clear of relying on just one form of protection—address fit, condition, and your riding environment. |
Gear up: Essential equipment and modern protection options
To begin, riders need the right gear foundation. Let’s break down what belongs in your kit and why each piece earns its place.
Helmets: the first and most critical layer
Not all helmets are equal. A basic foam shell certified to EN 1078 meets minimum standards, but modern riders in urban, road, and e-bike environments deserve more. Look for helmets carrying both EN 1078 and NTA 8776 certifications, the latter being specifically developed for faster e-bike speeds up to 45 km/h. MIPS technology (Multi-directional Impact Protection System) adds a low-friction layer inside the helmet that redirects rotational forces during angled impacts, which are the most common type in real crashes. Rotational brain injuries account for a significant proportion of cycling head trauma, and MIPS directly addresses this mechanism.
Integral helmets, those covering the chin and face, offer a substantially larger protection zone than standard half-shell designs. For urban commuters and e-bike riders, this matters more than most people realize. A chin strike is one of the most common impact points in cyclist falls, and an open-face helmet leaves that zone completely exposed.
| Helmet type | Coverage area | Best use case | Key certification |
|---|---|---|---|
| Half-shell road | Top and sides | Road, gravel | EN 1078 |
| Full-face MTB | Top, sides, chin | Trail, downhill | EN 1078 + ASTM F1952 |
| Integral urban/e-bike | Top, sides, chin | Urban, e-bike, commute | EN 1078, NTA 8776 |
| Standard commuter | Top only | Low-speed city | EN 1078 |
Check our urban protection gear guide for a deeper breakdown of helmet types by riding environment.
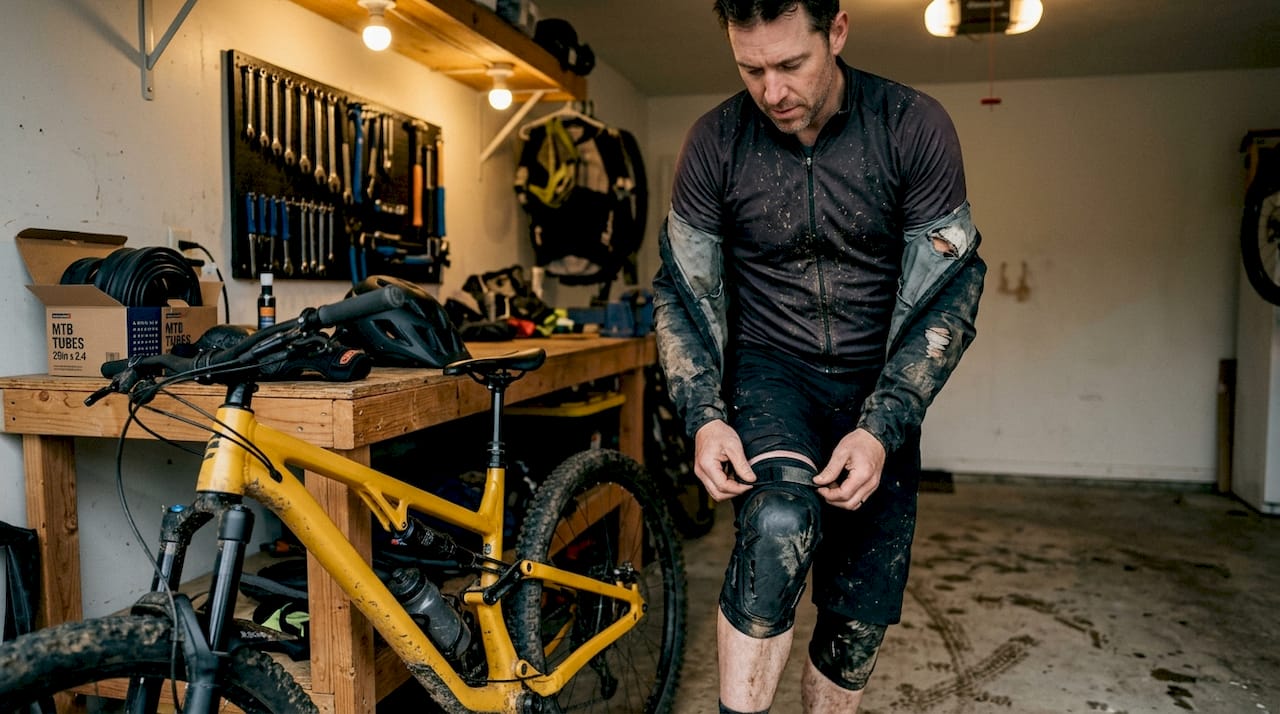
Beyond helmets: impact armor and protective clothing
Knee and elbow pads designed for cycling use a hard outer shell bonded to viscoelastic foam. Unlike skateboarding pads, cycling-specific armor is shaped to stay in position during the pedal stroke and conform to joint movement. Padded cycling shorts protect the sit bones but also reduce soft-tissue injury in lateral falls.
Gloves deserve more credit than they get. In almost every fall, the hands hit the ground first. Cycling gloves with reinforced palms significantly reduce road rash and help prevent wrist fractures caused by reflex bracing.
Key items to prioritize in your kit:
- Helmet with MIPS and appropriate certification for your riding style
- Padded cycling gloves with palm reinforcement
- Knee and elbow armor rated for your terrain
- High-visibility outer layer that works in all weather
- Rear-view mirror for situational awareness without turning your head
Review the full cycling safety gear guide to see how each layer integrates into a complete protection setup.
Pro Tip: Replace your helmet every 3 to 5 years even without a crash. Foam degrades silently from UV exposure, temperature swings, and minor compressions, reducing protective capacity well before visible damage appears. Always replace immediately after any significant impact.
See and be seen: Layering visibility with physical protection
Once your core protective gear is set, integrating visibility tools is the next critical safeguard. Physical armor protects you when a crash happens. Visibility gear works to prevent the crash from happening at all. These two layers are not in competition. Visibility and protective equipment complement each other for both crash risk and injury outcome, which means skipping either one creates a gap that the other cannot fill.
How visibility reduces accident risk
Most urban cycling accidents involve a driver who either did not see the cyclist or saw them too late to react. Increasing your visual footprint gives drivers the reaction time they need. A study from the Netherlands found that wearing conspicuous clothing reduced cyclist crash risk by up to 47% in low-light conditions. High-visibility reflectors, when placed on moving parts like wheels, ankles, or pedals, create a biological motion signature that human eyes detect faster than static reflectors on a frame.
Front and rear lights are not optional at night. They are legal requirements in most European countries and many U.S. states. But the quality difference between a 20-lumen blinker and a 200-lumen solid beam is enormous in terms of how far away drivers can detect you.
| Visibility tool | Effective range | Day effectiveness | Night effectiveness |
|---|---|---|---|
| High-vis vest | 100-150 m | High | Medium |
| Wheel reflectors | 50-100 m | Low | High |
| Rear light (100 lm+) | Up to 1 km | Medium | Very high |
| Front light (200 lm+) | 150-200 m beam | Low | Very high |
| Connected safety device | Varies | High | High |
Building a visibility system that actually works
The key word here is “system.” One rear light does not constitute a visibility strategy. Real visibility means coverage from multiple angles, at multiple distances, in both day and night conditions.
- Front light with a minimum 200-lumen mode for roads, mounted at handlebar level
- Rear light with a steady or pulse mode that stays visible in direct sunlight
- Side visibility through wheel reflectors or ankle-mounted LEDs
- High-visibility or reflective outer layer that catches ambient light and car headlights
- Helmet-mounted rear light for elevated visibility above traffic
Explore the complete bike visibility guide for specific product and placement recommendations for different riding environments.
For riders who want an additional layer of situational awareness, the RS1000 ride safety dashcam records both front and rear footage, adding accountability and post-incident documentation to your safety setup.
Pro Tip: During daytime rides, use a rear light in flash mode. Human peripheral vision is highly responsive to flickering light, which means a flashing red light at 200 meters gets a driver’s attention faster than a steady one of the same brightness.
Step-by-step guide: Upgrading your ride protection
With knowledge of both protection and visibility, here is how to implement effective improvements for your next ride. Upgrading gear without a structured process often leads to redundant purchases and missed gaps.
-
Audit your current kit. Lay out every piece of safety gear you own. Check helmet certification labels and manufacture dates. Test lights for battery condition. Look for cracked foam, worn reflectors, and stretched straps.
-
Identify your primary riding environment. Urban commuting, recreational road cycling, gravel, and e-biking each present different risks. Speed, traffic density, road surface, and lighting conditions all influence which upgrades matter most.
-
Prioritize the helmet upgrade first. Studies show helmeted riders achieve higher Glasgow Coma Scale scores and require fewer ventilator days after crashes, which reflects meaningfully better neurological outcomes. If your helmet is over 3 years old, lacks MIPS, or does not match your current riding speed category, upgrade it before anything else.
-
Add visibility gear as the second priority. Based on your audit and environment, add the missing layers from the visibility system checklist above. Start with rear lighting if it’s absent, then add side visibility and high-vis clothing.
-
Check fit on every piece. A helmet that sits too high exposes the forehead. A helmet that tilts back exposes the face. Two fingers should fit between your eyebrows and the helmet’s front edge. Straps should form a V-shape below each ear and allow only one finger under the chin strap.
-
Test before your next serious ride. Ride a short loop to confirm nothing shifts, chafes, or obstructs your vision or hearing. Check that lights are mounted securely and angled correctly.
“The difference between a helmet that works and one that merely fits is adjustment. Most cycling injuries involving helmets show the helmet shifted or was incorrectly fitted at the time of impact.”
Follow a structured approach like the one detailed in our e-bike safety step guide to ensure your upgrades translate directly into better protection on the road.
Troubleshooting and common mistakes in ride protection
Even with upgrades, many riders stumble at these pitfalls. Avoiding them is just as important as choosing the right gear in the first place.
Overreliance on a single layer of protection
The most common mistake is treating the helmet as a complete protection solution. It is not. Research shows no significant difference in injury severity between helmeted and non-helmeted riders when looking at overall Injury Severity Score and hospital days, which makes clear that a helmet alone does not cover the full risk profile. Limb injuries, road rash, and soft-tissue damage to the torso, shoulders, and hands all require separate protective layers.
Improper fit and outdated equipment
A cracked helmet liner, a strap stretched out of shape, or a reflector with degraded retroreflective material all provide false confidence. Gear that appears intact can be functionally useless after age, UV exposure, or minor impacts.
Common errors to avoid:
- Wearing a helmet tilted back so the front rides above the eyebrows
- Skipping gloves because the weather is warm
- Using the same helmet for e-biking and road cycling when the speed categories differ
- Relying on a single rear blinker with no side visibility
- Never checking strap tension after washing or adjusting your hairstyle
- Ignoring terrain-specific risks such as debris, gravel, or wet pavement that demand different gear priorities
Ignoring environmental and terrain factors
A setup optimized for a flat urban commute may leave you underprotected on mixed gravel terrain or at night in low-lit suburban roads. Cyclists frequently keep the same gear configuration year-round, even as seasons and riding conditions change significantly. Winter riding in northern Europe or mountain states in the U.S. calls for increased reflectivity, different tire choices, and thermal layers that may affect how outer visibility gear sits on your body.
Pro Tip: Review your protection setup at the start of each season. Use the road cycling protection methods guide as a seasonal checklist to identify gaps before they become problems on the road.
Why real ride protection is a multi-layered strategy
Here is where we want to push back against something most cycling safety content quietly reinforces: the idea that better gear automatically means better protection. It does not, at least not on its own.

The riders who sustain the worst injuries are not always the ones with the worst gear. They are often riders who bought excellent gear, stopped thinking critically about their environment, and assumed the equipment would handle the rest. Gear creates margin. It does not create safety.
Real protection is a continuous practice. It means reading traffic before you enter an intersection, not just after your light turns green. It means recognizing that the road surface that felt fine in summer becomes genuinely dangerous in November. It means knowing that your reaction time at 35 km/h on an e-bike is not the same as at 20 km/h on a city bike, and adjusting your visibility strategy and following distance accordingly.
The experienced cyclists we see prioritizing comprehensive cycling protection are not just buying better helmets every few years. They are actively reviewing their routes, practicing emergency braking, and updating their gear when their riding habits evolve.
Risk is dynamic. What works well on a flat Dutch bike path is genuinely insufficient on a fast descent through an Alpine village. That sounds obvious when stated plainly, but most riders never formally apply this thinking to their gear choices. Your protection setup should evolve with where and how you ride, not stay fixed at the level where you started.
Upgrade your protection with innovative cycling gear
Knowing what to do is only half the equation. Having the right tools makes implementation possible.

At THE BEAM, we design safety equipment specifically for riders who take protection seriously, from the VIRGO integral helmet with MIPS technology, built for urban and e-bike riders who need chin protection without sacrificing aerodynamics or style, to high-visibility reflectors, connected accessories, and the RS1000 dashcam for full ride documentation. Every product in our lineup is built around one principle: layered protection that works in real-world conditions. Visit thebeamofficial.com to explore our full range of helmets and safety accessories designed for road, gravel, urban, and e-bike cycling.
Frequently asked questions
How often should I replace my cycling helmet?
Most experts recommend replacing your helmet every 3 to 5 years or immediately after any significant impact, even when no external damage is visible, because internal foam degrades over time.
Is visibility gear as important as impact protection?
Yes, both are essential because visibility and protective equipment complement each other, reducing the likelihood of a crash occurring while also limiting injury severity when one does happen.
Can upgraded gear make a real difference in cycling injuries?
Absolutely. Helmet use improves injury outcomes measurably, and adding visibility systems, proper armor, and correct fit multiplies those benefits across a wider range of crash scenarios.
What is the most common mistake cyclists make with their protection setup?
Most cyclists rely exclusively on a helmet while neglecting visibility accessories, proper fit checks, and terrain-appropriate gear, creating protection gaps that no single product can fill.


