

A helmet-mounted mirror is worth buying if you ride in traffic, switch lanes, or hate craning your neck to check what’s behind you. THE BEAM VIRGO’s rearview mirror line is the pick we’d point commuters and safety-conscious riders toward first, because it keeps rear awareness one glance away without adding noticeable weight to the helmet.
TL;DR:
- Helmets with mirrors are most beneficial for urban commuters and riders who frequently change lanes, as they reduce head-turning and improve rear awareness.
- Compatibility with helmet vents, weight between 20 and 25 grams, and multi-axis adjustability are key factors for optimal fit and stability during rides.
- Proper installation involves thorough mounting and fine-tuning at low speed, with vibration damping joints helping prevent image blur on rough terrain.
- Regular maintenance includes lens cleaning, mount inspection, and re-centering after falls to ensure consistent, reliable rear visibility.
- The most effective helmet mirrors prioritize secure, lightweight mounting over size or additional features, with Velcro mounts offering versatility for multi-helmet use.
Table of Contents
- What Is a Rétroviseur Casque Vélo and Who Actually Needs One?
- Is a Helmet Mirror Actually Safer, and What Are the Trade-Offs?
- How Do You Choose the Right Helmet Mirror?
- How Do You Install and Adjust a Helmet Mirror?
- How Do You Maintain a Helmet Mirror Over Time?
- What Specs and Design Choices Back THE BEAM’s Mirror Line
- What Do Riders Get Wrong About Helmet Mirrors?
- Ready to Buy a Helmet Mirror? Here’s What to Check First
- Sources
What Is a Rétroviseur Casque Vélo and Who Actually Needs One?
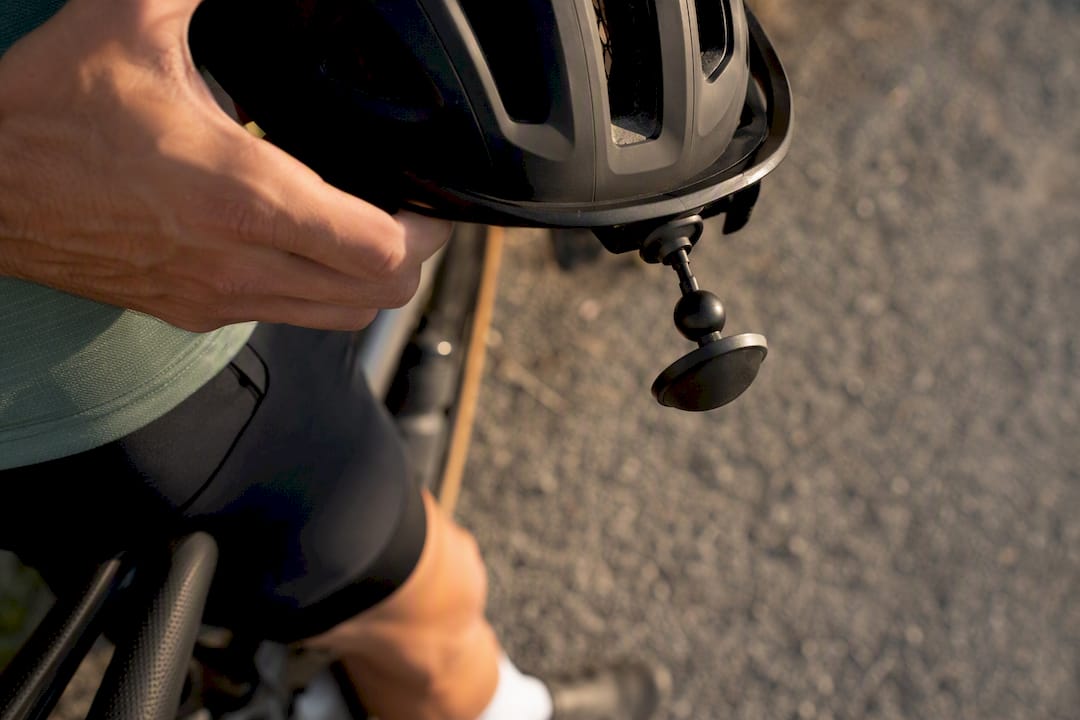
A rétroviseur casque vélo, or bike helmet mirror, clips or straps onto the side of a helmet and gives the rider a rear view without turning the head. It’s a different animal from a handlebar mirror, which stays fixed no matter where you look, or a glasses-mounted mirror, which sits closer to your eye line but shifts with every sunglasses swap.
Three mounting styles dominate the market:
- Velcro or strap mount: wraps around a helmet vent or strap, no adhesive required.
- Adhesive pad mount: sticks flat to a smooth helmet section, best for helmets with limited vent access.
- Clip-through vent mount: threads a small arm directly through a vent slot for a more rigid hold.
Urban commuters and riders who change lanes often get the most out of a helmet mirror, since the view turns with your head instead of staying locked to the bars. Riders who rarely check behind them, or who ride mostly on closed trails, may not need one at all. The trade-off is simple: handlebar mirrors are steadier but limited to one angle, while helmet mirrors move with you at the cost of a little extra fiddling.
Is a Helmet Mirror Actually Safer, and What Are the Trade-Offs?
The core safety benefit is fewer head-turns. Every time you twist your neck to check traffic, your eyes leave the road ahead for a beat, and a mirror cuts that risk down to a quick glance to the side. That matters most in dense traffic, on descents, or anywhere a car might be closing fast from behind.
The limitations are real too. Because the mirror rides your head, not your bike, the image swings every time you look down at your cue sheet or up at a signal, which takes some getting used to. Very light imbalance is possible if the mirror isn’t centered well, and at high speed or on rough gravel, vibration can sometimes blur the reflection just when you need it clearest.
- Best fit: urban commuters, group riders, anyone doing frequent lane changes.
- Less ideal fit: aggressive descenders on technical trails, riders who already run a rearview dashcam or radar unit.
- Middle ground: gravel and road riders who want backup awareness without a permanent bar attachment.
Pro Tip: If you split time between a road bike and a commuter setup, buy a Velcro-mount mirror instead of an adhesive one. You can move it between helmets in seconds instead of committing to one bike.
How Do You Choose the Right Helmet Mirror?
Not every mirror on the market survives real riding conditions, and the checklist below is what separates a mirror you forget you’re wearing from one you rip off after a week.
- Check mount compatibility first. Measure your helmet’s vent spacing before ordering, since some manufacturers recommend verifying strap or adhesive fit against your specific helmet model rather than assuming a universal mount will sit flush.
- Weigh the weight. Most helmet mirrors on the French market run between roughly 20 and 36 grams, and lighter models in the 20 to 25 gram range tend to feel less noticeable on long commutes.
- Look for multi-axis adjustability. A stem that rotates a full 360 degrees, as many product manuals recommend, lets you dial in a stable field of view once and mostly leave it alone.
- Confirm the lens is convex. A convex mirror widens your field of view compared to a flat one, which matters more than mirror size on a helmet mount.
- Choose shatterproof materials. ABS or acrylic mirrors marketed as shatter-resistant hold up far better in a fall than glass.
- Ask about durability and weather resistance. Vibration and rain are the two things that kill cheap mounts fastest.
- Check the return policy before you buy. Buying through an official brand store rather than an anonymous marketplace listing generally means a clearer path to a refund or replacement if the mount fails.
A quick reality check on cost: most helmet mirrors sit in a modest price band compared to a full rearview dashcam setup, which makes them one of the cheaper safety upgrades a cyclist can make relative to the awareness gained.
How Do You Install and Adjust a Helmet Mirror?
Getting the angle right the first time saves you from fiddling mid-ride, which is when it matters least to be distracted.
- Pick your side. Most riders mount on the left, matching traffic flow, but mount on whichever side matches your local road rules.
- Check vent paths and clean the surface. Wipe down the helmet shell if you’re using an adhesive pad; dust and oils weaken the bond.
- Attach the mount. For Velcro or strap systems, wrap it snugly around the vent rib or strap channel. For adhesive pads, press firmly for the full cure time listed on the packaging.
- Set the angle while stationary. Aim the mirror so you can see the road behind you with a slight downward glance, not a full head turn.
- Verify while riding slowly. Because the mirror moves with your head rather than staying fixed, take a slow lap around a quiet street and fine-tune the angle before riding in traffic.
- Balance the weight. If the mirror pulls slightly to one side, shift the mount through an adjacent vent hole or add a thin shim to recenter it without changing the angle you just set.
Full walkthroughs with photos live on our step-by-step installation guide, which covers both mount types in more detail.
Pro Tip: A ball-joint stem, rather than a single-hinge one, dampens vibration far better on rough pavement. If your mirror blurs on gravel, that joint is usually the fix, not a heavier mirror.
How Do You Maintain a Helmet Mirror Over Time?
A mirror that works perfectly on day one can fail quietly over a few months if you skip basic upkeep.
- Wipe the lens with a microfiber cloth after wet rides to prevent fogging and water spots from clouding your view.
- Inspect the mount monthly. Velcro loses grip over time, and adhesive pads dry out; both are cheap to replace and worth swapping before they fail mid-ride.
- Re-center after any fall or bump. A knocked mirror rarely breaks outright, but it can shift enough to throw off your field of view without you noticing.
- Watch for the three common failure modes: persistent vibration blur (usually a loose stem joint), hairline cracks near the mount (a sign to replace before a crash makes it worse), and adhesion failure in heat or heavy rain (switch to a strap mount if this keeps happening).
Pairing a mirror with other visibility gear, like reflectors and lights, rounds out a complete commuter safety setup rather than relying on one accessory alone.
What Specs and Design Choices Back THE BEAM’s Mirror Line
THE BEAM’s mirror line follows the same design logic behind the VIRGO helmet with MIPS technology: safety features should disappear into the ride, not fight against it. That means prioritizing low weight, secure mounting, and a wide, clear field of view over flashy extras that add bulk.
- Designed to pair with THE BEAM VIRGO and compatible vented helmets without permanent modification.
- Built around a Velcro-style mount for quick repositioning or removal between helmets.
- Convex mirror shape for a wider rear field of view than a flat lens at the same size.
- Shatter-resistant construction, aligned with the same shatterproof-material standard seen across the broader helmet mirror market.
Lightweight design and secure, tool-free mounting are the two things that determine whether a rider actually keeps wearing a helmet mirror past the first week. Everything else is secondary.
For the full product lineup and specs, browse the complete accessory collection on THE BEAM’s site.
What Do Riders Get Wrong About Helmet Mirrors?
Most advice online treats helmet mirrors as an either-or decision against handlebar mirrors, and that framing misses the point. The real question isn’t which mirror type wins in the abstract. It’s which one matches how you actually ride.
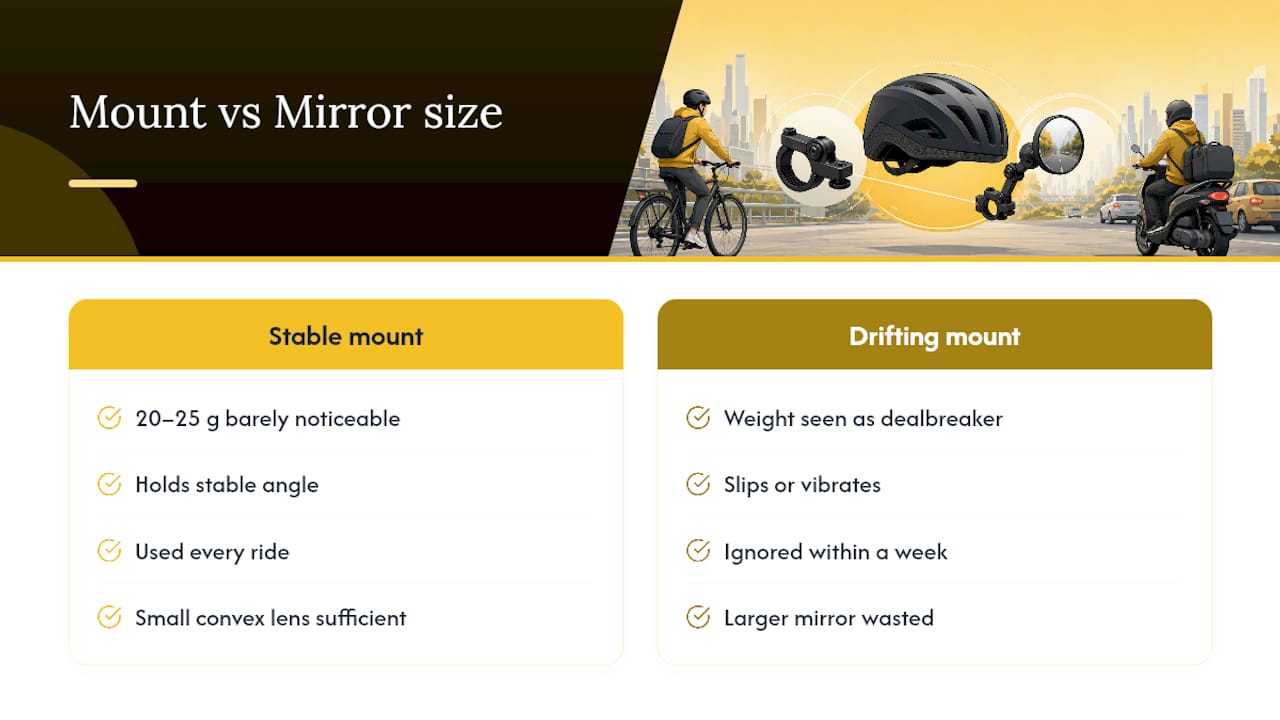
Conventional wisdom overstates the imbalance problem. A properly centered mirror in the 20 to 25 gram range is barely noticeable after the first few rides, yet plenty of buying guides treat weight as the dealbreaker and skip past mount security, which is the factor that actually causes most abandoned mirrors. A mirror that slips or vibrates gets ignored within a week; one that holds a stable angle gets used every ride.
Prioritize the mount before the mirror size. A smaller convex lens on a rock-solid Velcro strap beats a larger mirror on a mount that drifts after two rides. If you commute daily, that stability is what determines whether the mirror becomes a habit or ends up in a drawer. Riders switching between multiple helmets should weight that decision even more heavily, since a mount you can move in seconds is worth more than marginal gains in mirror size.
— Sophie
Ready to Buy a Helmet Mirror? Here’s What to Check First
THE BEAM’s helmet mirror is a direct fit if you’re already riding, or considering, the VIRGO helmet: it’s built for helmet comfort first, sits low in weight, and mounts without permanent changes to your gear.

Before you check out, confirm three things: which side you need (left or right, based on your local traffic direction), that the mount matches your helmet’s vent pattern, and the return window in case the fit isn’t right on the first try. Riders training for longer distances often pair a mirror with a reflector setup, and our FRAME FLASH reflector makes a solid add-on for that same commute. If you’re curious how far safety-focused riders push this gear, THE BEAM’s ultracycling event page shows what long-distance riders rely on. Anyone weighing broader safety habits alongside the gear itself may also find sustainable mobility practices worth a look.
Browse the full helmet and accessory collection to pick the mirror, and mount, that fits your ride.
Sources
- Z EYE - Rétroviseur de casque cycliste — Zéfal
- Notice d’utilisation rétroviseur casque cycliste — product manual PDF
- Rétroviseur de casque de vélo réglable 360° — Spy-Shop


