

A helmet light earns its place as a secondary visibility layer, never as a substitute for your bike’s required white front and red rear lights. For most urban riders, the smartest immediate pick is a stable, non-flashing red rear module or an integrated helmet with lighting that already follows color and flash rules under Décret n° 2024-1074.
TL;DR:
- A helmet light should only serve as an extra visibility layer and must adhere to the French rule of steady, non-flashing lights in red at the rear and white at the front.
- Integrated helmet systems offer better cohesion and additional features like reactive brake signals but come with higher costs and less flexibility, while add-on modules are more adaptable and easier to replace or upgrade.
- Choosing the right helmet light depends on matching brightness, beam pattern, runtime, mount compatibility, and control style to your specific riding environment and preferences.
- Proper mounting using manufacturer-approved attachment methods is crucial to avoid damaging the helmet shell and ensuring safety during impact.
- A layered lighting setup combining a handlebar light, helmet light, and reflectors provides the best safety and visibility, especially at intersections and in low-light conditions.
Table of Contents
- Éclairage Casque Vélo: Integrated Systems vs. Add-On Modules
- How Do You Choose the Right Helmet Light?
- What Does the French Decree Actually Require?
- Mounting a Helmet Light Without Weakening the Shell
- How THE BEAM Approaches Visibility and Mounting Safety
- Helmet Lights or Handlebar Lights: Which Do You Actually Need?
- Helmet Lights vs. Chest and Ankle Lights
- Battery Types in Helmet Lights and Their Environmental Trade-Offs
- Building a Complete Lighting Setup, Not Just a Helmet Light
- Practical Setups for Common Urban Riders
- Why THE BEAM Fits This Checklist
- Sources
Éclairage Casque Vélo: Integrated Systems vs. Add-On Modules
Helmet lighting comes in two basic families, and picking the wrong one wastes money on features you’ll never use. Integrated helmets build LEDs directly into the shell, often with a rear brake light, sometimes with turn signals and a handlebar remote. Add-on modules are separate units, clipped or stuck onto a helmet you already own.
Integrated systems win on cohesion. The lighting is positioned by engineers who tested the shell’s aerodynamics and weight balance together, and many now include a stop-signal function that reacts to deceleration, useful in dense traffic where a driver’s reaction time is everything. The tradeoff is cost and commitment: you’re buying a whole helmet, not just a light, and if the electronics fail, you’re not just swapping a battery.
Add-on modules are the flexible option. A magnetic clip-on rear light or a small strip LED can move between helmets, bags, or jackets, and most run on replaceable or rechargeable cells that last from a few hours to over 20 on their lowest setting. They’re cheaper to replace and easier to upgrade as battery tech improves, but retention quality varies wildly between brands.
Who benefits from which:
- Daily commuters usually do best with add-on rear modules. Low weight and long runtime matter more than extra features when you’re riding the same six miles every day.
- Night-road riders get more value from integrated front-and-rear systems, since visibility from multiple angles matters most where street lighting is sparse.
- Bikepackers and long-distance riders need modularity: a helmet light that can be swapped, recharged independently, and doesn’t rely on one helmet’s internal battery lasting the whole trip.
How Do You Choose the Right Helmet Light?
Selecting a helmet light comes down to five things: brightness matched to your riding environment, beam pattern, runtime, mount compatibility, and control ergonomics. Skip any one of these and you’ll end up with gear that looks good on a spec sheet but fails on your actual commute.
- Match lumens to your riding context, not to the biggest number on the box. Urban riding with streetlights calls for a wide, mid-range beam that makes you visible to drivers at typical intersection distances. Rural or unlit roads justify a brighter, more focused beam, since you’re lighting your own path as much as signaling your presence.
- Check beam pattern before brightness. A wide-angle spread at moderate intensity beats a narrow, blinding beam for city riding, where the goal is “be seen,” not “see far.”
- Set a runtime floor based on your ride length. A 30 to 45 minute commute needs less battery than a weekend century ride; look for at least double your typical ride time so you’re not caught dark on a delayed trip home.
- Confirm mount compatibility before buying. A light designed for a smooth-shell road helmet may not sit securely on a vented commuter or MIPS helmet with a textured surface.
- Weigh control style against your riding style. Handlebar-mounted remotes suit riders who don’t want to reach up mid-ride; Bluetooth-paired controls suit those who want mode changes from a phone at a stoplight.
Pro Tip: Don’t chase the highest lumen count for city riding. A well-aimed 90 to 200 lumen rear light with a wide beam angle is often more visible to drivers than a much brighter light that’s mounted at the wrong angle or pointed at the ground.
Weatherproofing and weight round out the checklist. An IP rating suited to rain exposure matters more in a place with unpredictable weather than a few extra lumens, and every gram on your helmet affects comfort over a long ride.
What Does the French Decree Actually Require?
Décret n° 2024-1074, dated November 27, 2024, sets the baseline rule for every light on a bicycle, including anything mounted to your helmet: white at the front, red at the rear, and no flashing.
Bicycle lights must show white to the front and red to the rear. Flashing modes are not permitted for standard bike lights, though turn-signal functions are allowed when they aren’t redundant with another signal already in use.
That single rule reshapes how you should think about helmet lights. A helmet-mounted white LED at the front and a red module at the back both need to hold steady, not pulse, to stay within the rule. Turn signals are the one carved-out exception. Some integrated helmets and connected accessories now build directional signals into the design specifically because the decree treats them differently from a standard running light, as covered in more detail in The Beam’s breakdown of flashing light rules.
Confirming compliance before you buy takes three checks. Look at the packaging or product page for an explicit statement of steady versus flashing modes. Check whether the manufacturer lists a “constant” mode as the default, not just an option buried in a settings menu. And if a vendor markets a product purely as a “flashing safety light” with no steady setting, treat that as a fashion accessory, not your primary compliant light.
Mounting a Helmet Light Without Weakening the Shell
The single biggest safety mistake with helmet lighting is treating the shell like a hardware project. Zip ties threaded through vents, screws drilled into the foam, or aggressive adhesives never designed for a helmet’s polycarbonate surface all risk the same outcome: a compromised shell that fails differently than it was designed to in a crash, and loose hardware that becomes a projectile on impact.
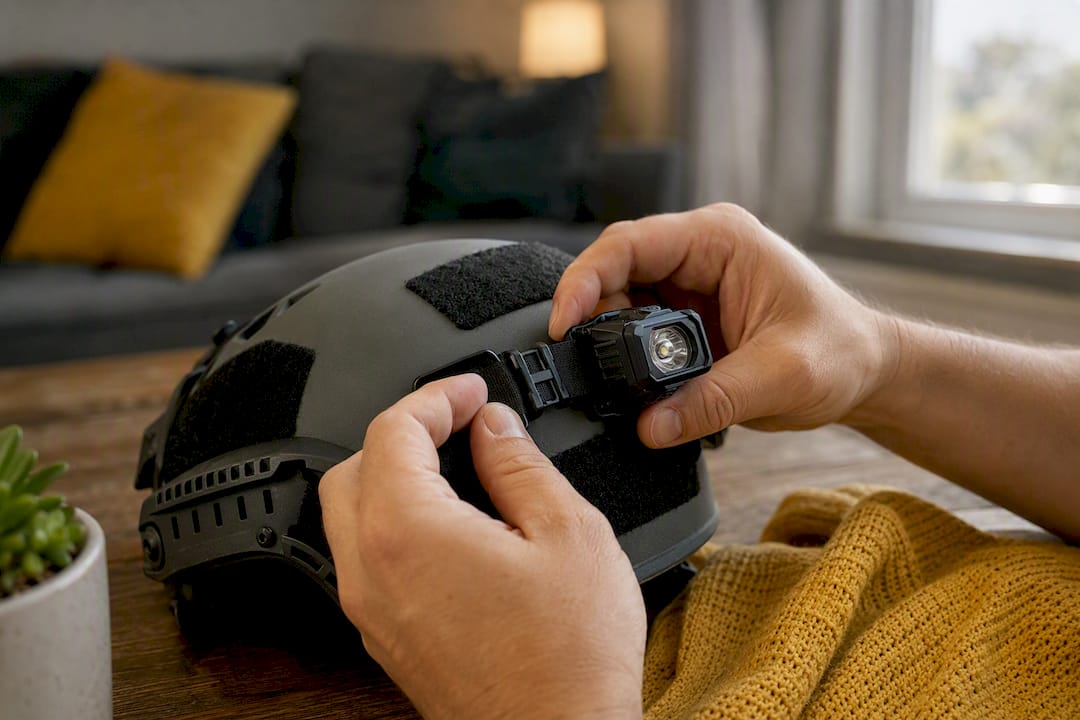
The safer path uses attachment systems built and tested for the job. Manufacturer-approved adhesive pads, automotive-grade in most cases, and magnetic clip systems with documented retention forces both preserve the shell’s structural integrity while holding firm at speed. Integrated mounts, built into the helmet at manufacture, remove the guesswork entirely since the shell and the light were engineered together.
Placement affects more than looks:
- Keep the front light roughly level with your natural gaze so the beam illuminates where you’re actually looking, not the pavement six feet ahead.
- Balance weight side to side and front to back. A light stuck too far forward creates a pendulum effect on rough roads.
- Position rear lights high and centered for the widest visibility angle to following traffic.
Pro Tip: Run a monthly check on any clip-on or adhesive-mounted light: tug gently to confirm it hasn’t loosened, inspect the seal around the charging port for water ingress, and check battery health before a light dies mid-commute.
How THE BEAM Approaches Visibility and Mounting Safety
Every design decision at Thebeamofficial starts from the same question: does this protect the rider without compromising the shell? That principle shapes how lighting and mounting hardware get integrated into helmets like the VIRGO, which pairs MIPS rotational-impact protection with a shell designed to accept visibility accessories without drilling or improvised fixes.
The lineup maps to a few common rider profiles:
- Daily commuters benefit from a low-profile rear light setup that survives a five-day workweek without a nightly recharge.
- E-bike riders, who move faster and brake harder in traffic, get more value from stronger rear visibility and connected accessories designed for higher-speed stop-and-go riding.
- Mixed urban and road riders want a helmet that transitions from a bike path to a longer road ride without a wardrobe change, which is where an integrated, MIPS-equipped shell earns its keep.
For a deeper look at how integrated lighting fits into helmet design, The Beam’s guide to integrated helmet lights and its urban helmet safety breakdown cover the engineering reasoning in more depth, alongside product photos worth a look before you buy.
Helmet Lights or Handlebar Lights: Which Do You Actually Need?
Neither replaces the other, and that’s the real answer. A handlebar light is fixed, aimed once, and stays aligned with the bike’s direction of travel, which makes it reliable for lighting the road ahead. A helmet-mounted light moves with your head, which sounds like a downside until you realize what it actually does: it shows drivers, and other cyclists, exactly where you’re looking.
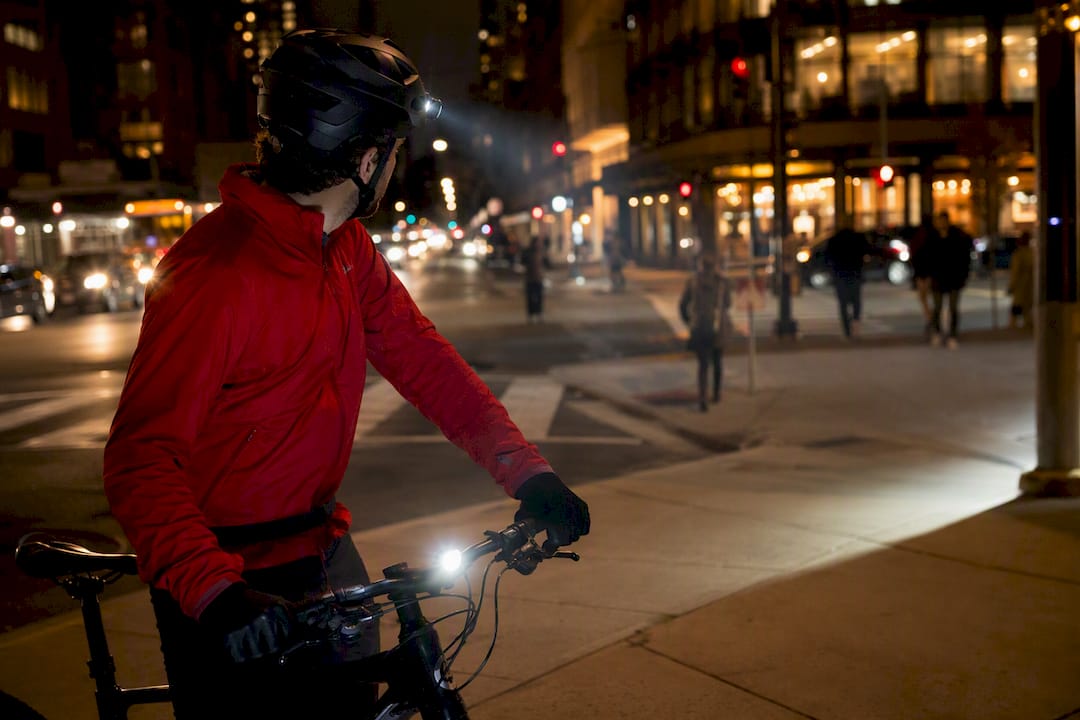
That matters most at intersections. Glance left to check for a car pulling out, and a helmet light sweeps that direction with you, catching the driver’s eye a half second before a handlebar-fixed beam ever could. Handlebar lights can’t replicate that behavior no matter how bright they are.
The practical answer for most urban riders is both, not one or the other. A steady handlebar light handles the job of illuminating the road and satisfying the legal front-light requirement with a fixed, predictable beam. A helmet light adds the active, gaze-following visibility layer that helps you get noticed at the exact moments drivers are deciding whether to yield. Riders who only have budget or mounting space for one should default to the handlebar light for road illumination and add a helmet light as the next purchase, not the first.
Helmet Lights vs. Chest and Ankle Lights
Chest and ankle lights each solve a narrower problem than a helmet light does, and knowing the difference saves you from buying the wrong accessory twice.
Ankle lights exploit a well-documented perceptual advantage: the pumping motion of pedaling is instantly recognizable to drivers as a cyclist, even at a distance where shape and color are hard to make out. They’re cheap, lightweight, and nearly impossible to mount incorrectly. Their weakness is coverage. An ankle light does nothing for the moment a driver is scanning eye level at an intersection.
Chest lights sit at a natural eye-level height for oncoming traffic and don’t require touching the helmet at all, which appeals to riders wary of adding weight or hardware to their headgear. They’re static, though. They don’t follow your gaze the way a helmet light does, so they lose the intersection advantage that makes helmet lighting valuable in the first place.
A helmet light’s edge is that gaze-following behavior, paired with the elevation advantage of being the highest point on a rider’s body. Its downside is real too: it adds weight and complexity to something whose primary job is impact protection, and a poorly mounted unit risks compromising that job. The strongest setups don’t pick one. They layer a helmet light for active visibility, an ankle or pedal light for motion recognition, and a steady handlebar or frame light for road illumination.
Battery Types in Helmet Lights and Their Environmental Trade-Offs
Most helmet and add-on lights run on one of three power sources: replaceable coin or AAA cells, built-in rechargeable lithium-ion packs, or USB-rechargeable removable batteries. Each comes with a different environmental and practical cost.
Disposable batteries are convenient in an emergency; you can buy a replacement at nearly any convenience store. They’re also the worst option environmentally, since single-use cells generate far more waste per hour of light output than rechargeable alternatives, and many end up in general trash rather than proper battery recycling streams.
Built-in lithium-ion packs, common in integrated helmets, cut down on waste during the product’s life but create a different problem at end of life: when the battery degrades, the whole light unit (sometimes the whole helmet) may need replacing, since the cell isn’t user-serviceable. USB-rechargeable removable batteries split the difference. You get the lower per-use environmental cost of rechargeables with the flexibility to swap a dead cell for a spare rather than retiring the whole device.
For most urban riders, prioritizing USB-rechargeable lights with a standard USB-C port cuts both cost and waste over a few years of regular use, since it avoids the disposable-battery cycle entirely and doesn’t lock you into a single device’s lifespan.
Building a Complete Lighting Setup, Not Just a Helmet Light
A helmet light works best as one piece of a layered system, not a standalone fix. Pair it with a steady front light on your handlebars for road illumination and legal compliance, a steady rear light on your seat post or rack for a low, wide-angle backup to your helmet’s rear LED, and passive reflectors on pedals, spokes, or your frame for the moments your active lights face the wrong direction, like turning a corner.
The goal is redundancy, not repetition. If your helmet light dies mid-ride, a frame-mounted backup keeps you visible from behind. If your handlebar light is aimed too low for a driver at an intersection to notice quickly, your helmet light’s gaze-following beam picks up that slack. Reflective elements, covered in more depth in The Beam’s guide to reflectors and night visibility, don’t need batteries at all and keep working even if every powered light on your bike fails at once.
Check your full setup together before a ride, not each light in isolation. A helmet light aimed slightly too low can wash out a handlebar light’s beam pattern instead of complementing it, and two rear lights mounted at nearly the same height provide less coverage than one high and one low.
Practical Setups for Common Urban Riders
A daily commuter riding the same route each week does best with a lightweight rear module rated for long runtime paired with a fixed handlebar front light. Simple, low-maintenance, and rarely needs a mid-week charge.
A part-time night rider, someone who only rides after dark occasionally, benefits more from an integrated front-and-rear helmet system with selectable modes. Easy to charge before an evening ride and no separate accessory to remember.
An e-bike rider moving faster in mixed traffic should prioritize a brighter rear module with stop-signal capability, since higher speeds mean drivers need more warning time to react to sudden braking.
— Sophie
Why THE BEAM Fits This Checklist
If you’ve made it through the mounting, compliance, and runtime checklist above, you already know what to look for: a stable, compliant light layer that doesn’t compromise the helmet underneath it. That’s the exact problem Thebeamofficial’s engineering team designs around, starting with MIPS-equipped shells like the VIRGO built to accept visibility hardware without drilling, zip ties, or aftermarket guesswork.

The lineup covers commuters who want low-maintenance daily reliability, e-bike riders who need stronger rear visibility at higher speeds, and mixed-terrain riders who don’t want to switch helmets between a bike path and a longer road ride. Every accessory, from mounts to rear-visibility modules, is built to work with the shell rather than against it. Browse the current lineup and spec sheets on The Beam’s product pages to see which setup matches your routine, and check the fit against your own checklist before your next ride.
Sources
- Pour meilleure visibilité des cyclistes et des trottinettistes — Ministère de l’Intérieur (France)
- Bike lights: helmet mounted or handlebar mounted? — Bicycles StackExchange
- Les meilleurs casques vélo lumineux : notre guide 2025 — TransitionVelo


